
Ajenti is a modern, lightweight, open source, web-based control panel for managing virtual private servers (VPS). In this article, we will install Ajenti Server Admin Panel in Ubuntu 16.04, followed by the Ajenti V plug-in for managing websites, emails, domains, and more from the panel.
Using Ajenti, an administrator can control a Linux server from a browser with its responsive web interface, which otherwise requires the use of a terminal. Optionally, one can extend the functionalities of Ajenti using few existing plug-ins or develop a custom plugin from scratch using Python.
Prerequisites:
- You will require a new Ubuntu 16.04 machine with at least 1 GB of RAM.
- A valid DNS name pointing its A record to the IP address of your Ubuntu machine. For example, an A record named test would point to test.DOMAIN.TLD.
Notes
This tutorial uses variables to represent user-specific configurations, such as server IP addresses, passwords, domain names, and more. Whenever you see one of these variables, you should replace them with your specific details.
The following variables are used in this tutorial: SUBDOMAIN, DOMAIN, TLD.
In example.ssdnodes.com, example is the SUBDOMAIN, ssdnodes is the DOMAIN, and .com is the TLD.
Step 1. Configure the FQDN of the host
To change the hostname of your system, use the hostnamectl command. hostnamectl will directly update the kernel about the change in the hostname, and you don’t need to reboot the machine afterward. We’re going to choose the hostname based on the subdomain we’ll use to access the control panel later.
$ sudo hostnamectl set-hostname SUBDOMAIN
Next, edit the file /etc/hosts and add the following line at the end.
$ sudo vi /etc/hosts
IP-ADDRESS SUBDOMAIN.DOMAIN.TLD SUBDOMAIN
Here’s an example using a fake IP, panel as the subdomain/hostname, and example as the domain name, and com as the TLD.
$ sudo vi /etc/hosts
123.456.78.9 panel.example.com panel
Run the command below to restart network manager to apply above changes:
$ sudo systemctl restart NetworkManager.service
Check the hostname and FQDN of the host:
$ hostname
panel
$ hostname -f
panel.example.com
Your result will be different based on your SUBDOMAIN, DOMAIN, and TLD.
Step 2. Install Ajenti
The installation of Ajenti is simple and straightforward. The first step is to add the repository key from Ajenti so that the package manager can recognize the sources of Ajenti during installation.
$ wget http://repo.ajenti.org/debian/key -O- | apt-key add -
Next, add the Ajenti’s repository data to the sources list and update/upgrade packages in the system to make sure that you always get the latest software packages.
$ sudo echo "deb http://repo.ajenti.org/ng/debian main main ubuntu" >> /etc/apt/sources.list
$ sudo apt-get update && sudo apt-get upgrade
Finally, install Ajenti by issuing following command from the terminal. It will take few minutes to complete the installation of Ajenti.
$ sudo apt-get install ajenti
....
....
------------------------------------------------
Now start Ajenti with 'service ajenti restart'
Ajenti will listen on HTTPS port 8000 by default

Default username : root
Default password : admin
------------------------------------------------
....
....
Once the installation is complete, Restart Ajenti:
$ sudo service ajenti restart
The installation of Ajenti is complete! Let’s access Ajenti and configure a few of its settings.
Step 3. Access Ajenti
To access Ajenti, open your favorite browser and point it to the URL https://SUBDOMAIN.DOMAIN.TLD:8000. If you have not configured the domain name, then access it using IP address like https://IP_ADDRESS:8000 You will be warned about an unsigned certificate, but you can add it to the exception list to continue with login to the Ajenti panel.
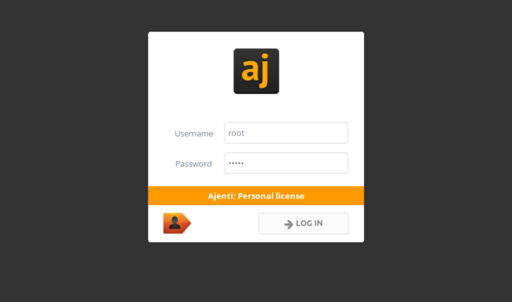
Login with user root and password as admin, and you will be redirected to the Ajenti dashboard.
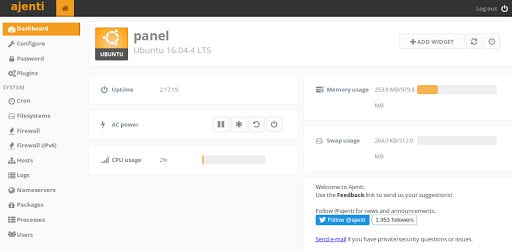
Browse Ajenti’s dashboard and other options from the left sidebar. You can also restart, pause, and stop Ajenti from the main page.
Step 4. Using Ajenti
Once you have logged in successfully, configure few settings of Ajenti. You can try out changing the following parameters:
- To change the password for
admin, Choose thepasswordoption from the left sidebar and then provide the values for old password, new password, and password confirmation parameters, and clickSave. - Ajenti’s dashboard uses a few default widgets like memory usage, CPU usage, and so on. To add more such widgets click the
Add widgetsbutton in the top right corner of the page to have better control of what Ajenti displays by default. - To extend the default functionalities of Ajenti, choose
Pluginsfrom the left sidebar and then click on a disabled plug-in. Install it by clicking the button in theStatuscolumn. - Choose
Configurefrom the left sidebar to edit your language, host, HTTPS server port, or to generate a self-signed certificate. - Choose
Nameserverfrom the left sidebar and click the plus symbol at the bottom of the page to add a new nameserver. SelectTypeas DNS Nameserver and the value as IP address of the nameserver. - To view processes running in the system, choose
Processesfrom the left sidebar. Don’t kill or terminate a process through this interface unless you know what you are doing. - To create new users or groups, choose
Usersfrom the left sidebar and then click either+Useror+Groupfrom the main page. - Use
File managerin the left sidebar to browse through the file system. Assign new permissions for files through this file manager. To edit a file, click theeditbutton. The file will open in an editor inside the panel. Make changes to the file and save it using the button at the top of the page. There are other options as well to create a new file or save it as a new name. - Choose
Servicesfrom the left sidebar to start, restart, or stop a service.
Step 5. Install Ajenti V
Ajenti V is an add-on package to extend the functionalities of Ajenti core. As of now, it consists of packages from gunicorn, mail, MySQL, NodeJS, php-fpm, puma, pureftpd, unicorn, and NGINX. You can retain legacy PHP 5.6 support to Ajenti V by adding ppa:ondrej/php repository to your sources list. We will keep PHP 5.6 support by adding it to the repository list.
$ sudo apt-get install -y software-properties-common
$ sudo add-apt-repository ppa:ondrej/php
$ sudo apt-get update
Now install Ajenti V packages by issuing following command from the terminal:
$ sudo apt-get install ajenti-v ajenti-v-ftp-pureftpd ajenti-v-mail ajenti-v-mysql ajenti-v-nginx ajenti-v-nodejs ajenti-v-php5.6-fpm ajenti-v-php7-fpm ajenti-v-php7.1-fpm ajenti-v-php7.2-fpm ajenti-v-python-gunicorn ajenti-v-ruby-puma ajenti-v-ruby-unicorn
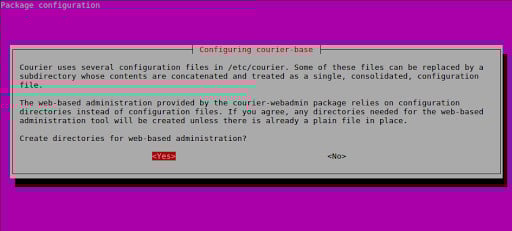
During the installation process, the package manager will prompt you to provide a MySQL root password and a confirmation for creating directories for the courier web admin. Choose Yes to create directories for the courier web admin.
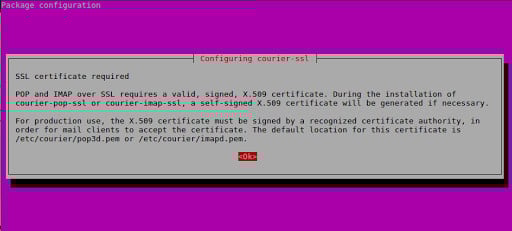
Next, the package manager will inform you that a certificate is required for courier mail service. Press Ok to continue.
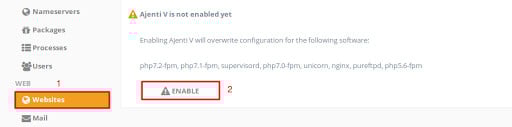
The installation of Ajenti V will be complete within few minutes. Once done, choose Services option from the left sidebar and then click Restart icon at the end of the Ajenti row. Once the system reboots, you should log in to the panel again. You will see the newly added Web section in the left sidebar. Enable Ajenti V by clicking the Enable button.
Now that Ajenti V is installed and enabled, your admin panel suddenly has a lot more power! You can add websites, enable webmail (be sure to send in a support ticket to have us enable port 25), among many other tasks. Enjoy your newly-empowered VPS!
A note about tutorials: We encourage our users to try out tutorials, but they aren't fully supported by our team—we can't always provide support when things go wrong. Be sure to check which OS and version it was tested with before you proceed.
If you want a fully managed experience, with dedicated support for any application you might want to run, contact us for more information.