
So, you just purchased a super reliable and affordable VPS from SSD Nodes, and you're now ready to deploy your applications or install self-hosted software. But wait, you need to put first things first, and you must secure your VPS. This guide will walk you through exactly that! I will show you all of the essential steps you must take for strong VPS security.
Why You Should Secure Your VPS Server
VPS Security gives back exactly what you put into it.
No matter how small or big the project you’re running on your VPS is, you need to be vigilant. Attackers are continually probing the entire internet for servers that they can easily commandeer, whether that’s through misconfigured SSH, weak passwords, or security bugs in server-side software. Attackers look for easy targets, move quick, and leave a lot of damage in their wake.

How to Secure Your VPS Servers
The goal of this guide is to give you easy-to-follow, high-value strategies for protecting your server. You should follow these steps when you first create an account with your VPS hosting provider and whenever you provision a new server. These tips will work on most VPS-hosted servers running one of the popular variants of Linux, such as Debian,Ubuntu, Fedora, or RockyLinux.
Note: This guide is just the start of server security, but by following these steps, you'll avoid being an easy target, which is a crucial first step. For a more in-depth guide, check out Red Hat’s security guidebook.
Step 1) Perform Regular Security Updates
No matter what OS, software, and services you’re using on your new server, you want to ensure that they’re always up-to-date. The developers behind Linux distributions (Ubuntu, Debian, CentOS, and so on) are constantly updating software to patch and mitigate security issues. Not upgrading regularly can leave your server vulnerable to known, exploitable flaws. Luckily, most Linux distributions (and all those available through SSD Nodes) come with a package manager that makes updates incredibly easy.

Ubuntu/Debian
For Ubuntu/Debian, the updating process uses a tool called apt.
sudo apt update
sudo apt upgrade
The first command updates the list of available software, and the second downloads and installs any new updates for software you currently have installed.
Rocky Linux/AlmaLinux/CentOS/RHEL
For Rocky Linux, AlmaLinux, CentOS, and RHEL, the updating process uses a tool called dnf.
sudo dnf check-update

sudo dnf upgrade
The first command checks for updates and the second updates the list of available packages and installs any new updates for the software currently installed.
Avoid Installations With Deb/Rpm
It can be tempting to use the tools behind these package management systems such as deb and rpm to install external packages. At SSD Nodes, we recommend against this practice, namely because it creates dependency issues if you aren’t fully aware of the consequences of installing a certain package.
As a rule of thumb, only install software with the appropriate package manager for your system: apt or dnf.
If you must install software not in the package manager, you can use developer-created repositories like Ubuntu's PPAs, which integrate with the system for updates but come with lower security than official repositories.
Update Other Software
If your VPS server hosts a web app with its own package manager, like Node.js with npm, keep its packages updated. Popular platforms like WordPress also require timely updates due to their large codebases and frequent security patches.
Step 2) Implement Strong, Unique Passwords
Before we dive into VPS-specific strategies, we need to talk about cybersecurity at its most fundamental: passwords.
There are three ways for attackers to successfully acquire your password to any service: they can make educated guesses based on what they learn about you as a person (your birthday, your favorite hobby, the name of your child), they can use computer programs that use “brute force” by trying millions of passwords until one actually works, or they can download lists of common passwords in hope that you’re the kind of person who uses “password123” on every website.
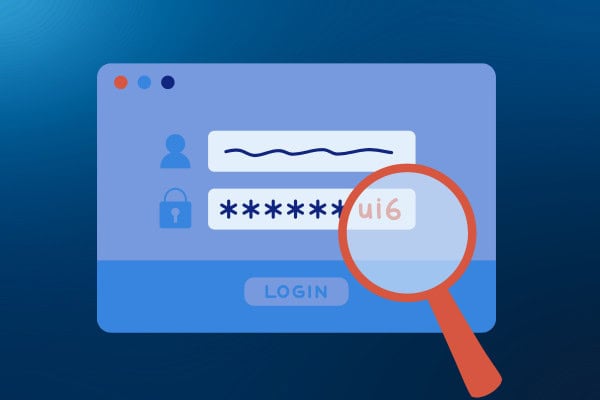
It should come as no surprise then that the more complex your password is, the more difficult it will be to guess using any of two strategies. You want your passwords to be both strong and unique.
What Is a Strong Password?
Here at SSD Nodes, we have some general guidelines:
- A minimum of 10 characters
- No words you can find in a dictionary(“cot,”"password,’“tree”)
- No words or numbers that reference personal information, such as a birthday or the name of a child
- Both upper and lowercase letters
- At least one symbol (# $!% &)
Why Does Uniqueness Matter?
You want to use a different password for every website. That way, if an attacker manages to figure out one of your passwords, they can’t then use that same password to access all your other accounts. The same policy goes for your virtual private servers.
How Do I Create Strong, Unique Passwords?
The easiest way is using a password manager like LastPass or 1Password, which stores and generates strong passwords, requiring you to remember only a secure master password. Alternatively, you can create unique passwords using a pattern or mnemonic device.
Dashboard Area
To change your password on the SSD Nodes dashboard, visit the Change Password page.
You want to ensure that any user account that you’ll use to connect to your server is protected with a strong password.
The first time you connect to a newly-provisioned VPS, we recommend changing the root password. This can be done easily with the passwd command:
$ passwdTwo-factor Authentication
Two-factor authentication (2FA) is increasingly common for accounts holding sensitive information, like emails, and bank accounts. With 2FA enabled, you’ll need both your password and another verification method, such as a code sent to your phone. This adds an extra layer of security, requiring attackers to compromise both your password and your physical device.
For example, Facebook may send a 6-digit code to your phone if you log in from a new device. By entering the code, you prove your identity and gain access. SSD Nodes supports 2FA and strongly recommends enabling it for your dashboard account. Set it up by clicking your user icon, selecting Security settings, and following the prompts.
For more details, check out our tutorial: Enabling Two-Factor Authentication with SSD Nodes.
Database Passwords
Hackers will often probe for easy access to databases (such as MySQL), which they can use as an access point for the entire server.
Always ensure your database root password is strong and unique.
Later, we’ll cover restricting access to MySQL’s port (3306) for added security, but a strong password can deter further damage if your server is compromised.
Step 3) Use SSH Keys

Secure Shell (SSH) is the primary way people connect to their servers. SSH is a secure,encrypted protocol on its own, but there is a way to make it even stronger: SSH authentication keys.
Using authentication keys is similar to using 2FA on your SSD Nodes dashboard. Instead of relying solely on passwords to log into your server, you’re using a secret key that only you have. You can even password-protect these keys for maximum security.
Generate an SSH Key Pair
On your Linux or OS X machine, you can create an SSH key pair using the ssh-keygen tool.
Follow the prompts to create your public/private key pair.
On Windows machines, you can use PuTTY, our recommended tool for Windows users who want to connect to their VPS.
For SSH keys that you’ll use to log into your VPS and make administrative changes,install programs, or edit files, we highly recommend password-protecting this file. But, you can also opt to leave the key unprotected, which is more useful for tasks that need to be completed without your intervention, such as automated backups.
Once you create the key, you can copy the public key to your server. This will allow you to log into your server using the SSH key rather than your user password. It’s a far more secure method of connecting to your VPS, as someone would have to steal your SSH key to get in.
Disable Password-based Logins
After you have SSH-based logins working, you can disable password-based logins for an additional layer of security against brute-force attacks. However, before you do this, you want to be sure your SSH-based authentication is working, and that the user has sudo access. You will then want to edit the /etc/sshd_config file on your server so that both the PermitRootLogin and PasswordAuthentication lines are followed by no, as in the following:
PermitRootLogin no

PasswordAuthentication no
You’ll then want to restart the SSH server with the following command: sudo systemctl restart ssh.
For a more comprehensive look into SSH keys, how to set them up, and step-by-step directions of the entire process, visit our tutorial on the topic: SSH authentication setup and improved security.
Once these steps are complete, your server will be significantly more resilient to intrusion by brute-force attackers.
Step 4) Configure Your Firewall with nftables

The core of modern Linux firewall systems is nftables, which replaces the legacy iptables framework. nftables offers several advantages:
- Simpler syntax and rule organization.
- Better performance.
- You only need one tool,
nft, to add, edit, or delete rules. - Better support for dynamic rule updates.
- Modern features like sets, maps, and concatenations; these tools let you create more efficient and powerful rules.
- Managing both IPv4 and IPv6 rules together is simpler than iptables.
Note: nftables can be difficult for those new to Linux administration, so many distributions come with a wrapper tool that helps make configuration easier. For example, Ubuntu comes with ufw, which offers a more user-friendly method of creating firewall rules. In Rocky Linux/AlmaLinux/RHEL distros, the default wrapper is firewalld.
Basic nftables Setup
First, make sure nftables is installed:
# Ubuntu/Debian
sudo apt install nftables
sudo systemctl enable nftables
sudo systemctl start nftables

# Rocky Linux/AlmaLinux/RHEL
sudo dnf install nftables
sudo systemctl enable nftables
sudo systemctl start nftables
Creating a Basic Firewall Configuration
Here's a basic secure configuration file (/etc/nftables.conf):
#!/usr/sbin/nft -f

# Clear any existing rules
flush ruleset

# Create a new table for filtering traffic
table inet filter {
    # Input chain: handles incoming traffic
    chain input {
        type filter hook input priority 0;
        policy drop;

        # Allow traffic from established connections
        ct state established,related accept

        # Allow localhost traffic
        iif lo accept

        # Allow SSH (port 22)
        tcp dport 22 accept

        # Allow HTTP/HTTPS (ports 80, 443)
        tcp dport { 80, 443 } accept
    }

    # Output chain: handles outgoing traffic
    chain output {
        type filter hook output priority 0;
        policy accept;
    }
}
Let's break it down line by line:
#!/usr/sbin/nft -f: This tells the system to usenftto process this fileflush ruleset: Clears any existing rules to start freshtable inet filter: Creates a table named "filter" that handles both IPv4 and IPv6 trafficinetmeans it handles both IPv4 and IPv6filteris just the table name - you could name it anything
- Inside the input chain:
type filter hook inputmeans these rules apply to incoming trafficpolicy dropmeans "deny all traffic by default"ct state established,related acceptallows responses to come back for connections you initiatediif lo acceptallows traffic on the localhost interface (needed for many applications)tcp dport 22 acceptallows SSH connectionstcp dport { 80, 443 } acceptallows web traffic (HTTP and HTTPS)
- The output chain:
policy acceptmeans "allow all outgoing traffic"- This is generally safe because connections have to be initiated from your server
To use this configuration:
# Test the configuration
sudo nft -c -f /etc/nftables.conf

# If no errors, apply it
sudo nft -f /etc/nftables.conf

# View the current rules
sudo nft list ruleset
This is a minimalist configuration that:
- Blocks all incoming traffic by default
- Allows SSH and web traffic
- Allows all outgoing traffic
- Maintains existing connections
- Works for both IPv4 and IPv6
You can add more rules as needed, like:
# Allow another port (example: for MySQL)
tcp dport 3306 accept

# Allow specific IP address
ip saddr <YOUR-IP> accept
Allow Only a Certain IP Address to Access Your SSH Server
For extra SSH security, you can choose to allow only a specific IP address to access your SSH server while denying all other IPs, you can use the ip saddr (source IP address) match in your nftables rule:
ip saddr <YOUR-IP> tcp dport 22 acceptYour updated chain input section of your nftables configuration would look this:
# Input chain: handles incoming traffic
chain input {
    type filter hook input priority 0;
    policy drop;

    # Allow traffic from established connections
    ct state established,related accept

    # Allow localhost traffic
    iif lo accept

    # Allow SSH only from a specific IP
    ip saddr <YOUR-IP> tcp dport 22 accept

    # Allow HTTP/HTTPS (ports 80, 443)
    tcp dport { 80, 443 } accept
}
Note: Allowing SSH only from a specific IP is a great way to harden your server’s security. It minimizes risk by restricting connections to trusted locations and devices. However, it can be limiting if your IP changes frequently, or if you need access from multiple devices or networks. This setup also requires careful testing, locking yourself out is easier than you think! So make sure you have a backup access method (e.g., a management console or an out-of-band connection).
Managing Rules
Here are some common nftables commands to help you manage your rules.
To display the current ruleset:
sudo nft list rulesetTo add a new rule, use add. For example, to allow MySQL traffic on port 3306:
sudo nft add rule inet filter input tcp dport 3306 acceptTo delete a rule, first, get the handle number of the rule:
sudo nft -a list rulesetThen, delete the rule using the handle number (replace X with the actual number):
sudo nft delete rule inet filter input handle XFirewall Strategies
When it comes to setting up your firewall, there are two main approaches, similar to what you might already know from working with iptables. These approaches determine how your firewall treats traffic by default:
- Default Drop (Recommended)
- Deny all traffic by default.
- Explicitly allow needed services.
- This approach ensures that your server has a strong security baseline, but it does require careful planning to ensure that you don’t accidentally block legitimate traffic or lock yourself out.
- Default Accept
- Allow all traffic by default.
- Block specific threats.
- This can be a good starting point for beginners or for less critical setups since it’s easier to configure and less likely to cause access issues.
Protip: Don’t Get Locked Out!
Unfortunately, it’s common for firewall beginners to lock themselves out of their VPS when creating new rules. In the worst-case scenario, you would need to reinstall your operating system from the SSD Nodes dashboard and begin again.
To prevent a lockout, you can test the configuration without applying:
sudo nft -c -f /etc/nftables.confIt’s a good idea to schedule nftables to restart a few minutes after making changes to the rules. This acts as a safety net. If you accidentally lock yourself out, the restart will revert to the saved configuration (if persistence is set up) or clear the active rules, giving you a fresh start.
echo "sudo systemctl restart nftables" | at now + 5 minutesPersistence
nftables rules are automatically persistent when managed through systemd.
You can save the current ruleset using the following command:
sudo nft list ruleset > /etc/nftables.confThen enable automatic loading at boot:
sudo systemctl enable nftablesMonitoring and Debugging
If you want to log dropped packets, you can add a rule like so:
nft add rule inet filter input log prefix \"nftables-dropped: \" dropThe dropped packets are logged in journalctl:
sudo journalctl -fYou can use the nft monitor command to get real-time information about changes to your firewall rules. It shows events like when rules are added, modified, or deleted, helping you track the changes in your firewall configuration:
sudo nft monitorNow that you've successfully configured your firewall with nftables and learned how to manage and monitor it, you're ready to move on to the next step: Limiting server-side application access to the internet. This is an important part of securing your server, as it allows you to control which applications or services can connect to the outside world.
Step 5) Limit Server-side Application Access to the Internet

If an application you’re running on your VPS doesn’t need to access the internet, you shouldn’t let it. That’s just common sense VPS security.
Let’s use a MySQL database as an example. Let’s say you have a MySQL database connected to your WordPress blog. When someone visits your website and scopes out a few posts, they’re not accessing your MySQL database directly. The WordPress application running on your VPS is actually doing the work to pull information from the database and display it on the user interface.
In this setup, the MySQL database does not need to connect to the entire internet, only to WordPress. You should ensure the database refuses connections coming from outside the VPS itself.
A simple way to do this is to edit the MySQL configuration file located in /etc/mysql. For MySQL 8.0+ the configuration file is located at:
/etc/mysql/mysql.conf.d/mysqld.cnfFor MariaDB, this file is located at:
/etc/mysql/mariadb.conf.d/50-server.cnfYou’ll want to ensure that the bind-address setting points to what’s called the loopback network device (essentially, the server itself).
bind-address=127.0.0.1Using Firewalls for Securing Application Ports
Firewalls are also an effective method of preventing access to your server-side apps. For example, MySQL listens on the 3306 port for connections. It’s possible to restrict this 3306 port directly, or restrict access based on groups. If you use the recommended Default Drop firewall setup, port 3306 will be blocked by default, and you should keep it that way!
Protip: For more detailed instructions on how to secure MySQL/MariaDB, check out the Securing The MariaDB Database Server section in our LAMP tutorial. It details how to use the mysql_secure_installation script to improve your database’s security by ensuring that root accounts have passwords, removes root accounts that are accessible from outside the server itself, removes anonymous users, and more.
The MySQL example above is just a quick look into the philosophy behind limiting server-side applications from accessing the internet. There are too many other examples to possibly cover them here.
But, keep in mind this rule: If an application or service doesn’t need to directly access traffic from the internet, it shouldn’t be allowed to.
Step 6) Block Intruders With fail2ban
As we’ve said before, hackers are regularly probing servers-even those that rely on SSH keys rather than passwords-in search of ways to get access. Obviously,strong passwords and SSH key-based logins (while also disabling password-based logins) can help mitigate those issues, but it’s also possible to prevent hackers from even trying a brute force attack to begin with.
Enter fai12ban, an intrusion prevention system that blocks would-be intruders from gaining access to your server via a firewall. After a certain number of unsuccessful login attempts, that IP will automatically be added to a blocklist in the firewall, preventing any further access attempts.
Installing fail2ban
Before you install fail2ban, make sure you update your system packages then follow the instructions in this section.
To install fail2ban on Debian/Ubuntu:
sudo apt install fail2banFor Rocky Linux/AlmaLinux/RHEL, you need to enable the EPEL repository before installing fail2ban:
sudo dnf install epel-release
sudo dnf install fail2ban
Start and Enable fail2ban
Once installed, start and enable the Fail2Ban service to ensure it runs on system boot:
sudo systemctl start fail2ban
sudo systemctl enable fail2ban
Once installation completes, fail2ban will be running, and your VPS will immediately be more secure from automated tools that are trying to sneak their way in.
Verify Installation
Check if fail2ban is running correctly:
sudo systemctl status fail2banIf the service is active, then you can use commands like restart to reload the service:
sudo systemctl restart fail2banConfiguring fail2ban
To customize Fail2Ban’s behavior, such as setting the number of failed attempts before a ban or defining the ban duration, you’ll need to edit its configuration file, often referred to as the "jail file." Instead of modifying the default file directly, it’s best practice to create a unique .local version for your server. To do this, copy the default configuration file to a .local file:
sudo cp /etc/fail2ban/jail.conf /etc/fail2ban/jail.localThen open it with your favorite editor, like nano.
sudo nano /etc/fail2ban/jail.localOnce you’ve dialed in your configuration, just restart the fail2ban service:
sudo systemctl restart fail2banTesting fail2ban
To test whether Fail2Ban is actively working, you can set up a test jail with shorter ban times for testing. Let’s test with SSH.
Open a new sshd.local configuration file:
sudo nano /etc/fail2ban/jail.d/sshd.localAdd the following:
[sshd]
enabled = true
port = ssh
filter = sshd
logpath = %(syslog_authpriv)s
maxretry = 3
findtime = 300
bantime = 300[sshd]defines settings specific to the SSH service.enabled = trueActivates this jail to monitor SSH login attempts.port = sshMonitors the default SSH port (port 22). You can specify a custom port if SSH runs on a different one (e.g.,port = 2222).filter = sshdUses thesshdfilter, which is a predefined Fail2Ban rule to identify failed SSH login attempts in the logs.logpathSpecifies the log file to monitor for SSH failures. In Fail2Ban,%(syslog_authpriv)sis a variable that dynamically points to the appropriate log file for authentication-related messagesmaxretry = 3The number of failed login attempts allowed before the offending IP is banned.findtime = 300The time window (in seconds) in which themaxretryattempts are counted. Here, 3 failures within 5 minutes (300 seconds) will trigger a ban.bantime = 300The duration (in seconds) that the offending IP will remain banned. In this case, 5 minutes.
Restart Fail2Ban:
sudo systemctl restart fail2banNow, on one terminal, you can watch real-time fail2ban logs:
sudo tail -f /var/log/fail2ban.logOn another terminal, you can monitor banned IPs:
sudo fail2ban-client status sshdNow try to connect to your server via SSH and use an incorrect passwords 3 times, you’ll see the real-time logs reflecting the failed tries, and /var/log/fail2ban.log will inform you that your IP is banned after 3 attempts:
2024-12-16 22:52:06,517 fail2ban.actions [15161]: NOTICE [sshd] Ban your_IP_addressThe output of fail2ban-client status sshd will include your IP in the banned IPs list:
Status for the jail: sshd
|- Filter
|  |- Currently failed: 2
|  |- Total failed: 6
|  `- Journal matches: _SYSTEMD_UNIT=sshd.service + _COMM=sshd
`- Actions
   |- Currently banned: 6
   |- Total banned: 6
   `- Banned IP list:  Banned_IP_1 Banned_IP_2 Banned_IP_3 your_IP_address
You may also see other IPs being banned in the same time-span, which tells you just how much the Internet is full of malicious bots.
Fail2ban Resources
For more information on fail2ban, check out the following resources:
Beyond the 6 Steps to Secure Servers
This guide only covers six key steps for securing your new VPS-there are dozens, if not hundreds, more. Once you’re finished with this guide, your VPS will be far more resilient to attack, but you can still take your security to the next level with additional resources.
Thanks so much for reading, and congratulations on your new VPS!
Additional Security Measures
- Turn off or uninstall unneeded services.
- Create unique user accounts for web server processes that have read access to only the relevant files/directories.
- Restrict write access for web server users to all directories except when explicitly needed, such as for image uploads in WordPress.
- Change your SSH port to something other than 22, and then block 22 with your firewall.
- Enable automatic updates.
- Set up automated backups, and then test that they work!
A note about tutorials: We encourage our users to try out tutorials, but they aren't fully supported by our team—we can't always provide support when things go wrong. Be sure to check which OS and version it was tested with before you proceed.
If you want a fully managed experience, with dedicated support for any application you might want to run, contact us for more information.