
Imagine you just deployed a web application to your business VPS, but when visitors try to access it, they get permission errors.
Or maybe you're working with a development team where everyone needs different levels of access to the same project files. Sound familiar? These scenarios highlight exactly why understanding the difference between chown and chmod matters in real-world Linux administration.

Note: Want an easy way to calculate Linux permissions? Check out our handy Chmod Calculator.
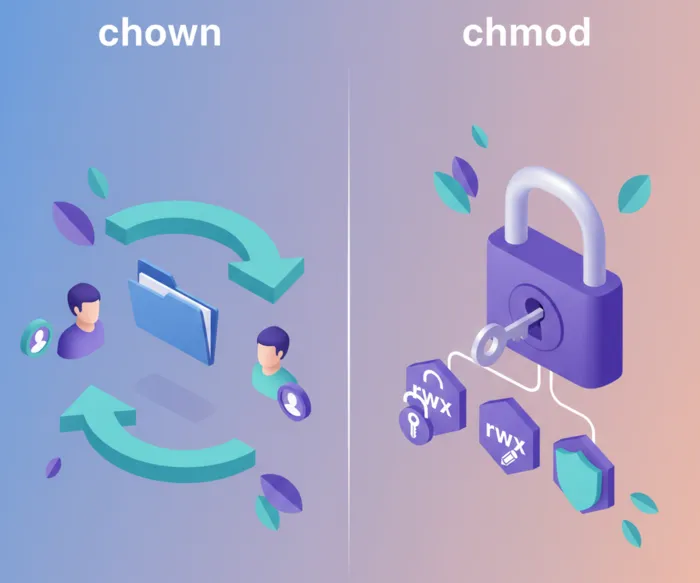
What's the Difference Between chown and chmod?
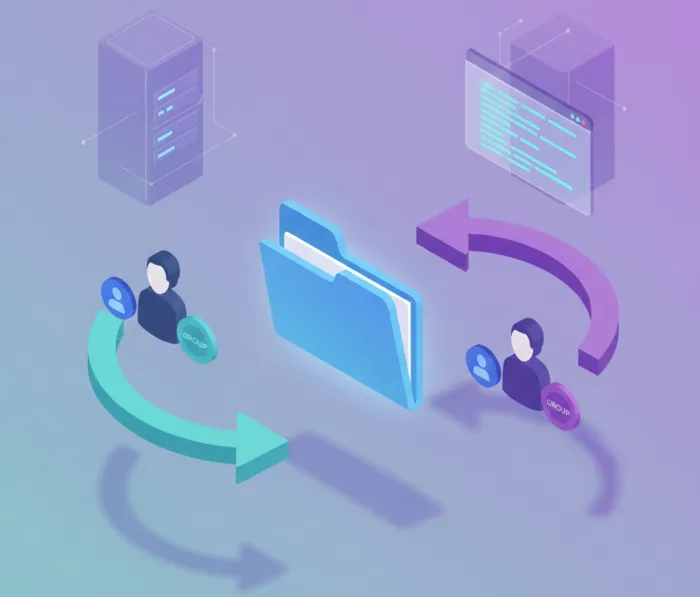
The fundamental difference is simple: chmod controls what actions can be performed on a file (read, write, execute), while chown controls who owns the file (which user and group). Think of chmod as setting the rules of engagement, and chown as deciding who gets to play by those rules in the first place.
When you run chmod 755 script.sh, you're defining permissions—the owner can read, write, and execute, while others can only read and execute.
When you run chown alice:developers script.sh, you're changing ownership—now Alice owns the file and it belongs to the developers group, but the permissions (755) remain unchanged.
These commands work together to create Linux's two-layer security model: ownership determines identity, permissions determine capability. You'll use chmod when you need to restrict or expand what people can do with a file. You'll use chown when you need to transfer responsibility for a file to a different user or group.
What Does chmod Stand For?
The chmod command stands for "change mode" where "mode" refers to the permission settings of a file or directory. The name comes from the early days of Unix, when file permissions were simply called the "mode" of a file. When you execute chmod, you're literally changing the access mode that determines who can read, write, or execute that file.
What is chmod and How Does It Work?

The chmod command modifies file permissions using either symbolic notation (letters like rwx) or numeric notation (numbers like 755). It operates on three permission levels (owner, group, and others) and controls three types of access: read (r/4), write (w/2), and execute (x/1).
Here's how chmod works in practice:
# Give everyone read and execute permissions
$ chmod 755 deploy.sh

# Make a file readable and writable only by owner
$ chmod 600 config.yml

# Add execute permission for owner
$ chmod u+x script.sh

# Remove write permission from group and others
$ chmod go-w shared-file.txt
The numeric method adds up permission values: read (4) + write (2) + execute (1) = 7 for full permissions. The symbolic method uses letters (u for user/owner, g for group, o for others) combined with operators (+ to add, - to remove, = to set exactly).
For a complete breakdown of permission numbers like 755, 644, and 700, check out our detailed guide to Linux file permissions, which covers everything from basic symbolic notation to advanced permission patterns.
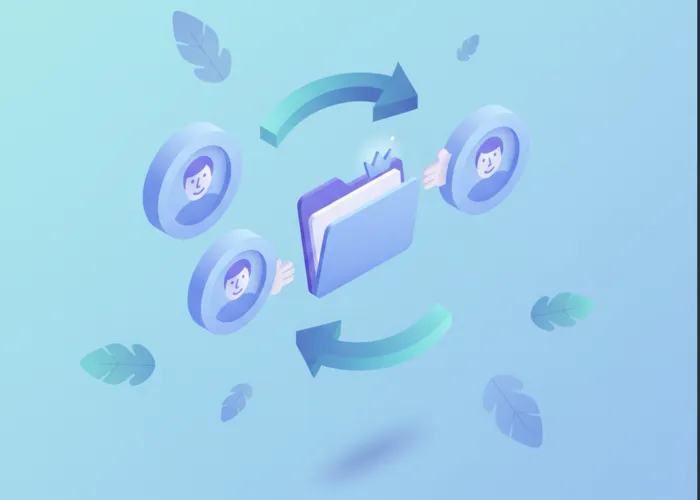
What Does chown Do?
The chown command changes file ownership, specifically, it modifies which user and/or group owns a particular file or directory. Every file in Linux has both a user owner and a group owner, and chown lets you change either or both of these ownership attributes.
When you change ownership with chown, the permissions set by chmod don't change, only the identity of who those permissions apply to changes. This is crucial for understanding how the two commands complement each other rather than overlap.
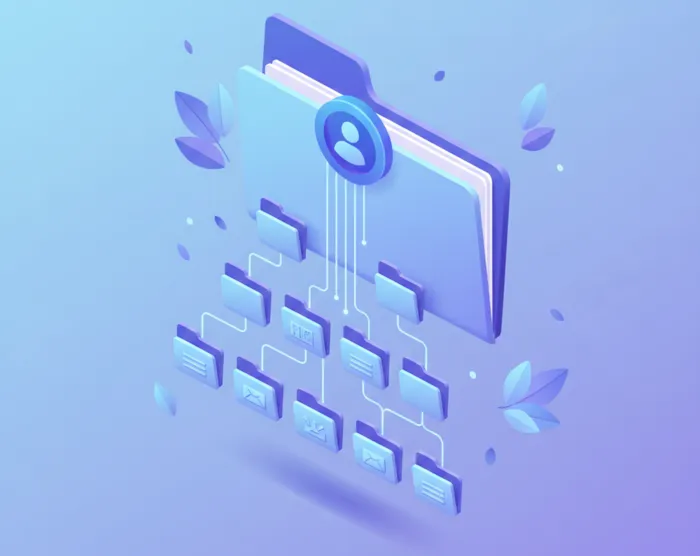
What is chown and When Do You Need It?
The chown command (short for "change owner") transfers file ownership from one user or group to another. You need chown in several common scenarios: when files need to belong to a different user after deployment, when setting up shared directories for team collaboration, when configuring web server files to be owned by the web server user, or when fixing ownership issues after copying files between systems.
Here are practical examples of chown in action:
# Change owner to alice
$ chown alice project-file.txt

# Change both owner and group
$ chown alice:developers project-file.txt

# Change only the group
$ chown :developers project-file.txt

# Change ownership recursively for entire directory
$ chown -R www-data:www-data /var/www/html
The syntax follows a simple pattern: chown [user]:[group] [file]. You can change just the user, just the group (using :group), or both at once. The -R flag applies changes recursively to all files and subdirectories, which is essential when managing directory trees.
Understanding the chown Command in Linux
The chown command is your primary tool for managing file ownership in Linux environments. It's particularly critical in multi-user systems where different people or processes need ownership of different files. Unlike chmod, which anyone can use to modify their own files' permissions (within limits), chown typically requires superuser privileges because changing file ownership has significant security implications.
The Syntax of chown
The basic chown syntax follows this pattern:
chown [OPTIONS] [USER][:GROUP] FILE
Let's break down the components:
User specification: You can specify a username or numeric user ID (UID). For example, chown 1000 file.txt and chown john file.txt both work if user john has UID 1000.
Group specification: After a colon or period, add the group name or numeric group ID (GID). Both chown :developers file.txt and chown .developers file.txt change the group ownership.
Combined syntax: The most common pattern is user:group, which changes both simultaneously: chown alice:team project.conf.
Shorthand options: Using chown alice: file.txt (with a trailing colon but no group name) changes the file's group to Alice's login group.
Common chown Options
The chown command supports several useful flags that modify its behavior:
Recursive operation (-R): Applies ownership changes to directories and all their contents. This is essential when managing web directories or project folders:
# Change ownership of entire web directory
$ sudo chown -R www-data:www-data /var/www/myapp
Preserve root (--preserve-root): Prevents accidentally changing ownership of the root directory /, which could break your entire system. Modern versions of chown enable this by default.
Verbose output (-v): Reports every file that gets modified, useful for debugging or confirming changes:
$ sudo chown -Rv alice:developers /home/shared/
changed ownership of '/home/shared/file1.txt' from root:root to alice:developers
changed ownership of '/home/shared/file2.txt' from root:root to alice:developers
Reference file (--reference): Copies ownership from one file to another, matching both user and group:
# Make file2.txt have the same ownership as file1.txt
$ chown --reference=file1.txt file2.txt
Dereference (-h): By default, if you run chown on a symbolic link, it changes the ownership of the target file. Use -h to change the symlink itself instead.
Change Ownership of Files in Linux: Practical Examples
Let's walk through real-world scenarios where you need to change file ownership on a Linux system. These examples reflect situations you'll encounter regularly when managing servers, especially in development environments.
Scenario 1: Deploying a Web Application
After you upload files to your VPS via SFTP or git, they're typically owned by your user account. But your web server (nginx or Apache) runs as a different user, usually www-data on Ubuntu/Debian or nginx/apache on other distributions. The web server needs to own these files to serve them properly:
# Transfer ownership to web server user
$ sudo chown -R www-data:www-data /var/www/html/myapp

# Verify the change
$ ls -l /var/www/html/myapp
drwxr-xr-x 3 www-data www-data 4096 Dec 26 10:00 public
-rw-r--r-- 1 www-data www-data 2048 Dec 26 10:00 index.php
This ensures the web server can read your application files and, if needed, write to specific directories like uploads or cache folders.
Scenario 2: Team Development on Shared VPS
When multiple developers work on the same VPS for development, you need shared directories where everyone can contribute. Here's how to set this up properly:
# Create a shared project directory
$ sudo mkdir /var/projects/teamapp

# Change ownership to a shared group
$ sudo chown -R :developers /var/projects/teamapp

# Verify group ownership
$ ls -ld /var/projects/teamapp
drwxrwxr-x 2 root developers 4096 Dec 26 10:15 /var/projects/teamapp
Now any user in the developers group can work with these files. You'd typically combine this with chmod g+w to ensure group members can write to the directory, but the ownership change via chown is what grants them membership-based access in the first place.
Scenario 3: Fixing Ownership After File Transfers
When you copy files from one user's directory to another, or when you extract archives, ownership often doesn't match your needs:
# Files extracted from backup owned by wrong user
$ ls -l backup/
-rw-r--r-- 1 olduser olduser 5120 Nov 10 08:00 database.sql
-rw-r--r-- 1 olduser olduser 2048 Nov 10 08:00 config.php

# Fix ownership to current user
$ sudo chown -R alice:alice backup/

# Verify the fix
$ ls -l backup/
-rw-r--r-- 1 alice alice 5120 Nov 10 08:00 database.sql
-rw-r--r-- 1 alice alice 2048 Nov 10 08:00 config.php
This is particularly common when migrating projects between servers or restoring from backups where the original user accounts no longer exist.
Scenario 4: Database File Ownership
Database servers like MySQL or PostgreSQL need to own their data directories. If you've moved database files or restored from backup, you might need to fix ownership:
# MySQL data directory ownership
$ sudo chown -R mysql:mysql /var/lib/mysql

# PostgreSQL data directory
$ sudo chown -R postgres:postgres /var/lib/postgresql/14/main
Without correct ownership, the database server can't start or access its data files, leading to service failures.
Change Owner of Directory Linux: The Recursive Approach
Directories present unique challenges because they typically contain many files and subdirectories. When you need to change ownership of an entire directory tree, the -R (recursive) flag becomes essential.
Using chown -R for Directory Trees
The recursive flag tells chown to descend into directories and change ownership of everything it finds:
# Change ownership of directory and all contents
$ sudo chown -R username:groupname /path/to/directory
This single command replaces what would otherwise require changing ownership on potentially thousands of individual files. For a project directory with 500 files across multiple subdirectories, chown -R handles everything in one operation.

Real-World Directory Ownership Example
Consider setting up a shared project directory on a development VPS where your team collaborates:
# Create the project structure
$ sudo mkdir -p /var/projects/webapp/{src,tests,config,logs}

# Set ownership to project lead with developer group
$ sudo chown -R alice:developers /var/projects/webapp

# Verify the recursive change worked
$ ls -lR /var/projects/webapp
/var/projects/webapp:
drwxr-xr-x 2 alice developers 4096 Dec 26 10:30 config
drwxr-xr-x 2 alice developers 4096 Dec 26 10:30 logs
drwxr-xr-x 2 alice developers 4096 Dec 26 10:30 src
drwxr-xr-x 2 alice developers 4096 Dec 26 10:30 tests
Every subdirectory and any future files created inherit appropriate ownership patterns, though you'll want to combine this with proper chmod settings and potentially setgid bits to ensure new files get correct group ownership automatically.
Important Note: When NOT to Use Recursive chown
Be cautious with recursive ownership changes on system directories. Running sudo chown -R username / would try to change ownership of your entire filesystem, breaking system files and potentially making your system unbootable. Always specify the exact path you intend to modify:
# DANGEROUS - Don't do this
$ sudo chown -R alice /

# SAFE - Specific path
$ sudo chown -R alice /home/alice/projects
Modern chown versions include --preserve-root by default to prevent the first scenario, but it's still worth understanding the risk.
Unix chown Command: Understanding the Relationship with chmod
While chown and chmod are separate commands, they work together to create Linux's comprehensive security model. Understanding when to use each—and when to use both—separates effective system administration from constant permission headaches.
The Two-Layer Security Model
Linux file security operates on two distinct layers:
Layer 1: Ownership (chown): Establishes identity (who owns the file and which group it belongs to). This is the "who" of file access.
Layer 2: Permissions (chmod): Defines capabilities (what the owner, group members, and others can do with the file). This is the "what" of file access.
You can't skip either layer. A file might have perfect permissions (chmod 644), but if it's owned by the wrong user (needs chown), those permissions apply to the wrong person. Conversely, a file might be owned by the right user, but without appropriate permissions set via chmod, that user still can't access it properly.
Combining chown and chmod for Complete Control
Most real-world scenarios require both commands working in tandem. Here's a complete example of setting up a web application directory:
# Start with a fresh directory
$ sudo mkdir /var/www/myapp

# Step 1: Set ownership to web server user
$ sudo chown -R www-data:www-data /var/www/myapp

# Step 2: Set directory permissions (755)
$ sudo find /var/www/myapp -type d -exec chmod 755 {} \;

# Step 3: Set file permissions (644)
$ sudo find /var/www/myapp -type f -exec chmod 644 {} \;

# Step 4: Make specific directories writable for uploads/cache
$ sudo chmod 775 /var/www/myapp/storage
$ sudo chmod 775 /var/www/myapp/cache

# Verify the complete setup
$ ls -la /var/www/myapp
drwxr-xr-x 5 www-data www-data 4096 Dec 26 11:00 .
drwxr-xr-x 3 root     root     4096 Dec 26 10:45 ..
-rw-r--r-- 1 www-data www-data 2048 Dec 26 11:00 index.php
drwxrwxr-x 2 www-data www-data 4096 Dec 26 11:00 storage
This workflow demonstrates the relationship: chown establishes that www-data owns everything, then chmod defines what www-data (and others) can actually do with those files.
Common Permission and Ownership Patterns
Certain combinations of chown and chmod appear repeatedly in Linux administration:
Web server files:
$ sudo chown -R www-data:www-data /var/www/html
$ sudo chmod -R 755 /var/www/html
# Owner (www-data) has full control, others can read/execute
SSH private keys:
$ chown username:username ~/.ssh/id_rsa
$ chmod 600 ~/.ssh/id_rsa
# Only owner can read/write, everyone else blocked completely
Shared development directory:
$ sudo chown -R :developers /var/projects/shared
$ sudo chmod -R 775 /var/projects/shared
# Group has write access, others can read
Log files:
$ sudo chown syslog:adm /var/log/application.log
$ sudo chmod 640 /var/log/application.log
# Owner can write logs, group can read them, others blocked
Each pattern serves a specific security purpose. The chown portion identifies who's involved, the chmod portion defines the access rules.
chown vs chmod: When to Use Each Command
Knowing which command solves which problem is crucial for efficient Linux administration. Here's how to decide between chown and chmod based on the situation you're facing.
Use chmod When You Need to Control Access Levels
Reach for chmod when the question is "what can people do with this file?" You're not changing who owns it, you're changing what's allowed:
Scenario: You have a script that shouldn't be executable by random users.
Solution: chmod 644 script.sh (removes execute permission for everyone)
Scenario: A configuration file contains sensitive credentials.
Solution: chmod 600 config.ini (only owner can read/write)
Scenario: A shared directory needs to allow group members to create files.
Solution: chmod 775 /shared/projects (adds write permission for group)
Scenario: You've created a new shell script that needs to run.
Solution: chmod +x deploy.sh (adds execute permission)
The common thread: you're modifying capabilities, not identities.
Use chown When You Need to Transfer Ownership
Reach for chown when the question is "who should own this file?" The permissions might be perfect, but they're assigned to the wrong user or group:
Scenario: Files uploaded via SFTP are owned by your user account, but the web server needs to own them.
Solution: sudo chown -R www-data:www-data /var/www/html/uploads
Scenario: A developer leaves the team and their project files need new ownership.
Solution: sudo chown -R newlead:developers /var/projects/legacy-app
Scenario: Database files were restored from backup with wrong ownership.
Solution: sudo chown -R mysql:mysql /var/lib/mysql
Scenario: You're setting up a collaborative directory for a specific team.
Solution: sudo chown -R :engineering /var/projects/api-v2
The common thread: you're changing who's responsible for the file, not what they can do with it.
Use Both When Setting Up New Services
Most service configurations require both commands working together. When you deploy a new application to a VPS server, you'll typically need to:
- Set ownership to the appropriate user/group (
chown) - Set permissions for security and functionality (
chmod)
Here's a complete Rails application deployment example:
# Deploy the application
$ git clone https://github.com/example/rails-app.git /var/www/rails-app

# Set ownership to app user
$ sudo chown -R rails:rails /var/www/rails-app

# Set secure defaults for files and directories
$ sudo find /var/www/rails-app -type d -exec chmod 755 {} \;
$ sudo find /var/www/rails-app -type f -exec chmod 644 {} \;

# Make scripts executable
$ sudo chmod +x /var/www/rails-app/bin/*

# Secure credentials
$ sudo chmod 600 /var/www/rails-app/config/database.yml
$ sudo chmod 600 /var/www/rails-app/config/master.key

# Allow application to write to specific directories
$ sudo chmod 775 /var/www/rails-app/tmp
$ sudo chmod 775 /var/www/rails-app/log
$ sudo chmod 775 /var/www/rails-app/public/uploads
This combination ensures the application owns its files (chown), has appropriate access levels (chmod for most files), and can write where needed (additional chmod on specific directories).
Practical chown and chmod Scenarios for Development Teams
Development teams working on shared VPS infrastructure face unique permission challenges. Getting the ownership and permission balance right prevents the "it works on my machine" problem from becoming "nobody can access our files."
Multi-User Development Environment Setup
When multiple developers share a VPS for collaborative projects, you need ownership and permissions that enable cooperation without creating security holes:
# Create a shared group for the team
$ sudo groupadd webdev

# Add team members to the group
$ sudo usermod -a -G webdev alice
$ sudo usermod -a -G webdev bob
$ sudo usermod -a -G webdev charlie

# Create project directory with group ownership
$ sudo mkdir /var/projects/company-site
$ sudo chown -R :webdev /var/projects/company-site

# Set permissions for collaborative work
$ sudo chmod -R 775 /var/projects/company-site

# Set setgid bit so new files inherit group ownership
$ sudo chmod g+s /var/projects/company-site
The setgid bit (set group ID) is crucial here—it ensures that when Alice creates a file in this directory, it automatically belongs to the webdev group rather than her personal group. This prevents the common issue where one developer's files are inaccessible to teammates.
Handling File Uploads and User-Generated Content
Web applications that accept file uploads need careful ownership and permission configuration. The web server must be able to write uploaded files, but you don't want to give it write access to your entire application:
# Application owned by deployment user
$ sudo chown -R deploy:deploy /var/www/webapp

# Upload directory owned by web server with group sticky bit
$ sudo chown -R www-data:deploy /var/www/webapp/public/uploads
$ sudo chmod 2775 /var/www/webapp/public/uploads

# Verify the setup
$ ls -ld /var/www/webapp/public/uploads
drwxrwsr-x 2 www-data deploy 4096 Dec 26 11:30 /var/www/webapp/public/uploads
The 2775 permission includes the setgid bit (the "2" prefix), which means uploaded files will be accessible to both the web server user (www-data) and deployment users in the deploy group.
Managing Deployment Permissions
Automated deployment systems need specific ownership patterns to work correctly. Here's a typical CI/CD setup where a deployment user manages application files:
# Create deployment user
$ sudo useradd -m -s /bin/bash deploy
$ sudo usermod -a -G www-data deploy

# Set up application ownership
$ sudo chown -R deploy:www-data /var/www/production-app

# Directories need group write for deployment
$ sudo find /var/www/production-app -type d -exec chmod 775 {} \;

# Files should be group readable but not writable
$ sudo find /var/www/production-app -type f -exec chmod 664 {} \;

# Except uploaded content which web server owns
$ sudo chown -R www-data:www-data /var/www/production-app/storage/uploads
$ sudo chmod -R 755 /var/www/production-app/storage/uploads
This structure lets the deployment user update application code while the web server can read files and write to designated upload areas.
Temporary Permission Escalation
Sometimes developers need temporary elevated permissions for specific tasks. Rather than constantly using sudo, you can grant ownership temporarily:
# Developer needs to debug production logs
$ sudo chown alice:alice /var/log/webapp/production.log
$ sudo chmod 600 /var/log/webapp/production.log

# Alice can now read logs directly
$ tail -f /var/log/webapp/production.log

# When finished, restore proper ownership
$ sudo chown syslog:adm /var/log/webapp/production.log
$ sudo chmod 640 /var/log/webapp/production.log
This is safer than opening permissions globally, as it limits elevated access to specific files for specific timeframes.
Common chown and chmod Mistakes to Avoid
Even experienced administrators make permission mistakes that can create security vulnerabilities or break applications. Here are the most common pitfalls and how to avoid them.
Mistake 1: Using chmod 777 as a Quick Fix
When something doesn't work, the temptation is strong to just run chmod 777 and move on. Don't do this. It grants full read, write, and execute permissions to everyone on the system:
# DANGEROUS - Never do this
$ chmod 777 /var/www/html
$ chmod -R 777 /var/www/application
This creates massive security holes. Anyone with access to your system can modify or execute these files. Instead, identify the specific permission problem:
# Better approach - diagnose then fix specifically
$ ls -l /var/www/html/index.php
-rw-r--r-- 1 alice alice 2048 Dec 26 12:00 index.php

# Web server can't read because it's owned by alice
# Fix: Change ownership, not permissions
$ sudo chown www-data:www-data /var/www/html/index.php
Mistake 2: Forgetting Recursive Operations Affect Everything
The -R flag is powerful but dangerous if you're not careful about what directory you target:
# DANGEROUS - This breaks system files
$ sudo chown -R username /etc

# SAFE - Be specific about subdirectories
$ sudo chown -R username /etc/myapp
Always double-check your path before running recursive ownership or permission changes. One typo can affect thousands of files.
Mistake 3: Changing Permissions Without Changing Ownership
You set perfect permissions, but the file still doesn't work because it's owned by the wrong user:
# This doesn't help if www-data doesn't own the file
$ sudo chmod 644 /var/www/config.php

# Need both ownership and permissions
$ sudo chown www-data:www-data /var/www/config.php
$ sudo chmod 644 /var/www/config.php
Remember that permissions are applied to the owner, group, and others based on the ownership attributes. Changing permissions without checking ownership first is treating the symptom, not the cause.
Mistake 4: Breaking SSH by Wrong Key Permissions
SSH is notoriously strict about key file permissions. If they're too permissive, SSH refuses to use them:
# This breaks SSH access
$ chmod 644 ~/.ssh/id_rsa
$ ssh user@server
@@@@@@@@@@@@@@@@@@@@@@@@@@@@@@@@@@@@@@@@@@@@@@@@@@@@@@@@@@@
@         WARNING: UNPROTECTED PRIVATE KEY FILE!          @
@@@@@@@@@@@@@@@@@@@@@@@@@@@@@@@@@@@@@@@@@@@@@@@@@@@@@@@@@@@
Permissions 0644 for 'id_rsa' are too open.

# Fix: Private keys must be 600, owned by you
$ chmod 600 ~/.ssh/id_rsa
$ chown username:username ~/.ssh/id_rsa
The SSH directory itself also needs specific permissions: chmod 700 ~/.ssh ensures only you can access it.
Mistake 5: Not Testing Permission Changes
After changing permissions or ownership, always verify the change worked and didn't break anything:
# Make changes
$ sudo chown -R www-data:www-data /var/www/myapp
$ sudo chmod -R 755 /var/www/myapp

# Verify ownership
$ ls -l /var/www/myapp
drwxr-xr-x 3 www-data www-data 4096 Dec 26 12:30 public
-rw-r--r-- 1 www-data www-data 2048 Dec 26 12:30 index.php

# Test the application
$ curl http://localhost/myapp/
# Should return content, not permission errors
This catch errors before they affect users or break production systems.
Advanced Permission Concepts: Beyond Basic chown and chmod
Once you've mastered the fundamentals, these advanced concepts give you even more precise control over file access in complex scenarios.
The setuid and setgid Bits
Special permission bits allow programs to run with elevated privileges or ensure files inherit group ownership:
setuid (Set User ID): When set on an executable, it runs with the permissions of the file's owner, not the user executing it. The classic example is the passwd command, which needs root privileges to modify /etc/shadow:
# The passwd command has setuid set
$ ls -l /usr/bin/passwd
-rwsr-xr-x 1 root root 68208 Nov 29 2022 /usr/bin/passwd
# Notice the 's' in place of 'x' for owner permissions
You can set the setuid bit with chmod 4755 (the "4" represents setuid) or chmod u+s.
setgid (Set Group ID): On directories, this ensures new files inherit the directory's group ownership rather than the creator's primary group:
# Set setgid on a shared directory
$ sudo chmod g+s /var/projects/shared
$ ls -ld /var/projects/shared
drwxrwsr-x 2 root developers 4096 Dec 26 13:00 /var/projects/shared
# Notice the 's' in the group permissions
This is essential for collaborative directories where multiple users need consistent group access.
The Sticky Bit for Shared Directories
The sticky bit prevents users from deleting files they don't own, even if the directory permissions would normally allow it. This is commonly used on /tmp:
# Check /tmp permissions
$ ls -ld /tmp
drwxrwxrwt 15 root root 4096 Dec 26 13:15 /tmp
# Notice the 't' at the end

# Set sticky bit on a shared directory
$ sudo chmod +t /var/shared/uploads
$ ls -ld /var/shared/uploads
drwxrwxr-t 2 root root 4096 Dec 26 13:20 /var/shared/uploads
Now users can create files in this directory, but they can only delete their own files, not files created by others.
Access Control Lists (ACLs) for Fine-Grained Control
Traditional Unix permissions are limited to owner, group, and others. ACLs allow you to grant specific permissions to specific users without changing the file's group:
# Give user 'bob' read access to a file without changing ownership
$ setfacl -m u:bob:r file.txt

# View ACL permissions
$ getfacl file.txt
# file: file.txt
# owner: alice
# group: developers
user::rw-
user:bob:r--
group::r--
mask::r--
other::---
ACLs solve the problem where you need to grant access to multiple specific users without creating complex group structures.
Testing Your Understanding: Hands-On Practice
The best way to master chown and chmod is through hands-on practice. If you want to experiment safely without risking a production system, spin up a development VPS where you can try these commands freely, and even if you mess up, you can just reinstall your OS and start fresh.
Here are some practical exercises to solidify your understanding:
Exercise 1: Basic Ownership and Permission Changes
# Create test files
$ mkdir -p ~/practice/testdir
$ touch ~/practice/testfile.txt
$ touch ~/practice/script.sh

# Practice chown
$ sudo chown :users ~/practice/testfile.txt
$ ls -l ~/practice/testfile.txt
# Should show group changed to 'users'

# Practice chmod
$ chmod 755 ~/practice/script.sh
$ ls -l ~/practice/script.sh
# Should show -rwxr-xr-x

# Try symbolic notation
$ chmod u+x,g-w,o-r ~/practice/testfile.txt
$ ls -l ~/practice/testfile.txt
# Should show modified permissions
Exercise 2: Web Server Scenario
# Simulate web application setup
$ mkdir -p ~/webapp/{public,storage,logs}
$ touch ~/webapp/public/index.html
$ touch ~/webapp/storage/cache.db

# Set appropriate ownership (using your username instead of www-data)
$ sudo chown -R $USER:$USER ~/webapp

# Set appropriate permissions
$ chmod 755 ~/webapp/public
$ chmod 775 ~/webapp/storage
$ chmod 775 ~/webapp/logs
$ chmod 644 ~/webapp/public/index.html

# Verify your setup
$ ls -lR ~/webapp
Exercise 3: Multi-User Collaboration
# Create a shared project structure
$ sudo mkdir -p /tmp/team-project/{src,docs,bin}
$ sudo chown -R :users /tmp/team-project
$ sudo chmod -R 775 /tmp/team-project

# Set setgid so new files inherit group
$ sudo chmod g+s /tmp/team-project

# Test creating files as different users
$ touch /tmp/team-project/src/myfile.txt
$ ls -l /tmp/team-project/src/myfile.txt
# Should show group ownership of 'users'
Troubleshooting Common Permission Issues
When things go wrong with file permissions or ownership, these diagnostic steps help identify and fix the problem quickly.
Diagnosing Permission Problems
Start by examining the current state:
# Check ownership and permissions
$ ls -l problematic-file.txt
-rw-r--r-- 1 alice developers 2048 Dec 26 14:00 problematic-file.txt

# Check which user is trying to access it
$ whoami
bob

# Check if bob is in the developers group
$ groups bob
bob : bob developers

# Check if the process trying to access it runs as a different user
$ ps aux | grep process-name
www-data 1234 0.0 0.1 12345 6789 ? Ss 14:00 0:00 process-name
This reveals the mismatch: Bob is in the developers group and should have read access, but if a process runs as www-data, it only gets "other" permissions (the final r--).
Common Solutions
Web server can't read files: Usually an ownership issue, not permissions:
$ sudo chown -R www-data:www-data /var/www/html
Users can't write to shared directory: Need both group ownership and write permissions:
$ sudo chown -R :developers /shared/project
$ sudo chmod -R 775 /shared/project
$ sudo chmod g+s /shared/project  # setgid for new files
Application can't write to logs: Ownership and directory permissions both matter:
$ sudo chown -R appuser:appuser /var/log/myapp
$ sudo chmod 755 /var/log/myapp
$ sudo chmod 644 /var/log/myapp/*.log
SSH key rejected: Too permissive permissions on private key:
$ chmod 600 ~/.ssh/id_rsa
$ chmod 700 ~/.ssh
Conclusion: Mastering File Ownership and Permissions
Understanding the difference between chown and chmod is fundamental to effective Linux system administration. These commands work together to create a flexible, secure environment where the right users have the right access to the right files.
Remember the core principle: chown controls who owns files (identity), while chmod controls what can be done with them (capability). Most real-world scenarios require both commands working in concert, setting ownership first with chown, then defining permissions with chmod.
As you work with these commands more, the patterns become second nature. Web applications need files owned by the web server user with read permissions for everyone. Shared development directories need group ownership with setgid bits. SSH keys need restrictive 600 permissions owned by a single user. Collaborative projects need careful balance of user and group permissions.
The best way to truly master these concepts is through hands-on practice on your own SSD Nodes VPS environment, where you can experiment freely without risk. Whether you're deploying applications, managing development teams, or securing production systems, chown and chmod are tools you'll use daily (getting comfortable with them now pays dividends throughout your Linux administration career).
A note about tutorials: We encourage our users to try out tutorials, but they aren't fully supported by our team—we can't always provide support when things go wrong. Be sure to check which OS and version it was tested with before you proceed.
If you want a fully managed experience, with dedicated support for any application you might want to run, contact us for more information.