


Jitsi Meet is video conference web app that allows for on-the-fly video conferencing. In fact, you could go to their site to fire up a call right now for free. But the really cool part is that you can self-host Jisti on your VPS to give you more control over your data and infrastructure.
It's an interesting alternative to Zoom or Google Hangouts and it's easy to set up on most Linux servers. In this article, we'll show you how to install Jitsi Meet on Ubuntu 18.04.
Not running Ubuntu?
Click here to set up Jitsi Meet on CentOS with Docker
Click here to set up Jitsi Meet on Debian
Why is Jitsi better than Zoom?
First of all, we're not saying that it is!
But there have been questions about the quality of Zoom's privacy that are leading a lot of people to look for other options. Among other things, Jitsi doesn't require you to create an account or install browser plugins to work.
Plus Jitsi Meet comes with a pretty rich feature set completely free, things like:
- Screen sharing for presentations or document reviews
- Fun, customizable meeting URLs
- Invite as many users as your infrastructure will support
- Collaborative document editing (with Etherpad)
- Google and Microsoft Calendar integrations
- Integration with other collaboration software, like Slack
- Mobile apps for Android and Apple
Prerequisites to run Jitsi Meet
- Root or Sudo User (this article defaults to the root user)
- Fully-Qualified Domain Name (FQDN)
- Server hostname set to match the above FQDN
- IP Address for your server
- Universe package repository available
- Minimum 1-core, 1GB RAM VPS running Ubuntu 18.04
Installing Jitsi Meet
The first step in getting Jitsi Meet up and running will be adding the repo that contains the application packages for Jitsi Meet and its dependencies.
echo 'deb https://download.jitsi.org stable/' >> /etc/apt/sources.list.d/jitsi-stable.list
wget -qO -  https://download.jitsi.org/jitsi-key.gpg.key | sudo apt-key add -
As a precaution, let's make sure the apt package can read properly from repositories served via HTTPS
apt-get install apt-transport-https
Then we'll update our apt cache and install Jitsi Meet.
apt update
apt install -y jitsi-meet
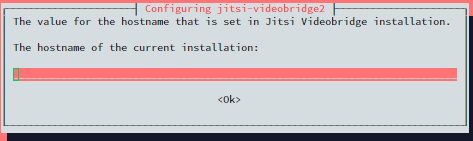
The install process will ask you to fill in some details about your Jitsi Meet instance.
First, enter the FQDN when it asks you for a hostname:
Next, select the default option when it asks about an SSL Certificate. It advises that you'll be able to use Let's Encrypt at a later point to install a proper SSL Certificate.

Once all that is done, you'll see a message advising you to actually switch to Let's Encrypt.
Let's do that now.
The following script prompts for an email address. This is to alert you when it is time to renew the certificate.
Note: this will install nginx and configure it for use with Jitsi.
/usr/share/jitsi-meet/scripts/install-letsencrypt-cert.sh
Assuming your FQDN is correctly setup to point to the IP Of your server, you now have a fully-secure, ready-to-run Jitsi Meet installation ready to use.
Navigate to your FQDN and create your first meeting!
A note about tutorials: We encourage our users to try out tutorials, but they aren't fully supported by our team—we can't always provide support when things go wrong. Be sure to check which OS and version it was tested with before you proceed.
If you want a fully managed experience, with dedicated support for any application you might want to run, contact us for more information.