

In this Discourse installation guide, we're going to walk you through the process of installing Discourse – our favorite forum software – on Ubuntu's latest releases.
Server Requirements
The minimum server requirements to install Discourse are:
- 10 GB of free disk space
- Single-core CPU
- 64 bit Linux compatible with Docker which you will need in order to install Discourse
- A Ubuntu server with a minimum of 1 GB RAM
We should add that even though 1 GB of RAM is the minimum technical requirement for the install, it is recommended that you host your forum on a server with at least 2 GB.
This is because the 1 GB minimum requirement needs a Swap file for Discourse to work on Ubuntu 20.04 and 18.04.
Fortunately, if you're looking to start growing your community – we, at SSD Nodes, offer extremely affordable VPS hosting perfect for Discourse.
The software requirements for installing Discourse are as follows:
To proceed further with the Discourse installation, you also need to:
- Install Docker
- Register a domain name or subdomain (such as "forum.example.com") with an A record that points to your server's IP address.
- An SMTP server for Discourse emails – you can check out this list of recommended email providers for Discourse.
Step 1 – Installing Discourse
Before you can actually download & install Discourse, you need to create the /var/discourse directory to house all Discourse-related files. This can be done using the following command:
sudo mkdir /var/discourse
And last but not least, you can now clone the official Discourse Docker image into the directory you've just created using the command below:
git clone https://github.com/discourse/discourse_docker.git /var/discourse
And that's it – you've successfully installed Discourse! 🎉
Now it's time to set up your new forum...
Step 2 – Setting Up Discourse
In order to properly set up Discourse, you now need to run the following command to navigate to the directory containing your Discourse installation's files:
cd /var/discourse
And now you can launch the included setup script using the following command:
./discourse-setup
During the Discourse setup, you'll be prompted to enter the following information:
- Hostname for your Discourse?
Here you will need to enter the hostname you've chosen for your Discourse forum – such as community.example.com. Replacing "community" with your preferred subdomain and "example.com" with your actual domain.
If you do not wish to host Discourse on a subdomain, you can also just enter the root domain ("example.com") in this case.
- Email address for admin account?
Here you insert the email address for your Discourse admin account. The email you choose to enter does not have to be related to the domain you use for discourse – you can use any address you see fit.
It is important to note that this email address will serve as the Discourse administrator email address by default right after a user registers with it. This email address will also be required later on when you’ll set up Discourse through the web control panel.
- SMTP Server Settings
- SMTP Server Address
- SMTP User Name
- SMTP Port
- SMTP Password
Here you will have to use the details of your SMTP server. We recommend using SendGrid as it works extremely well with Discourse & allows you to send up to 100 emails per day for free, forever.
Once you complete this process, a Discourse environment configuration file named app.yml will be automatically generated.
If you ever need to change or edit these settings after the initial setup, you can run the following command
sudo nano /var/discourse/containers/app.yml
The bootstrap process itself takes only a few minutes. After it’s done, your server will be prepared for launching the Discourse software. You can do it by running the following commands:
sudo ./launcher bootstrap app
sudo ./launcher start app
Step 3 – Registering Your Admin Account
Now that you've completed the Discourse installation and initial setup process, you can access your forum using your browser.
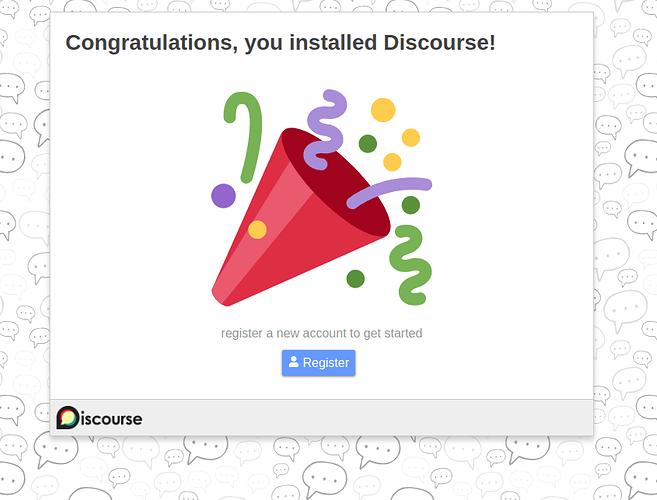
When you do, you'll see the following welcome message.
If you are met with a “502 Bad Gateway” error, this most likely means that Discourse hasn't finished bootstrapping. Simply refresh the page after a couple of minutes to solve this error.
Next, you'll need to click "Register" to create a new admin account using the email address you entered earlier.
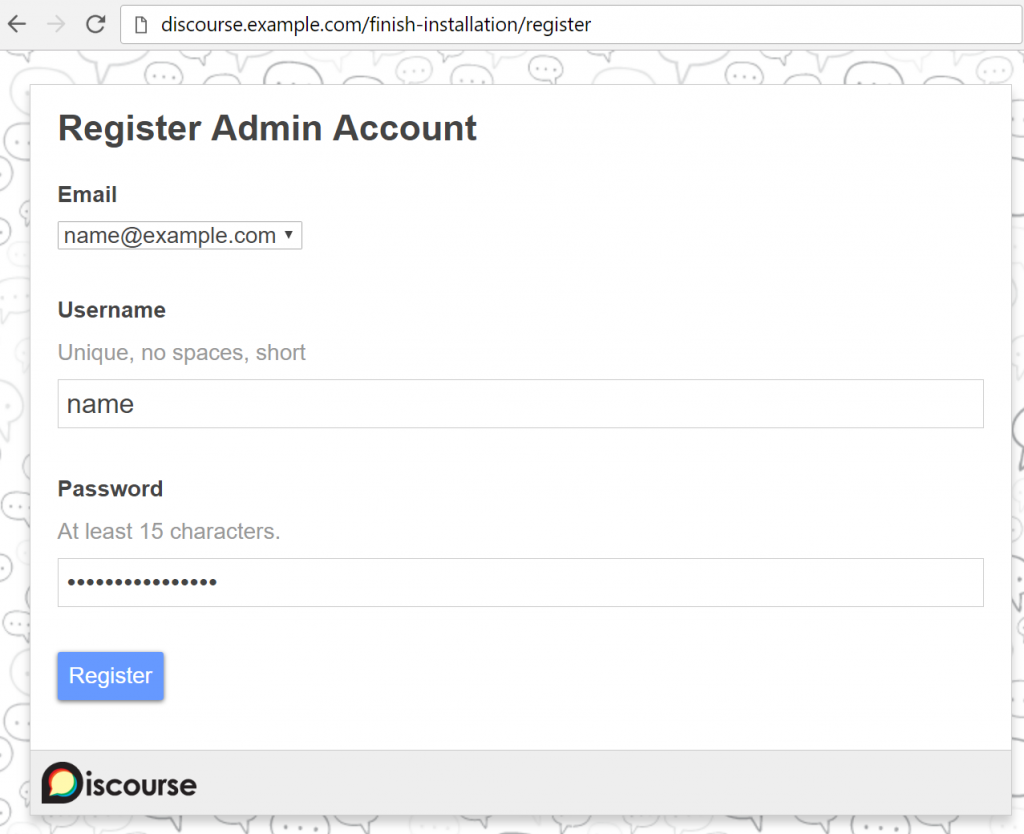
Using the above form, you'll need to enter the following information to register your Discours admin account:
- Email: This is an expanding menu that will allow you to pick your previously registered email address.
- Username: This box lets you fill in a unique short username with no spaces.
- Password: This box lets you determine a password of at least 15 characters.
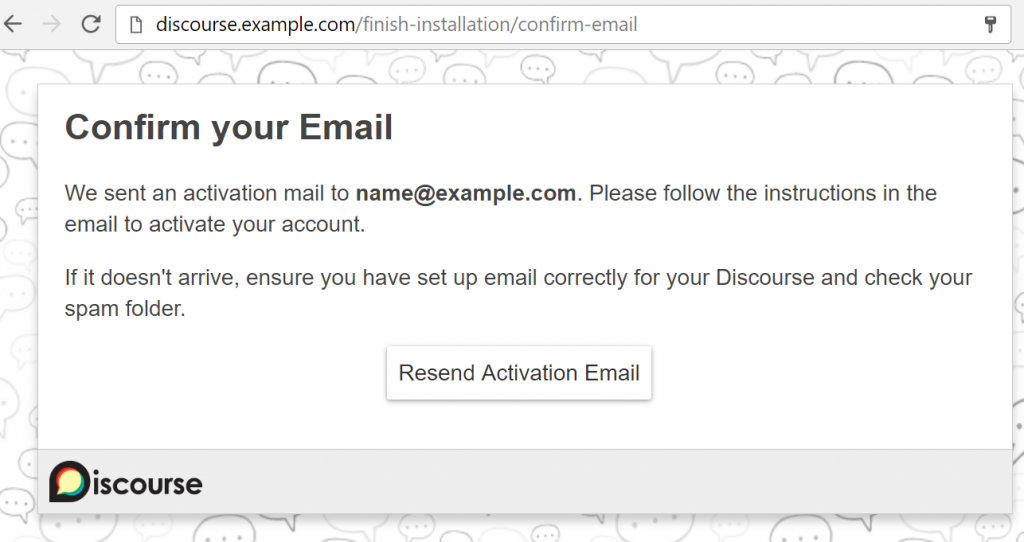
After completing the registration form, you'll be asked to confirm the email address. To do so, simply check your inbox for a confirmation email that will wrap up the admin registration process.
In the unlikely event that you run into any issues or are unable to receive an email to confirm your admin account, refer to this Discourse email troubleshooting guide.
Once you've finished registering your admin account, you'll be taken to the next step of the setup wizard which will allow you to configure some additional basic settings such as your preferred default language.
If you wish to skip this, for now, you can click Maybe Later.

Once you either complete or skip the setup wizard, you will be redirected to your brand new Discourse forum where you'll see the Discourse Admin Quick Start Guide. This guide contains additional information about what to do next and how you can further customize your Discourse installation.
Upgrading Discourse
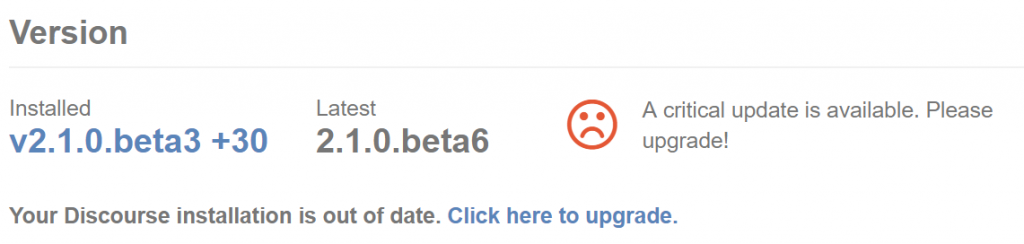
You've now successfully installed and configured your Discourse forum! When it's time to upgrade Discourse, it's good to know that the process has been simplified and no longer requires using the git pull command thanks to easy one-click upgrades.
You can now simply head to your Discourse admin area where you'll be notified when it's time to upgrade and can easily do so by clicking Click here to upgrade.
You can however still alternatively, use the manual git pull command by running the three commands:
cd /var/discourse
git pull
./launcher rebuild app
Conclusion – Time To Invite People To Your New Forum
Now that you've successfully completed the Discourse installation process, it's time for the hard part – growing your community.
If you're starting your first community or looking to migrate to faster & more affordable hosting – we make it really easy to get started with Discourse, so feel free to have a look at our available plans.
A note about tutorials: We encourage our users to try out tutorials, but they aren't fully supported by our team—we can't always provide support when things go wrong. Be sure to check which OS and version it was tested with before you proceed.
If you want a fully managed experience, with dedicated support for any application you might want to run, contact us for more information.