
Mailcow is a user-friendly mail system for sending, receiving and managing email. In this tutorial you'll install mailcow using Docker on your VPS server.
Mailcow's only officially-supported install method uses the consistency and ease of Docker and dockerized services, so this can be done quickly if you already have a functional Docker setup in place. That said, here are some prerequisites for Mailcow, as well as the steps to follow to get Mailcow up and running.

Prerequisites
- Docker and docker-compose installed and configured, as well as docker-compose
- A-Name record for email server address
- FQDN chosen and configured (can use the same address as above)
- MX Record for primary domain
- SSL Certificate for mail server
- Required ports open
- At least 3GB of RAM available on your VPS
Installing Mailcow using Docker and Docker Compose
Assuming Docker is all setup and ready to go, the installation process is fairly straightforward. Docker makes things a lot simpler, as packages and dependencies are self-managed within each docker image or package. All you need is to clone the mailcow: dockerized repository, configure it, then launch it.
Step 1: Check Umask Settings
First, we’ll need to ensure that the unmask settings for the operating system are correct. Typically, this is already the case, but it never hurts to check.
umask
0022
You’ll want to run the umask command, and if it isn’t 0022, modify your systems umask settings to match that.
Step 2: Clone the mailcow: dockerized Repository
Next, we’ll switch to the /opt folder and create our working directory. Git must be installed for this part, although most Linux-based operating systems have it available in their default repository, if not installed already.
cd /opt
git clone https://github.com/mailcow/mailcow-dockerized
cd mailcow-dockerized
Now, we will generate the configuration file that Mailcow will use. Luckily, there’s a simple-to-use script that allows us to just enter a few pieces of information to get this going.
./generate_config.sh
At this point, the script will ask for your FQDN. Keep in mind, this is different than your mail domain. For instance, if you plan on using emails that use the domain example.com, you might use the FQDN of mail.example.com. It will also ask you for your Time Zone. It’s perfectly fine to use the default (hit enter), or you can choose your local timezone as explicitly listed as the TZ database name here. I chose the America/Los_Angeles time zone as I am in the Pacific Standard time zone.
If you are using a reverse proxy, you’ll need to further modify the configuration file as necessary to accommodate for the default 80 and 443 ports to be already spoken for by your web server. Otherwise, the default configuration file that is generated is fine for a standalone server.
Step 3: Launch the Mailcow Docker Compose
Now, we’ve completed our setup. We just need to actually pull and launch the docker images that will run our Mailcow instance. While still in the /opt/mailcow-dockerized folder, we’ll run the docker-compose commands.
docker-compose pull
docker-compose up -d
The -d flag causes the Mailcow docker installation to run detached from the primary window, allowing it to continue running after the current session ends. Be patient, as this step can take some time. It’s pulling in and configuring all the different parts of the docker configuration that helps us run our Mailcow install.
If you navigate to your domain name:
https://mail.example.com
You'll likely see a page informing you that the database is being initialized:
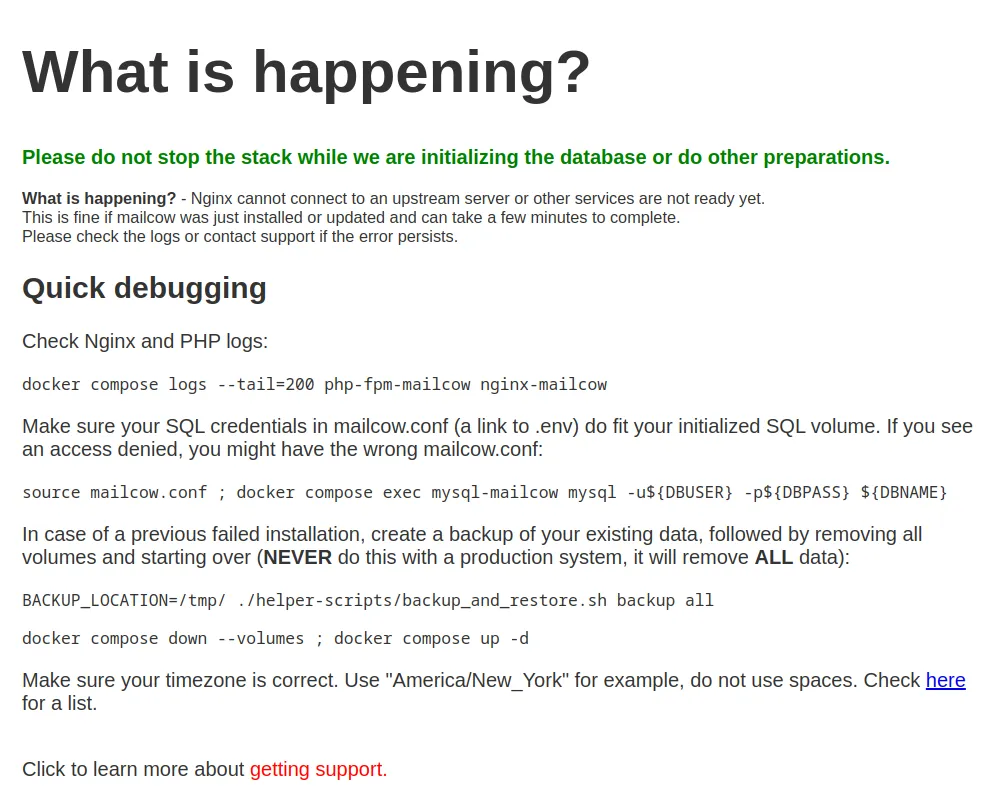
This will take a few minutes.
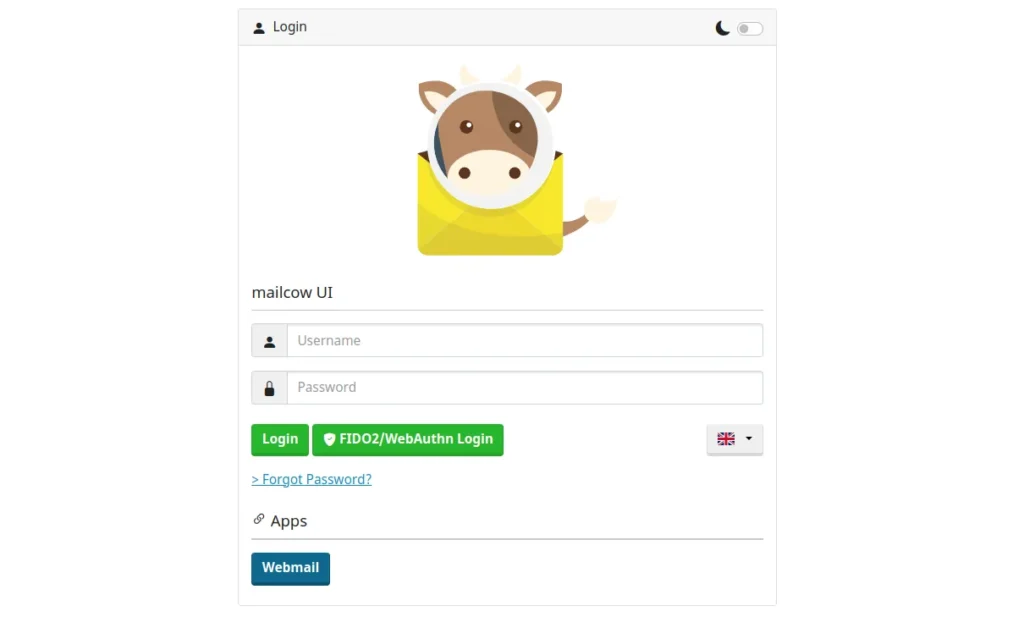
After the database is fully initialized, refresh the page, and the Mailcow user interface will appear:
Mailcow Setup
We'll now complete the mailcow setup, and create an email address.
Log into your new mailcow install by navigating to the secure url for your FQDN. Using our previous example, if your FQDN is mail.example.com, you’d want to point your browser to https://mail.example.com. The default username and password for your new Mailcow install is admin and moohoo, respectively.
Adding a Domain to Mailcow
First, we’ll need to add our domain. So after logging in, navigate to the E-Mail tab and click Configuration.
Next, we’ll click the Add domain button to add a domain.
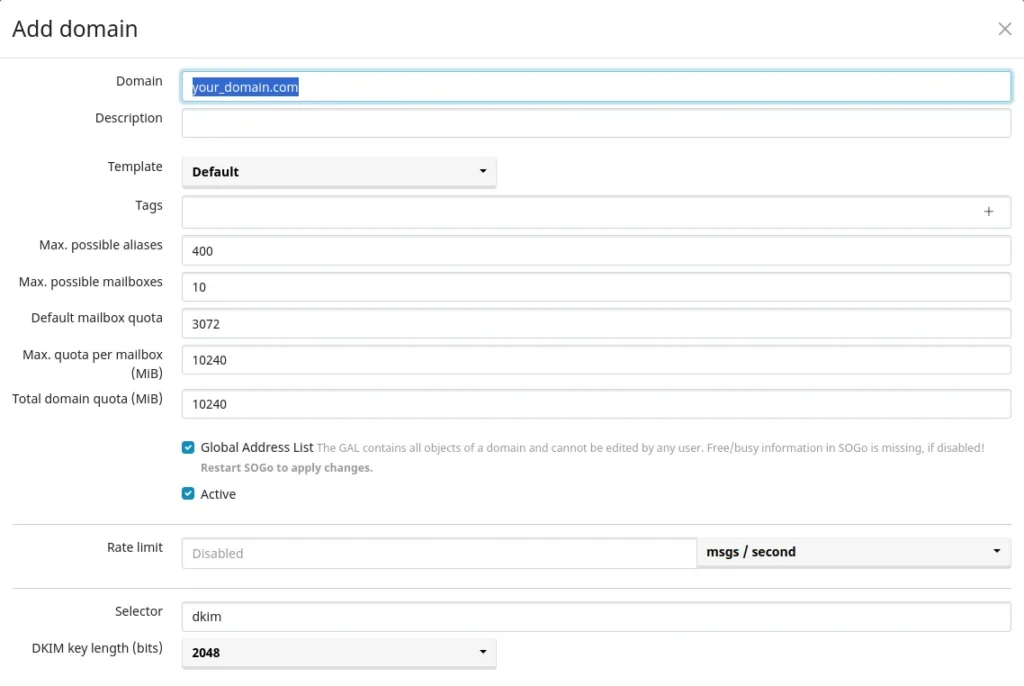
Fill out the domain name. That is, the root domain that we want to use for our email addresses. The defaults are fine, unless you specifically know something you need to change for your needs. To finish, click the Add domain and restart SOGo button. This adds the domain and restarts the service that manages it at the same time.
Adding a Mailbox to Mailcow
Next, you'll need to create a mail box. Click over the Mailboxes tab then click the Mailboxes button.
Click Add mailbox, you'll be presented with a form similar to the following:
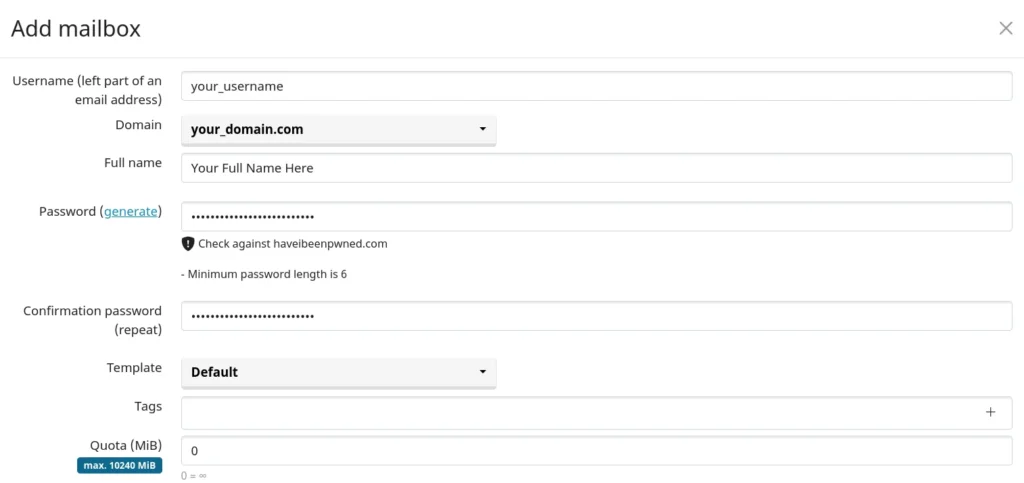
Enter a username, select the domain (if you’ve added more than one), then type in the full name for the user.
For the quota, leave it as 0 for no size limit, and then create or generate a password.
Finally, click Add.
And that’s it! You’ve setup mailcow, created an email address, and now are ready to use your email address to send and receive emails. Log out of the Admin user and navigate to https://your.mailhost.domain/SOGo and log in with the email address and password you created.
Alternatively, you can log into any standard email client using POP3 or IMAP4 protocols as you normally would.
Conclusion
You've installed Mailcow with Docker and Docker Compose using the mailcow: dockerized repository, and you now have a fully functional emailing system on your VPS. You can send, receive and manage your email with full control over your data. For more information on Mailcow, check out the official documentation.
FAQ: Questions on Mailcow
Does Mailcow support SSL encryption?
Yes, Mailcow supports SSL encryption. It can automatically generate SSL certificates using Let's Encrypt or you can manually configure your own SSL certificates for securing email traffic.
How do I back up Mailcow?
Mailcow provides built-in backup functionality. You can use the backup_and_restore.sh script found in the Mailcow tools directory. This script allows you to back up the Mailcow Docker volumes, which include email data, user settings, and configurations.
Is Mailcow suitable for business use?
Yes, Mailcow is well-suited for business use. It offers features like user and domain management, email filtering, and security options such as DKIM, SPF, and DMARC. However, businesses may need technical expertise for setup and ongoing management.
How do I manage users in Mailcow?
User management in Mailcow is done through the web admin interface. You can create, delete, and modify users, assign email addresses to domains, and set quotas for mailbox storage. The interface makes it easy to manage users even with multiple domains.
A note about tutorials: We encourage our users to try out tutorials, but they aren't fully supported by our team—we can't always provide support when things go wrong. Be sure to check which OS and version it was tested with before you proceed.
If you want a fully managed experience, with dedicated support for any application you might want to run, contact us for more information.