

Security is, and should be, your number one priority. One compromised server can lead to devastating data breaches, financial losses, and irreversible damage to your reputation.
Want to secure your Linux server but don't know where to start? Learning how to install Lynis on Linux and perform security audits is your first step toward bulletproof security.
Whether you want to download Lynis in Ubuntu, Debian, or Rocky Linux & AlmaLinux, this guide covers everything from installation (via GitHub or package managers) to implementing Lynis suggestions. In just a few minutes, you’ll learn how to harden your server's security and safeguard your peace of mind.

What is Lynis?
Lynis is a specialized security auditing tool designed to analyze Linux and Unix-based systems. It systematically examines system configurations, services, and security controls while identifying potential vulnerabilities and misconfigurations. The tool provides detailed recommendations for hardening your system, compliance checking against security frameworks, and generates comprehensive reports that help prioritize security improvements and track progress over time.
Prerequisites - Before You Install Lynis for Linux Security Audits
Lynis is available on all our OS options—Ubuntu, Debian, and others—and the installation/usage instructions are the same for every platform, so this tutorial is OS agnostic. To follow these instructions, you’ll need:
- A VPS running any of our available OS options. If you haven't noticed, we offer the best priced, most reliable Linux servers in the world. Take a look at our deals and prepare for your mind to be blown 🤯.
- A non-root user account (commands requiring escalated privileges will use
sudo).
Check out Connecting to Your VPS with SSH and Improving SSH Safety to learn how to connect to your server.
How to Install Lynis on Linux to Perform Security Audits
You can install Lynis with two methods: either through your distribution's official package repositories using standard package managers (apt/dnf), or by cloning the official GitHub repository to get the latest version with newest security checks and features.
Option 1: Installing The Official Distribution Package
To install Lynis and use it to perform security audits for your distribution, you can just use the package manager for your distribution.
To download and install Lynis in Ubuntu and Debian:
$ sudo apt install lynis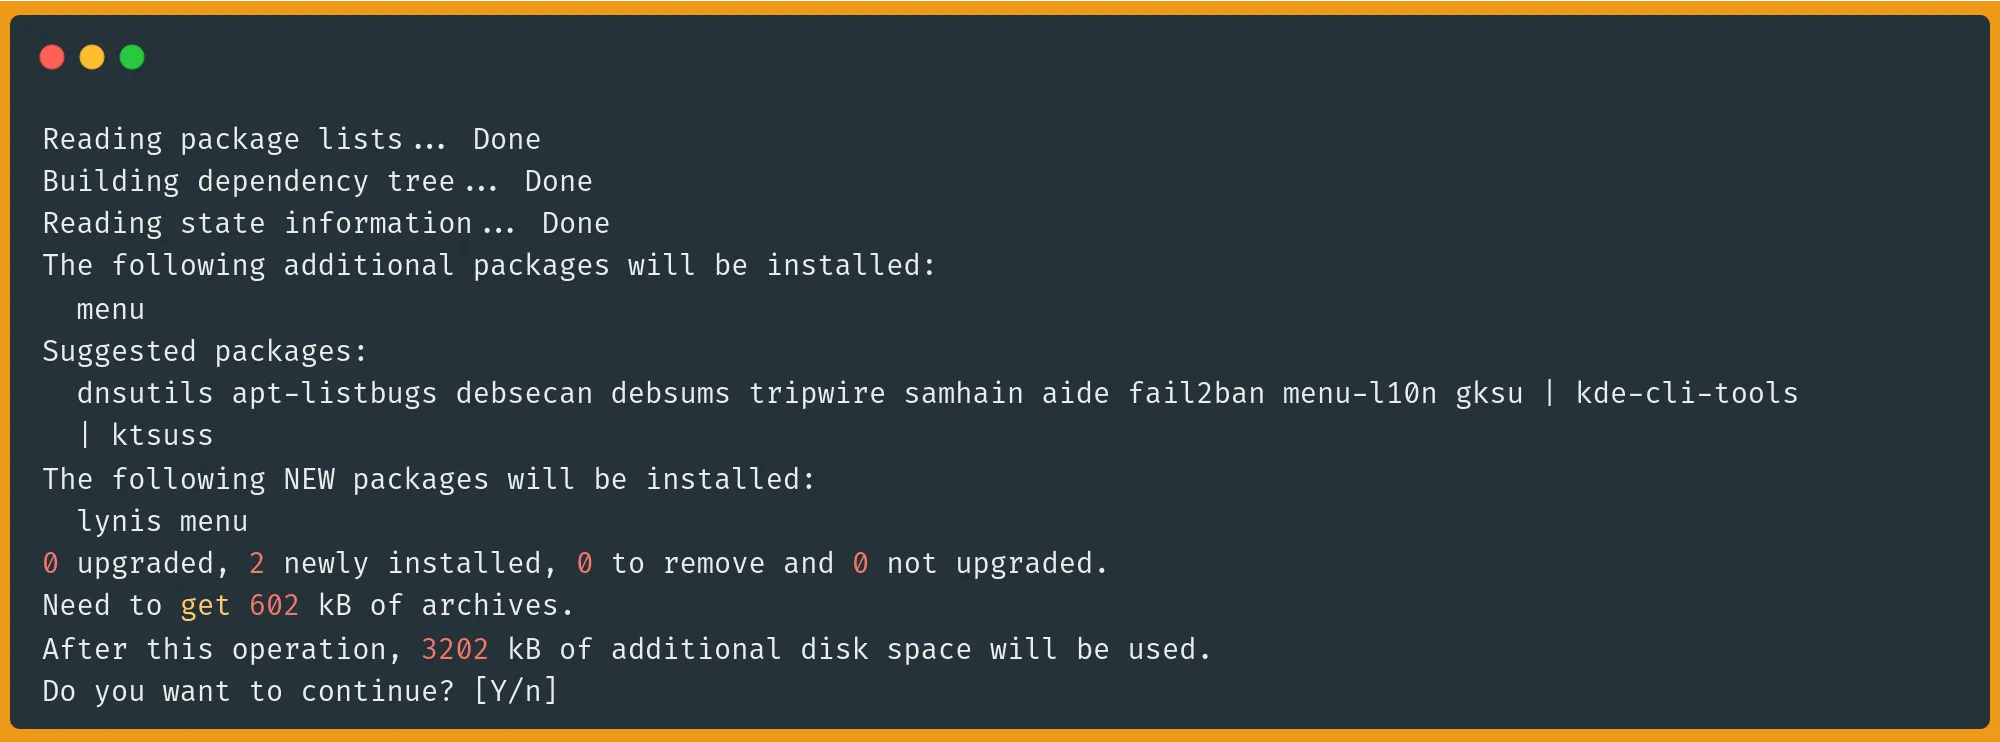
To download and install Lynis on Rocky Linux/AlmaLinux/CentOS/RHEL:
$ sudo dnf install epel-release -y
$ sudo dnf install lynis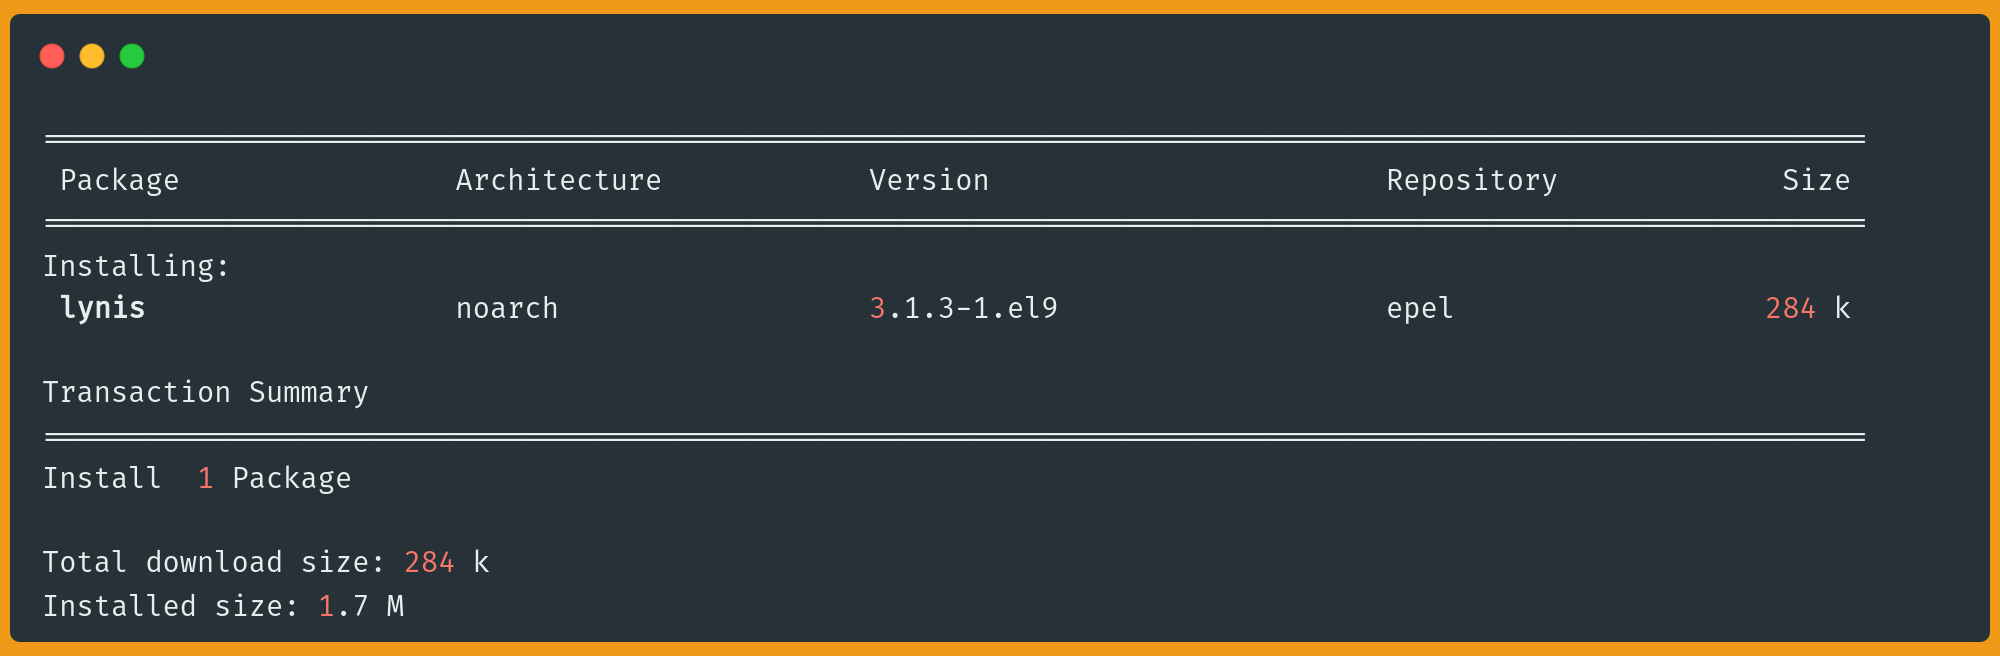
To verify the installation, check the Lynis version:
$ sudo lynis --versionOutput:
3.0.9You can now use the stable Lynis version currently available for your distribution. However, if you want to run the latest version. You can go with the second option and install Lynis using Git via the official Github repository.
Option 2: Installing Lynis Via GitHub For The Latest Version
Note: If you’ve already installed Lynis through your package manager with the first option above, make sure to uninstall it before proceeding to mitigate package conflicts.
If you want to use the latest Lynis version directly from the source, the process is as simple as cloning the GitHub repository to your VPS. If you're running a brand new VPS, you might not have Git installed yet:
$ sudo apt install git   # Ubuntu/Debian
$ sudo dnf install git       # Rocky Linux/AlmaLinux/CentOS/RHEL
Let's clone the Lynis repository next:
$ git clone https://github.com/CISOfy/lynisIt's recommended to run the script as the root user, so we'll use chown to change the ownership of the script. If you run the command with sudo or su without changing ownership first, you'll receive a security warning, which you can ignore by hitting Enter or cancel with Ctrl+C. And, if you try running the command using your normal users, you'll get a warning that results will be incomplete due to some processing requiring higher privileges.
$ sudo chown -R 0:0 lynis
$ cd lynis
Verify your installation by checking the Lynis version:
$ sudo ./lynis --versionYou’ll likely notice that the version of Lynis you’ve installed via Github is newer than the one available in your distribution's package manager:
3.1.4Command to See Documentation and Instructions for Lynis
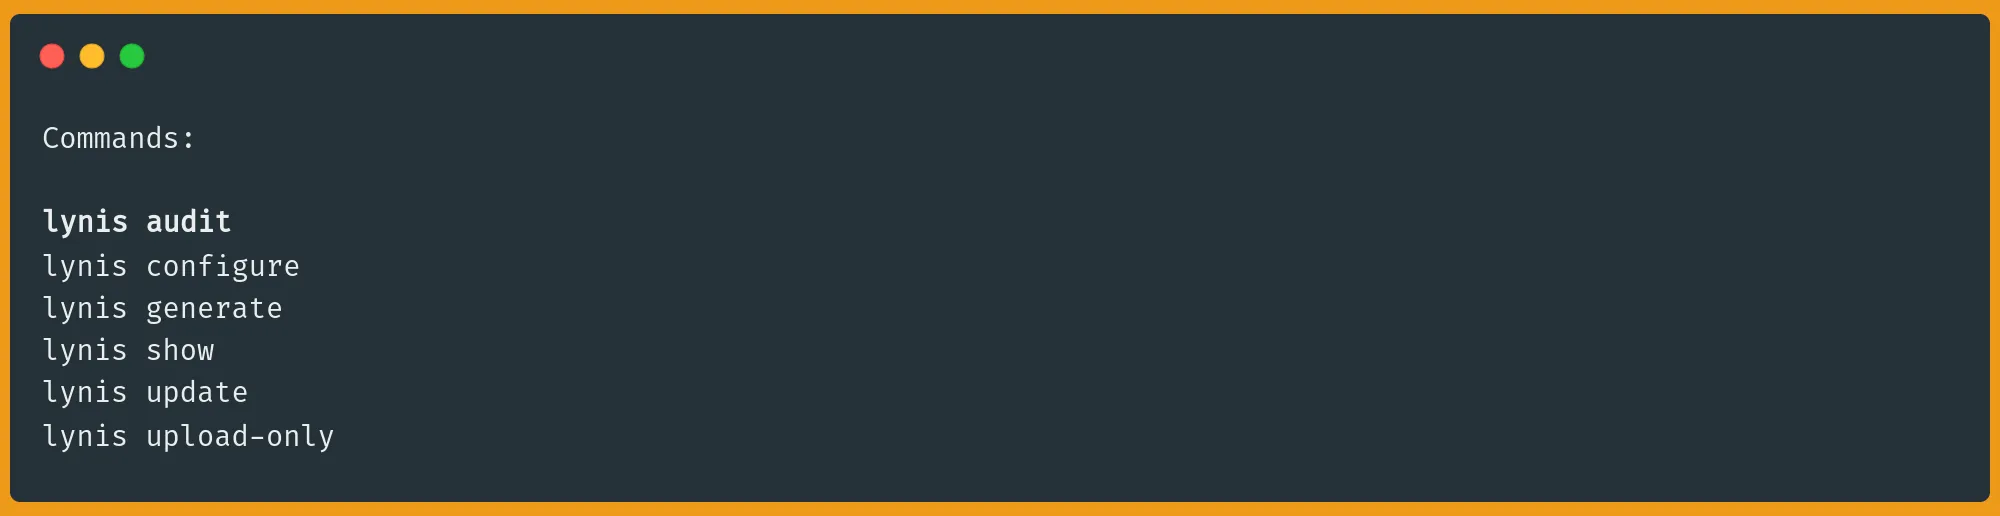
To see all available Lynis commands and their documentation, use:
# For package manager installations
sudo lynis show commands

# For GitHub installations (from lynis directory)
sudo ./lynis show commands
For detailed help on any specific command, use:
sudo lynis show help [command]
You can also view categories of commands like so:
# Show all options for auditing
sudo lynis show options

# Show all available tests
sudo lynis show tests

# View available debugging commands
sudo lynis show debug
This will display all available commands and their descriptions, helping you understand the full capabilities of Lynis as a security auditing tool.
Using Lynis on Linux to Perform Security Audits
Now that you have Lynis installed, using it to perform security audits for your Linux system is pretty straightforward.
Let's take a look at a list of options for what you can do with Lynis:
$ sudo lynis show commandsOr if you are using the version fetched from GitHub, make sure you’re inside the lynis directory, and run:
$ sudo ./lynis show commandsThe lynis show command gives you a lot of options you can run to perform specific tasks:
We are mainly interested in the lynis audit command to perform security audits on our Linux server. Which we’ll explore in the next section.
Using The lynis audit system Command
If you used your distribution’s package manager, then using Lynis to perform security audits can be done by running the following command:
$ sudo lynis audit systemAlternatively, if you cloned the Lynis Git repository, you can simply execute the built-in script like so (again, make sure you’re inside the lynis directory):
$ sudo ./lynis audit systemNote: The Lynis audit and scan will take some time.
Understanding Lynis Results
When Lynis completes its security audit, it will output warnings, suggestions, and some at-a-glance details of your security scan, such as a "hardening index" that you can use to score your efforts:
Lynis gives you different types of information:
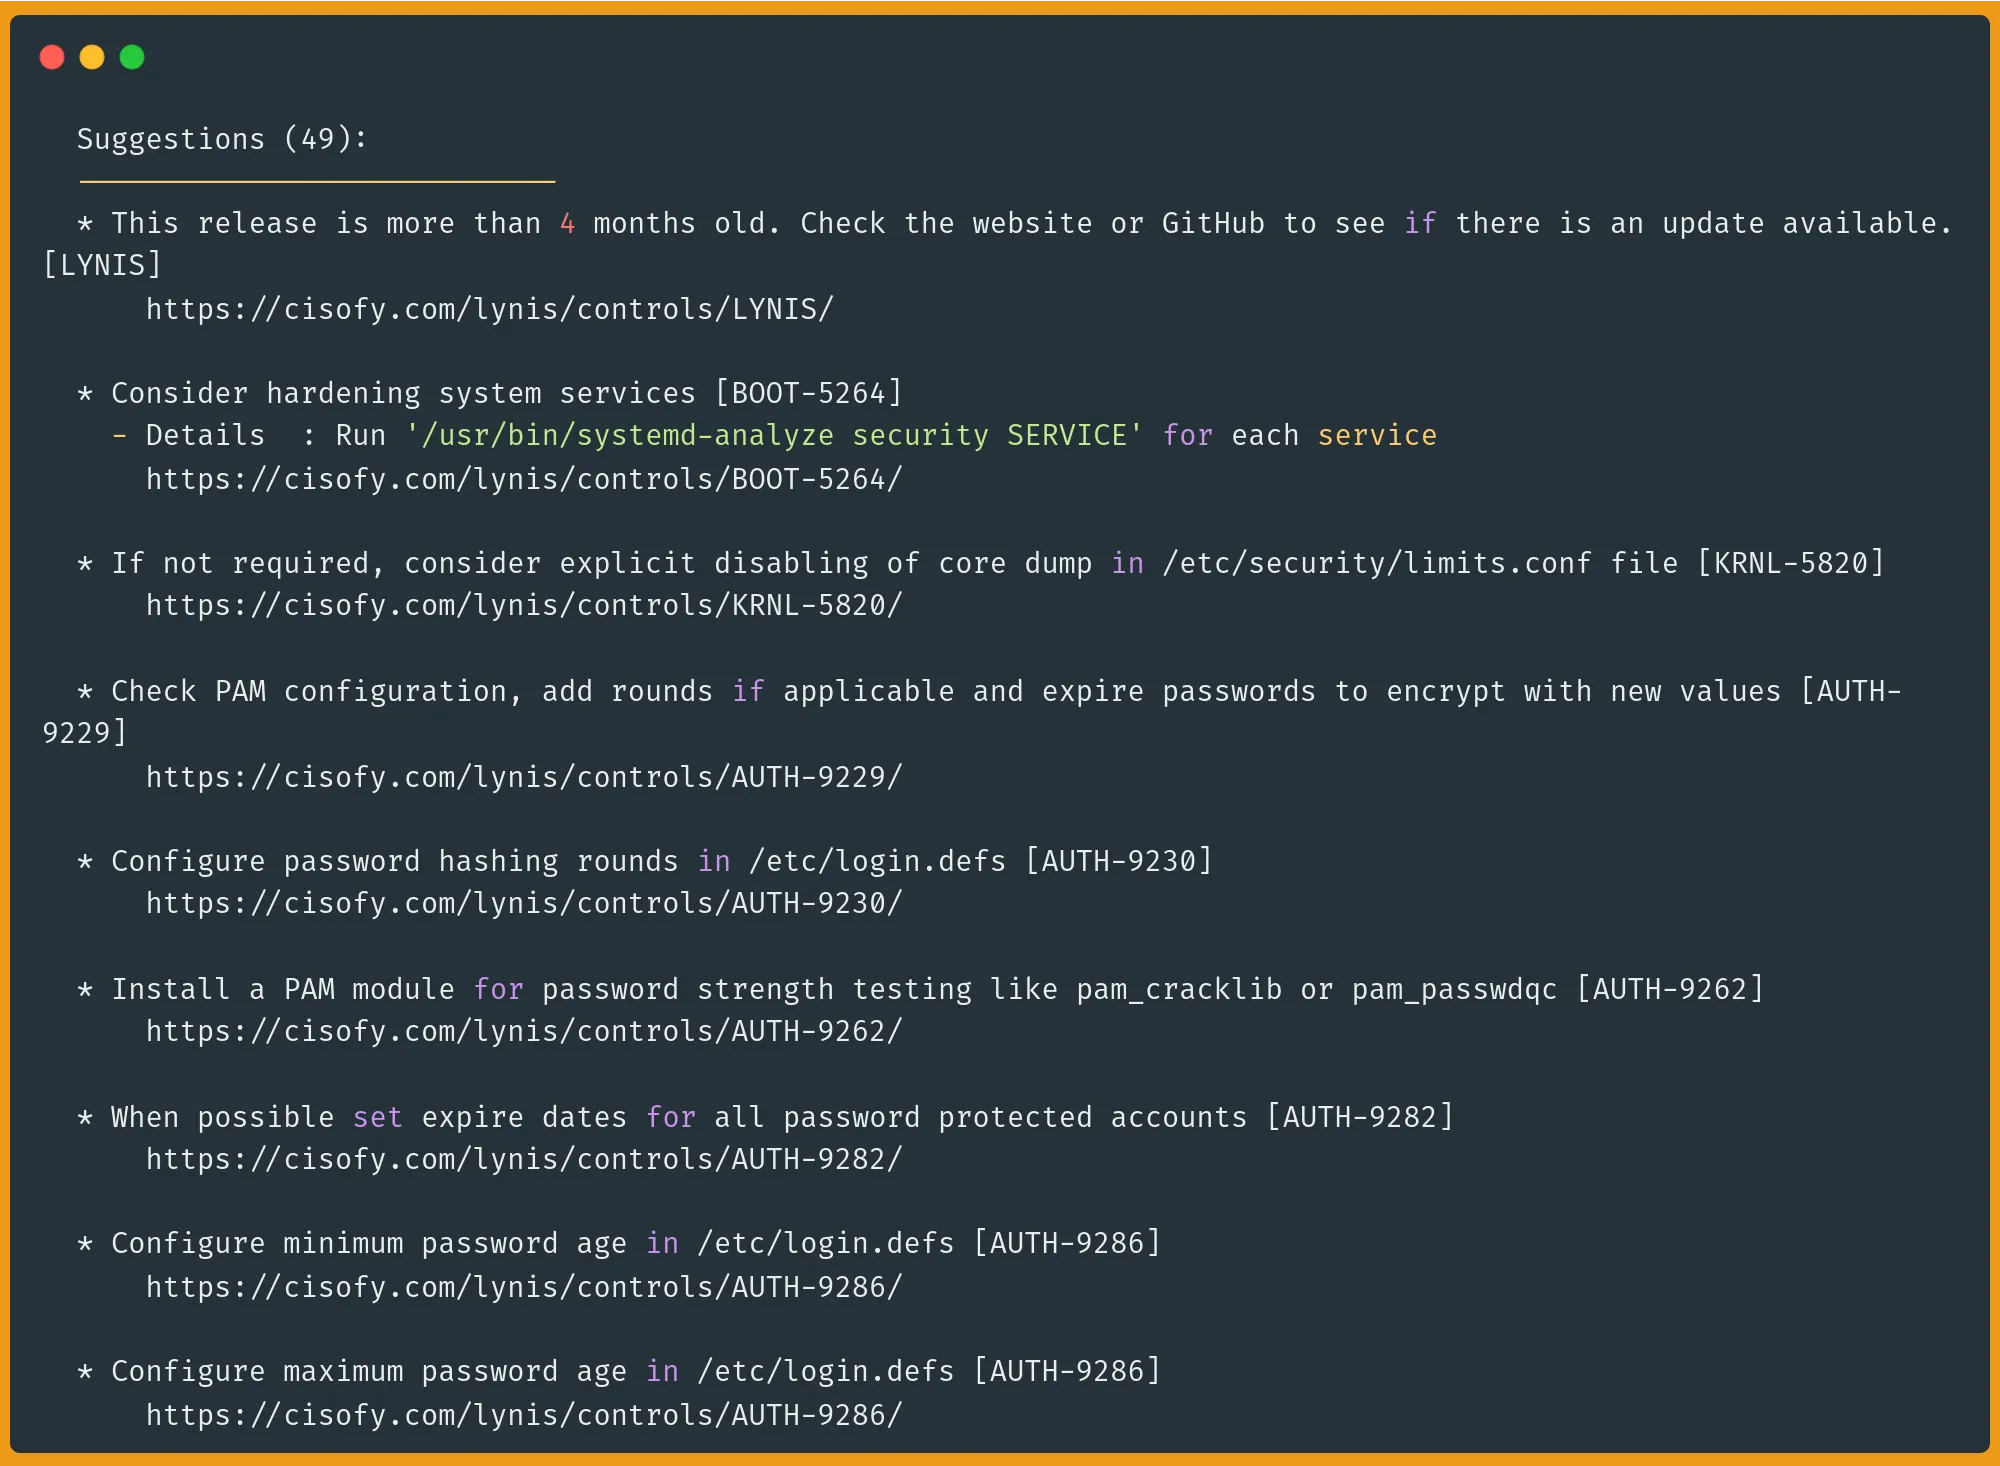
- WARNINGS: Critical issues requiring immediate attention, like vulnerable packages, inactive firewall rules, and time synchronization problems.
- SUGGESTIONS: Recommended improvements that would enhance security but aren't critical, such as installing security packages (fail2ban, pam_cracklib), hardening SSH configuration, and implementing file integrity monitoring.
- Informational: General findings and status checks for various system components like installed packages, running services, and configuration states.
Each suggestion and warning comes with:
- A unique ID (e.g., [PKGS-7392])
- A brief description of the issue
- A link to detailed documentation
For a fresh Ubuntu 24.04 install the overall audit concludes the following:
  Lynis security scan details:

  Hardening index : 61 [############        ]
  Tests performed : 255
  Plugins enabled : 1

  Components:
  - Firewall               [V]
  - Malware scanner        [X]

  Scan mode:
  Normal [V]  Forensics [ ]  Integration [ ]  Pentest [ ]

  Lynis modules:
  - Compliance status      [?]
  - Security audit         [V]
  - Vulnerability scan     [V]

  Files:
  - Test and debug information      : /var/log/lynis.log
  - Report data                     : /var/log/lynis-report.dat
A hardening index of 61 is respectable, but with a wide margin for improvement. Fortunately, Lynis also outputs any warnings and suggestions that you can use to inform yourself about improvements that could make your server more hardened to potential attack.
Note: Some entries can't be fixed on a VPS, such as placing /var on a separate partition. However remember that these are just suggestions.
You can also examine the full log of your scan at /var/log/lynis.log, and a data report at /var/log/lynis-report.dat.
Lynis looks at pretty much everything security-related:
- How strong your system's armor is (system hardening)
- What services are running and how they're configured
- How well your network is protected
- Whether your users and passwords are set up securely
- If your files and folders have the right permissions
For example, here's the SSH section for a fresh Ubuntu 24.04 server:
[+] SSH Support
------------------------------------
  - Checking running SSH daemon                               [ FOUND ]
    - Searching SSH configuration                             [ FOUND ]
    - OpenSSH option: AllowTcpForwarding                      [ SUGGESTION ]
    - OpenSSH option: ClientAliveCountMax                     [ SUGGESTION ]
    - OpenSSH option: ClientAliveInterval                     [ OK ]
    - OpenSSH option: FingerprintHash                         [ OK ]
    - OpenSSH option: GatewayPorts                            [ OK ]
    - OpenSSH option: IgnoreRhosts                            [ OK ]
    - OpenSSH option: LoginGraceTime                          [ OK ]
    - OpenSSH option: LogLevel                                [ SUGGESTION ]
    - OpenSSH option: MaxAuthTries                            [ SUGGESTION ]
    - OpenSSH option: MaxSessions                             [ SUGGESTION ]
    - OpenSSH option: PermitRootLogin                         [ SUGGESTION ]
    - OpenSSH option: PermitUserEnvironment                   [ OK ]
    - OpenSSH option: PermitTunnel                            [ OK ]
    - OpenSSH option: Port                                    [ SUGGESTION ]
    - OpenSSH option: PrintLastLog                            [ OK ]
    - OpenSSH option: StrictModes                             [ OK ]
    - OpenSSH option: TCPKeepAlive                            [ SUGGESTION ]
    - OpenSSH option: UseDNS                                  [ OK ]
    - OpenSSH option: X11Forwarding                           [ SUGGESTION ]
    - OpenSSH option: AllowAgentForwarding                    [ SUGGESTION ]
    - OpenSSH option: AllowUsers                              [ NOT FOUND ]
    - OpenSSH option: AllowGroups                             [ NOT FOUND ]
With the full information of scan results in hand, let's walk through some examples of how to implement Lynis suggestions and strengthen our system's security.
How to Implement Lynis Suggestions
After you get your scan results, it’s time to implement Lynis suggestions. If you fix Lynis warnings and implement the suggestions, you’ll make your Linux server more secure. Every warning and suggestion comes with a link to documentation that will help you understand the issue and example fixes, so be sure to take advantage of those resources.
Because all of us use ssh to connect to our VPS servers, let's walk through some basic fixes that will help reduce the number of warnings we get.
Note: Your default sshd configuration might look slightly different depending on your OS, and any tweaks you might have already made.
Let’s take the following OpenSSH suggestions from our audit as an example:
OpenSSH option: PermitRootLogin                         [ SUGGESTION ]
OpenSSH option: MaxAuthTries                            [ SUGGESTION ]
OpenSSH option: MaxSessions                             [ SUGGESTION ]
OpenSSH option: LogLevel                                [ SUGGESTION ]
OpenSSH option: AllowTcpForwarding                      [ SUGGESTION ]
OpenSSH option: X11Forwarding                           [ SUGGESTION ]
OpenSSH option: AllowAgentForwarding                    [ SUGGESTION ]
I’ll walk you through each SSH suggestion and what action you need to take to implement it securely:
OpenSSH option: PermitRootLogin [ SUGGESTION ]The root account has unlimited system access, making it a target for attackers. By default, many systems allow root to log in via SSH, which is risky. That’s why you should:
- Create a regular user account with sudo privileges for administration
- Disable root login by editing
/etc/ssh/sshd_config:
PermitRootLogin noNext, let’s take a look at MaxAuthTries and MaxSessions:
OpenSSH option: MaxAuthTries                            [ SUGGESTION ]
OpenSSH option: MaxSessions                             [ SUGGESTION ]
These settings help prevent brute force attacks and resource abuse. MaxAuthTries limits how many times someone can attempt to log in before being disconnected, while MaxSessions controls how many simultaneous connections a user can have. Edit the following sections in /etc/ssh/sshd_config:
MaxAuthTries 4       # Default is 6, which allows too many attempts
MaxSessions 2        # Default is 10, which is usually unnecessary
Next, let’s handle the log level:
OpenSSH option: LogLevel [ SUGGESTION ]Increasing the log level helps you detect potential security issues by providing more detailed information about SSH connections and authentication attempts. Modify /etc/ssh/sshd_config and set the logging level to VERBOSE :
LogLevel VERBOSEThe default level is INFO, which misses some useful security details.
Next, let’s handle forwarding:
OpenSSH option: AllowTcpForwarding                      [ SUGGESTION ]
OpenSSH option: X11Forwarding                           [ SUGGESTION ]
OpenSSH option: AllowAgentForwarding                    [ SUGGESTION ]
These features enable various types of forwarding through SSH connections. Unless specifically needed, they should be disabled as they can be used to bypass firewalls or expose services unintentionally. Modify the following in your /etc/ssh/sshd_config:
AllowTcpForwarding no
X11Forwarding no
AllowAgentForwarding no
After making any changes, first, test your configuration for syntax errors:
sudo sshd -tNext, restart SSH to apply changes:
sudo systemctl restart ssh

# OR

sudo systemctl restart sshd
Safety Tip: When making SSH changes, always:
- Keep your current SSH session open
- Open a new terminal and test connecting with the new settings
- Only close your original session after confirming the new configuration works
- Have a backup plan for access (like console access) in case of issues
Remember that while these are security best practices, you should evaluate each setting based on your specific needs. Check out our SSH guide for more information.
With the suggestions implemented, run the Lynis audit again:
sudo lynis audit systemOutput:
  Lynis security scan details:

  Hardening index : 67 [#############       ]
  Tests performed : 255
  Plugins enabled : 1
After editing just a few lines in the ssh configuration, my hardening index score has jumped from 61 to 67. Not bad for just a few minutes of work!
Now, most of these warnings and suggestions are beyond the scope of this tutorial, but the basic idea is to tackle them one or two at at time, re-run Lynis, and keep working to make your server as secure as possible.
Conclusion
If you've been wondering how to install Lynis on Linux and perform security audits, you'll find that the process is straightforward and powerful for maintaining any Linux server. Lynis makes security auditing simple and accessible whether you're running Ubuntu, Debian, AlmaLinux, Rocky Linux, or any other distribution.
Whether you choose to download Lynis in Ubuntu through apt or run Lynis on AlmaLinux from GitHub, the audit process remains consistent and thorough. Start by addressing the most critical warnings, implement Lynis suggestions systematically, and regularly re-run audits to track your progress. While we focused on SSH hardening in this guide, you'll discover many other areas where you can improve your server's security.
FAQ
What is a good Lynis score?
A Lynis hardening index score above 75 is considered good, while scores above 90 are excellent. However, the raw score isn't everything. Focus on addressing critical warnings first. A server with a score of 70 and no critical warnings might be more secure than one with 85 but several unaddressed vulnerabilities. Aim to improve your score gradually while prioritizing the most important security issues.
How to update Lynis?
If you installed Lynis through your package manager (apt/dnf), simply run sudo apt update && sudo apt upgrade or sudo dnf upgrade to get the latest version. For GitHub installations, navigate to your Lynis directory and run git pull to fetch the latest updates. Remember to check the changelog for any breaking changes before updating.
How to uninstall Lynis?
For package manager installations, use sudo apt remove lynis (Ubuntu/Debian) or sudo dnf remove lynis (Rocky Linux/AlmaLinux). If you installed via GitHub, simply delete the Lynis directory with sudo rm -rf /path/to/lynis. Don't forget to remove any configuration files in /etc/lynis if you want a complete uninstallation.