
In this tutorial, we'll look at how to install Nextcloud using Docker and Docker Compose.
Specifically, we'll be installing Nexcloud along with an Nginx reverse proxy and Let’s Encrypt SSL in a CentOS, Ubuntu, or Debian dockerized environment.
Why Install Nextcloud With Docker and Docker Compose?
Nextcloud is an open source software suite for storing and synchronizing data, sort of like a free alternative to Dropbox or Google Drive.
Plus, with Nextcloud, you get an open system architecture that gives you additional functionality and full control of your data.
With Nextcloud, you can:
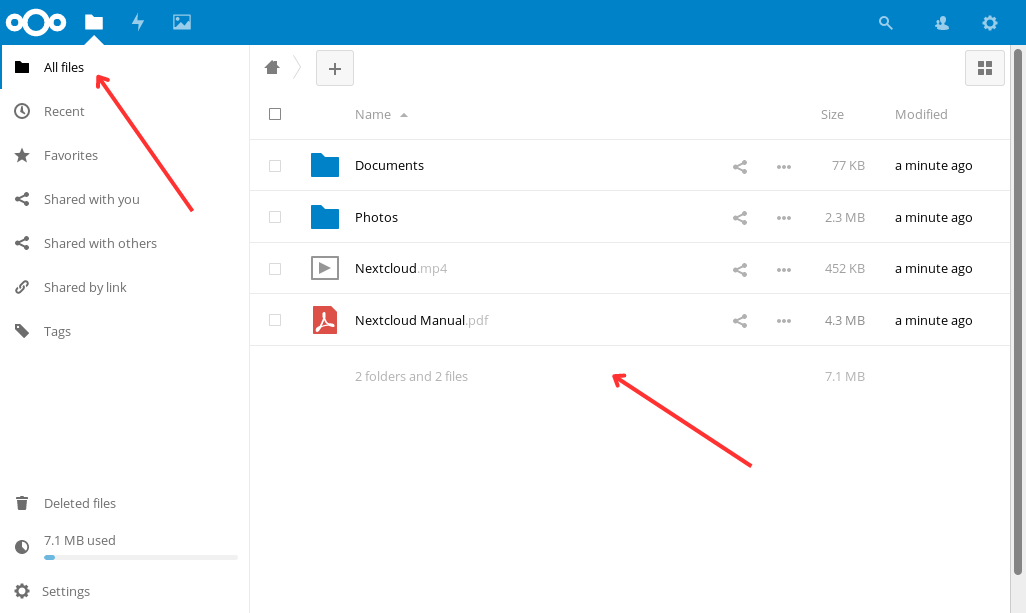
- Store files, contacts, calendars and more on your server, and synchronize them across various devices
- Share your data with others to view and collaborate on
- Expand your Nextcloud installation with apps from the Nextcloud App Store,
- Or build your own apps and integrate them with Nextcloud.
Install Nextcloud with Docker: Prerequisites
- A VPS running Ubuntu 24.04, CentOS or Debian. If you don't have one, no worries! We offer the best priced, most reliable, and fastest VPS servers in the market 🙂
- A working Docker installation—for information about how to install Docker, check out our getting started with Docker tutorial.
Note
If you want to skip all the technical steps of setting up Nextcloud on your server and have it installed in minutes, then I have some great news for you! Our team of engineers has prepared a ready-to-use 1-Click Nextcloud application for your convenience. Just choose a server, and while prompted to choose the operating system, choose Nextcloud from the dropdown menu. This will set up Nextcloud in minutes, which means you don't even need this tutorial. Save time and save money with our Nextcloud 1-Click solution.
Step 1. Install Docker
Ubuntu 24.04/Debian 12
For both Ubuntu and Debian servers, the latest versions of Docker CE may not be available in the repositories. We need to install the prerequisite packages:
sudo apt-get updatesudo apt-get install curl gnupg2 apt-transport-https ca-certificates software-properties-common
Next, we add the GPG keys, Docker repositories and finally install Docker. Here is where it gets different for both Ubuntu and Debian:
Ubuntu:
sudo install -m 0755 -d /etc/apt/keyrings
sudo curl -fsSL https://download.docker.com/linux/ubuntu/gpg -o /etc/apt/keyrings/docker.asc
sudo chmod a+r /etc/apt/keyrings/docker.asc

# Add the repository to Apt sources:
echo \
  "deb [arch=$(dpkg --print-architecture) signed-by=/etc/apt/keyrings/docker.asc] https://download.docker.com/linux/ubuntu \
  $(. /etc/os-release && echo "$VERSION_CODENAME") stable" | \
  sudo tee /etc/apt/sources.list.d/docker.list > /dev/null
sudo apt-get update
Then install docker:
sudo apt-get install docker-ce docker-ce-cli containerd.io docker-buildx-plugin docker-compose-pluginDebian:
sudo install -m 0755 -d /etc/apt/keyrings
sudo curl -fsSL https://download.docker.com/linux/debian/gpg -o /etc/apt/keyrings/docker.asc
sudo chmod a+r /etc/apt/keyrings/docker.asc

# Add the repository to Apt sources:
echo \
  "deb [arch=$(dpkg --print-architecture) signed-by=/etc/apt/keyrings/docker.asc] https://download.docker.com/linux/debian \
  $(. /etc/os-release && echo "$VERSION_CODENAME") stable" | \
  sudo tee /etc/apt/sources.list.d/docker.list > /dev/null
sudo apt-get update
Now install Docker:
sudo apt-get install docker-ce docker-ce-cli containerd.io docker-buildx-plugin docker-compose-plugin
Other Linux Distributions
If you are using another Linux distribution, check out the official Docker documentation.
Step 2. Install Docker Compose
To install Docker Compose, first determine the latest version from the releases page. At the time of writing, the current stable version is 2.26.0.
Create a new directory for Docker Plugins:
mkdir -p ~/.docker/cli-plugins/
Download the Docker Compose binary (Make sure to change 2.26.0 to the latest version):
curl -SL https://github.com/docker/compose/releases/download/v2.26.0/docker-compose-linux-x86_64 -o ~/.docker/cli-plugins/docker-compose
Set execute permissions to make the binary executable:
chmod +x ~/.docker/cli-plugins/docker-compose
Verify the installation:
docker compose version
You should see the version you installed:
Docker Compose version v2.26.0Step 3. Install Nextcloud using Docker and Docker Compose
We can now install Nextcloud with Docker and Docker Compose.
Before we start defining services in the docker-compose.yml file, we create a network so that containers can communicate. Run the following command in the terminal:
$ docker network create nextcloud_network
Since we want to containerize Nextcloud along with other containers associated with it, we will define and knit all the services together in the docker-compose.yml file incrementally.
For this tutorial, we’ll define the services one by one, starting with the Nginx reverse proxy:
- Nginx reverse proxy
- Let’s Encrypt
- MariaDB
- Nextcloud
Create the docker compose file where we will define all the services.
$ nano docker-compose.yml
Step 4. Configure the Nginx Reverse Proxy Container
In the file you just created, paste the following:
version: '3'

services:

  proxy:
    image: jwilder/nginx-proxy:alpine
    labels:
      - "com.github.jrcs.letsencrypt_nginx_proxy_companion.nginx_proxy=true"
    container_name: nextcloud-proxy
    networks:
      - nextcloud_network
    ports:
      - 80:80
      - 443:443
    volumes:
      - ./proxy/conf.d:/etc/nginx/conf.d:rw
      - ./proxy/vhost.d:/etc/nginx/vhost.d:rw
      - ./proxy/html:/usr/share/nginx/html:rw
      - ./proxy/certs:/etc/nginx/certs:ro
      - /etc/localtime:/etc/localtime:ro
      - /var/run/docker.sock:/tmp/docker.sock:ro
    restart: unless-stopped
Let’s look at the configuration created in the above docker-compose.yml file in detail. The service for proxy uses the image from jwilder/nginx-proxy. The label "com.github.jrcs.letsencrypt_nginx_proxy_companion.nginx_proxy" is used so that the Let’s Encrypt container knows which nginx proxy container to use for certificate generation.Then, there is network by the name nextcloud_network, which is used by the containers to communicate among themselves. The Volumes section is used by the container to configure the Nginx virtual host and to access certificates generated by Let’s Encrypt companion container. The /etc/localtime:/etc/localtime:ro is used to duplicate the host timezone inside the container.
Step 5. Configure the Let’s Encrypt Container
Now that you have nginx-proxy container set up, you can add the following to your docker-compose.yml file.
  letsencrypt:
    image: jrcs/letsencrypt-nginx-proxy-companion
    container_name: nextcloud-letsencrypt
    depends_on:
      - proxy
    networks:
      - nextcloud_network
    volumes:
      - ./proxy/certs:/etc/nginx/certs:rw
      - ./proxy/vhost.d:/etc/nginx/vhost.d:rw
      - ./proxy/html:/usr/share/nginx/html:rw
      - /etc/localtime:/etc/localtime:ro
      - /var/run/docker.sock:/var/run/docker.sock:ro
    restart: unless-stopped
The Lets’ Encrypt container depends on our first service (proxy) and is a part of the network nextcloud_network. The restart: unless-stopped allows the containers to be stopped gracefully unless you manually run docker stop letsencrypt or docker-compose down letsencrypt.
Step 6. Configure the MariaDB Container
For Nextcloud to work correctly, we need to connect it to a MariaDB database. Fortunately, we can add that to our docker-compose.yml file as well:
  db:
    image: mariadb
    container_name: nextcloud-mariadb
    networks:
      - nextcloud_network
    volumes:
      - db:/var/lib/mysql
      - /etc/localtime:/etc/localtime:ro
    environment:
      - MYSQL_ROOT_PASSWORD=secret
      - MYSQL_PASSWORD=mysql
      - MYSQL_DATABASE=nextcloud
      - MYSQL_USER=nextcloud
    restart: unless-stopped
The service section for MariaDB is pretty self-explanatory. This container is also part of the network nextcloud_network. We have also defined the environment variable for the database name, username, and password that Nextcloud uses to connect to the database.
Step 7. Configure the Nextcloud Docker Container
We’re finally ready to create the Nextcloud Docker container in our docker-compose.yml file. Add the following to the bottom.
  app:
    image: nextcloud:latest
    container_name: nextcloud-app
    networks:
      - nextcloud_network
    depends_on:
      - letsencrypt
      - proxy
      - db
    volumes:
      - nextcloud:/var/www/html
      - ./app/config:/var/www/html/config
      - ./app/custom_apps:/var/www/html/custom_apps
      - ./app/data:/var/www/html/data
      - ./app/themes:/var/www/html/themes
      - /etc/localtime:/etc/localtime:ro
    environment:
      - VIRTUAL_HOST=nextcloud.YOUR-DOMAIN
      - LETSENCRYPT_HOST=nextcloud.YOUR-DOMAIN
      - LETSENCRYPT_EMAIL=YOUR-EMAIL
    restart: unless-stopped
The nextcloud service depends on the other three containers. To make Nextcloud’s data persistent while upgrading, and get access to backups, we use a named Docker volume nextcloud, similar to the way we used a Docker volume named db for the MariaDB data.
Here, we have defined the virtual host, Let’s Encrypt host, and email in the environment variables VIRTUAL_HOST, LETSENCRYPTHOST, and LETSENCRYPT``EMAIL, respectively. The proxy service creates the subdomain and encrypts it with Let’s Encrypt certificates for the container, given you supply valid domains and emails for those three environment variables.
At last, we need defined volumes for both Nextcloud and MariaDB for data persistence followed by networks.
volumes:
  nextcloud:
  db:

networks:
  nextcloud_network:
After combining all the service definitions, your final docker-compose.yml should look like following:
version: '3'

services:

  proxy:
    image: jwilder/nginx-proxy:alpine
    labels:
      - "com.github.jrcs.letsencrypt_nginx_proxy_companion.nginx_proxy=true"
    container_name: nextcloud-proxy
    networks:
      - nextcloud_network
    ports:
      - 80:80
      - 443:443
    volumes:
      - ./proxy/conf.d:/etc/nginx/conf.d:rw
      - ./proxy/vhost.d:/etc/nginx/vhost.d:rw
      - ./proxy/html:/usr/share/nginx/html:rw
      - ./proxy/certs:/etc/nginx/certs:ro
      - /etc/localtime:/etc/localtime:ro
      - /var/run/docker.sock:/tmp/docker.sock:ro
    restart: unless-stopped

  letsencrypt:
    image: jrcs/letsencrypt-nginx-proxy-companion
    container_name: nextcloud-letsencrypt
    depends_on:
      - proxy
    networks:
      - nextcloud_network
    volumes:
      - ./proxy/certs:/etc/nginx/certs:rw
      - ./proxy/vhost.d:/etc/nginx/vhost.d:rw
      - ./proxy/html:/usr/share/nginx/html:rw
      - /etc/localtime:/etc/localtime:ro
      - /var/run/docker.sock:/var/run/docker.sock:ro
    restart: unless-stopped

  db:
    image: mariadb
    container_name: nextcloud-mariadb
    networks:
      - nextcloud_network
    volumes:
      - db:/var/lib/mysql
      - /etc/localtime:/etc/localtime:ro
    environment:
      - MYSQL_ROOT_PASSWORD=toor
      - MYSQL_PASSWORD=mysql
      - MYSQL_DATABASE=nextcloud
      - MYSQL_USER=nextcloud
    restart: unless-stopped

  app:
    image: nextcloud:latest
    container_name: nextcloud-app
    networks:
      - nextcloud_network
    depends_on:
      - letsencrypt
      - proxy
      - db
    volumes:
      - nextcloud:/var/www/html
      - ./app/config:/var/www/html/config
      - ./app/custom_apps:/var/www/html/custom_apps
      - ./app/data:/var/www/html/data
      - ./app/themes:/var/www/html/themes
      - /etc/localtime:/etc/localtime:ro
    environment:
      - VIRTUAL_HOST=nextcloud.YOUR-DOMAIN
      - LETSENCRYPT_HOST=nextcloud.YOUR-DOMAIN
      - LETSENCRYPT_EMAIL=YOUR-EMAIL
    restart: unless-stopped

volumes:
  nextcloud:
  db:

networks:
  nextcloud_network:
Step 8. Get Everything Running!
Now run the docker compose from the terminal to create the containers:
$ docker compose up -d
Creating nextcloud-mariadb ... done
Creating nextcloud-proxy   ... done
Creating nextcloud-letsencrypt ... done
Creating nextcloud-app         ... done
To confirm all the containers are running, issue the following command:
$ docker ps -a
CONTAINER ID        IMAGE                                    COMMAND                  CREATED             STATUS              PORTS                                      NAMES
92222232c4be        nextcloud:latest                         "/entrypoint.sh apac…"   9 minutes ago       Up 9 minutes        80/tcp                                     nextcloud-app
89e96fe10ee6        jrcs/letsencrypt-nginx-proxy-companion   "/bin/bash /app/entr…"   9 minutes ago       Up 9 minutes                                                   nextcloud-letsencrypt
d059517f519c        jwilder/nginx-proxy:alpine               "/app/docker-entrypo…"   9 minutes ago       Up 9 minutes        0.0.0.0:80->80/tcp, 0.0.0.0:443->443/tcp   nextcloud-proxy
7e0945eb6608        mariadb                                  "docker-entrypoint.s…"   9 minutes ago       Up 9 minutes        3306/tcp                                   nextcloud-mariadb
Wait a minute for the SSL certificate generation process to finish, and then load up the domain name you chose in your browser. Enter your chosen admin username and password. Choose MySQL as the database in the configure database section. Type in the username, password, and database name you configured via the MYSQL_USER, MYSQL_PASSWORD, and MYSQL_DATABASE environment variable from earlier. Change the hostname value from localhost to db and click Finish Setup. The system then redirects you to the Nextcloud dashboard.
The containerization of Nextcloud with Docker is complete! You have now learned how to install Nextcloud using Docker and Docker Compose.
Now you can upload files and photos to your drive hosted on your VPS and share them with others.
To extend the functionality of your Nextcloud server, you can now consider installing any number of the available apps, such as Bookmarks, Calendar, Contacts, Tasks, Notes, and more available on the Nextcloud App Store.
A note about tutorials: We encourage our users to try out tutorials, but they aren't fully supported by our team—we can't always provide support when things go wrong. Be sure to check which OS and version it was tested with before you proceed.
If you want a fully managed experience, with dedicated support for any application you might want to run, contact us for more information.
4 Responses to How To Install Nextcloud With Docker and Docker Compose
Abhishek
Port 80 and 443 is already in use. How to use another port
Marc Chartouny
Thanks Abishek for sharing your concern. Since it is a configuration specific to Nextcloud, could you please check this article directly from their support forum: https://help.nextcloud.com/t/configurating-nextcloud-on-different-port/151708/5
Sumone
It is crazy how nearly all Linux tutorials on the Internet skip over assumed steps and do not work following the precise steps actually listed.
Marc Chartouny
Hello Sumone, thanks for your comment. We make sure to build our tutorials with much detailed and realistic steps as possible.
Can you please help us out in highlighting the missing part so we inform our engineers to adjust it accordingly?
Much appreciated.
Marc