
Getting started with Docker on a VPS is pretty straightforward, and once you're set up via this Docker tutorial, it's like you've "leveled up" in DevOps.
In this article, I will go through how Docker can benefit your VPS, how to install it, and how to use it.
Why Install Docker on a VPS?
Docker is a platform for designing, building, and launching "containers," which are isolated environments containing all the software and configuration files necessary to run a service or application.
Running Docker on your virtual server gives you more stability, more flexibility, and a lot more ways to recover quickly if (or when) you mess things up.

Installing Docker on your VPS brings significant benefits:
- You can develop locally using a specific environment.
- You can ensure that local development environment is replicated exactly when you're ready to deploy code, ensuring 100% compatibility.
- Build Dockerfiles/Docker images to make your site/app portable to multiple VPSs for redundancy or fail-over.
- Host multiple applications on a single VPS without them interacting—or conflict—with one another. For example, run two WordPress installations with separate Apache/Nginx web servers and separate MySQL databases.
- One container can crash without affecting other containers or the health of your VPS.
- Capability to automatically restart containers upon reboot of the VPS itself.
- A certain degree of improved security by separating different apps into different containers.
- Easy backups!
With this, it's clear that having Docker on your VPS is a must. Now, let's get started on installing Docker and taking the first steps toward a container-powered VPS.
Prerequisites for Running Docker on a VPS
- A virtual private server (VPS) running any of our available OS options. See our pricing for details.
- A non-root user account (commands requiring escalated privileges will use
sudo).
Step 1 - Installing Docker on Your VPS
Ubuntu 22.04/Debian 12
For both Ubuntu and Debian servers, the latest versions of Docker CE may not be available in the repositories. We need to install the prerequisite packages:
sudo apt-get updatesudo apt-get install curl gnupg2 apt-transport-https ca-certificates software-properties-common
Next, we add the GPG keys, Docker repositories and finally install Docker. Here is where it gets different for both Ubuntu and Debian:
Ubuntu
sudo install -m 0755 -d /etc/apt/keyrings
sudo curl -fsSL https://download.docker.com/linux/ubuntu/gpg -o /etc/apt/keyrings/docker.asc
sudo chmod a+r /etc/apt/keyrings/docker.asc

# Add the repository to Apt sources:
echo \
  "deb [arch=$(dpkg --print-architecture) signed-by=/etc/apt/keyrings/docker.asc] https://download.docker.com/linux/ubuntu \
  $(. /etc/os-release && echo "$VERSION_CODENAME") stable" | \
  sudo tee /etc/apt/sources.list.d/docker.list > /dev/null
sudo apt-get update
Then install docker:
sudo apt-get install docker-ce docker-ce-cli containerd.io docker-buildx-plugin docker-compose-pluginDebian
sudo install -m 0755 -d /etc/apt/keyrings
sudo curl -fsSL https://download.docker.com/linux/debian/gpg -o /etc/apt/keyrings/docker.asc
sudo chmod a+r /etc/apt/keyrings/docker.asc

# Add the repository to Apt sources:
echo \
  "deb [arch=$(dpkg --print-architecture) signed-by=/etc/apt/keyrings/docker.asc] https://download.docker.com/linux/debian \
  $(. /etc/os-release && echo "$VERSION_CODENAME") stable" | \
  sudo tee /etc/apt/sources.list.d/docker.list > /dev/null
sudo apt-get update
Now install Docker:
sudo apt-get install docker-ce docker-ce-cli containerd.io docker-buildx-plugin docker-compose-plugin
Other Linux Distributions
If you are using another Linux distribution, check out the official Docker documentation.
Step 2 - Testing Your VPS Docker Installation
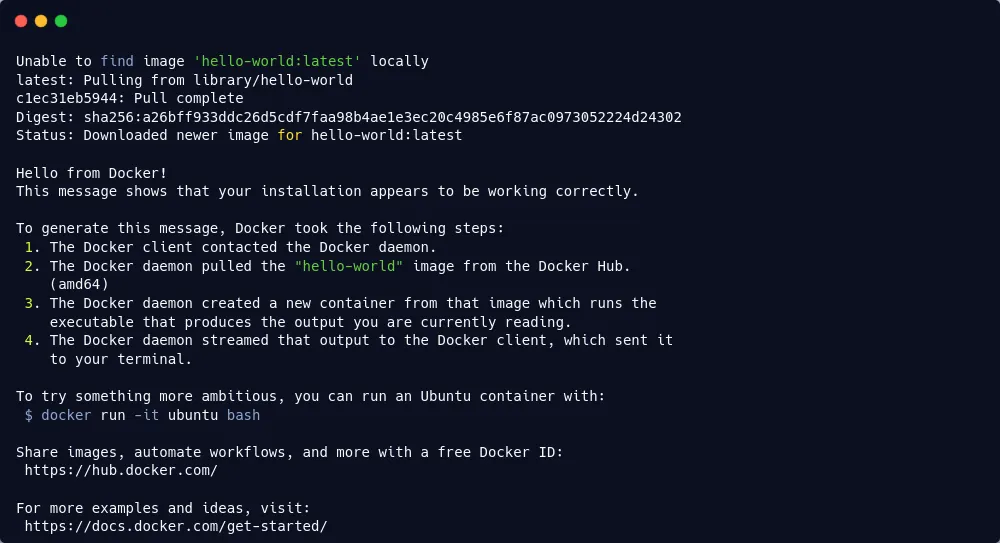
The people behind Docker recommend testing out your Docker installation with a basic Hello world command to ensure everything is working the way it should. If so, you'll see the following output:
$ sudo docker run hello-world
Step 3 - Some Docker Post-installation Configurations
Now that Docker is installed, let's take a moment to make a few quality-of-life improvements. These will help make Docker a little easier to use on a day-to-day basis:
- Enable Docker to start automatically after a reboot.
- Allow the non-root user to manage Docker.
Enable Docker Service
In CentOS, Debian, and Ubuntu, systemd is responsible for managing which services start when the system boots up.
Enabling the Docker service means configuring it to start automatically after a reboot. To do this, you can enable the Docker daemon with systemctl and make it automatically start on your VPS with a single command:
$ sudo systemctl enable docker
Once the Docker service is set to start automatically upon rebooting your VPS, all Docker containers will also spin up automatically. All your apps running in Docker containers will come back online without any manual intervention.
Once you have enabled the docker service itself, you do not need to take any further steps. This means that any application you run via Docker will gracefully restart after boot, potentially minimizing downtime (as long as the services inside the container are set up to start at boot themselves).
Docker Non-root Access
In order to give our non-root user access to the Docker management commands, we need to create a docker group (it may already be created for you), and then add your primary user to that group.
$ sudo groupadd docker
$ sudo usermod -aG docker $USER
Log out of your VPS by typing exit or Ctrl+D and log back in. Then, you can test whether or not you can use the docker command without prepending sudo.
$ docker run hello-world
Step 4 - Installing Docker-compose on Your VPS
Docker Compose is a tool that helps simplify the configuration and deployment of Docker containers and applications by using an easy-to-read .yml/.yaml file. In some cases, this will be easier than writing out a lengthy command for the shell prompt.
To install Docker Compose, first determine the latest version from the releases page. At the time of writing, the current stable version is 2.26.0.
Create a new directory for Docker Plugins:
mkdir -p ~/.docker/cli-plugins/
Download the Docker Compose binary (Make sure to change 2.26.0 to the latest version):
curl -SL https://github.com/docker/compose/releases/download/v2.26.0/docker-compose-linux-x86_64 -o ~/.docker/cli-plugins/docker-compose
Set execute permissions to make the binary executable:
chmod +x ~/.docker/cli-plugins/docker-compose
Verify the installation:
docker compose version
You should see the version you installed:

Step 5 - Testing Docker with a Basic LAMP Stack
Now we can get to the exciting bit—getting started running some actual applications in Docker containers. No more Hello, world!
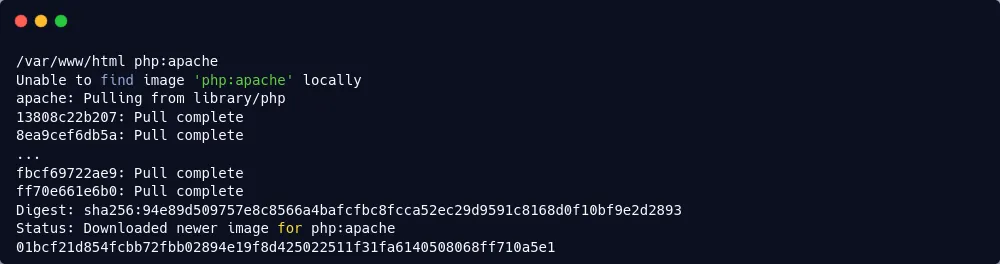
We'll start by creating a very basic LAMP stack using the php:apache container available from Docker. But, before that, let's create a directory on the host to store our files, which we'll link to the /var/www/html directory within the container.
$ mkdir $HOME/apache && cd $HOME/apache
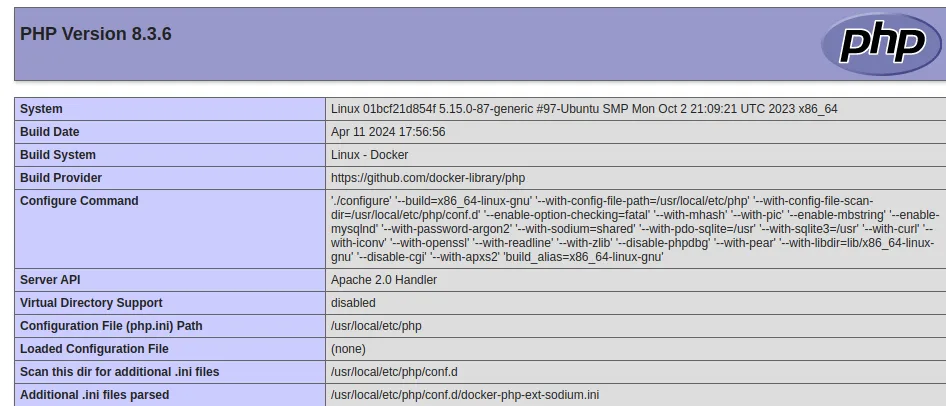
Then, we can create a small PHP file named info.php that will display information about the PHP configuration. It's a standard method of testing PHP-based installations.
$ printf '<?php\nphpinfo();\n?>' > info.php
Finally, we have our docker command. But, before you run it, check out the information just beneath the command so that you can understand exactly what it's accomplishing.
$ docker run -d --name=apache -p 8080:80 -v $HOME/apache:/var/www/html php:apache
First, the docker run specifies that we are going to create and start a new container, and the -d option means we will "detach" from it, much the way one detaches from a tmux session or an ssh session. In cases where you want to immediately run commands inside the newly-created container, you can omit the -d.
We use --name=apache to give the container a specific name. This is recommended, because your chosen names will be easier to manage and remember than the randomized defaults—comes in handy when you want to stop or delete a container.
-p 8080:80 will expose port 8080 to traffic arriving on the VPS, and will route that traffic to port 80 on the container. This makes it possible to expose different containers to different ports, and enable more complex configurations with an nginx reverse proxy.
-v $HOME/apache:/var/www/html is a virtual drive mapping. In this case, any files in the directory before the colon, $HOME/apache, will be available in the /var/www/html directory inside the container.
And finally, php:apache tells docker which image to use. More images can be found on the Docker Hub.
You should now be able to see that the container is running with the docker ps command:
$ docker ps
CONTAINER ID        IMAGE               COMMAND                  CREATED             STATUS              PORTS                  NAMES
d1fbdb7e0c5f        php:apache          "docker-php-entryp..."   3 seconds ago       Up 3 seconds        0.0.0.0:8080->80/tcp   apache
You can now also access your basic Apache web server by visiting http://YOUR-SERVER-IP:8080/info.php in your favorite browser. If all has gone correctly, you'll see something like the following:
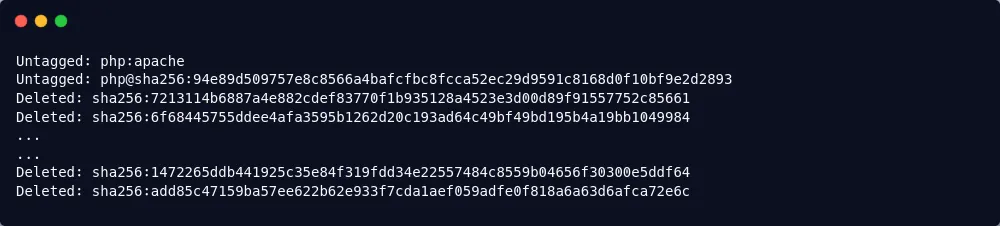
Now, for the sake of showing some more core docker commands, let's gracefully shut down this container, delete the container, followed by the image itself.
$ docker stop apache
$ docker rm apache
$ docker rmi php:apache
You should receive the following output:
For more, check out How To Remove Docker Images, Containers, and Volumes.
Step 6 - Installing WordPress with Docker on Your VPS
Okay, we've gotten started with Docker and tested the LAMP stack.
So, now let's take the LAMP stack a step further with a full-blown WordPress installation, and this time, let's also use docker-compose to make the process a little bit more human-readable.
The first step is creating a new directory for this project.
$ mkdir wp_test && cd wp_test
Then, create a docker-compose.yml file that will specify the configuration. This will create two containers: one running Apache/Wordpress, and another running the mysql instance, with data persisted between reboots and container shutdowns. Of course, for production use, you will want to change the passwords to be more secure.
version: '2'

services:
   db:
     image: mysql:5.7
     volumes:
       - db_data:/var/lib/mysql
     restart: always
     environment:
       MYSQL_ROOT_PASSWORD: somewordpress
       MYSQL_DATABASE: wordpress
       MYSQL_USER: wordpress
       MYSQL_PASSWORD: wordpress
     container_name: wp_test_db

   wordpress:
     depends_on:
       - db
     image: wordpress:latest
     ports:
       - "8080:80"
     restart: always
     environment:
       WORDPRESS_DB_HOST: db:3306
       WORDPRESS_DB_USER: wordpress
       WORDPRESS_DB_PASSWORD: wordpress
     container_name: wp_test
volumes:
    db_data:
To launch the container for the first time, use the docker-compose up command.
$ docker compose up -d
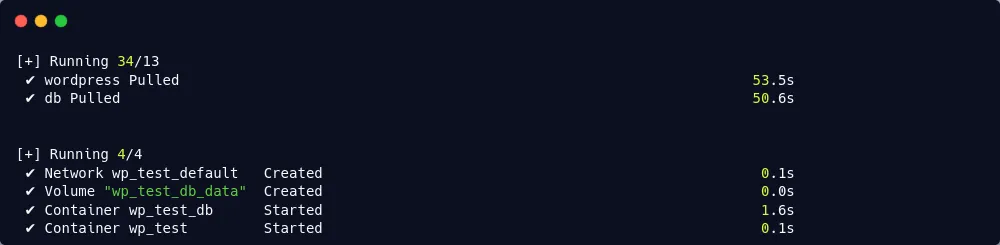
Now, you can check on these new containers using docker ps.
$ docker ps
20570a5eb798        wordpress:latest    "docker-entrypoint..."   3 seconds ago       Up 2 seconds        0.0.0.0:8080->80/tcp   wp_test
c1872cb1443d        mysql:5.7           "docker-entrypoint..."   3 seconds ago       Up 3 seconds        3306/tcp               wp_test_db
Of course, the WordPress installation is now available on http://YOUR-SERVER-IP:8080, for you to begin the famous 5-minute installation. And, if for any reason, you need to shut down these containers while retaining the data, use docker-compose down.
Getting Started with Docker on Your VPS: Next Steps
With this, I hope you're excited to get started taking full advantage of Docker on your VPS.
By offloading services to containers, you can keep your base OS cleaner, with fewer attack vectors, and with less risk of various applications conflicting with one another.
Plus, it's much safer to make mistakes with containers! All you need to do is stop the container, remove it, and try again, without worrying that you're cluttering up your system or potentially breaking it.
If you want to get started leveling up your Docker skills, check out a few of our Docker tutorials:
- Host multiple websites on one VPS with Docker and Nginx
- Hosting multiple SSL-enabled sites with Docker and Nginx
- Self-hosting with Docker: The definitive handbook
Enjoy your containers! And, while it's definitely possible, we can't recommend running Docker inside of Docker.
Additional resources:
- Docker Community Edition for Debian
- Docker Community Edition for Ubuntu
- Docker Community Edition for CentOS
- Post-installation steps for Linux
- Docker command line
- The Docker Hub
- Quickstart: Compose and WordPress
- A curated list of Docker resources and projects
A note about tutorials: We encourage our users to try out tutorials, but they aren't fully supported by our team—we can't always provide support when things go wrong. Be sure to check which OS and version it was tested with before you proceed.
If you want a fully managed experience, with dedicated support for any application you might want to run, contact us for more information.