

The DevOps field as we know it is changing rapidly, and manually configuring servers isn't just inefficient, it's a dangerous liability that's costing you insane amounts of time. This Ansible step by step tutorial for beginners is your guide to mastering server automation before your competition leaves you behind. Fortune 500 companies are already using Ansible to manage thousands of servers with just a few keystrokes, and after this comprehensive guide, you'll have these same powerful capabilities at your fingertips.
I'll break everything down into bite-sized, actionable steps that you can immediately apply to your infrastructure. By the end of this tutorial, you'll be automating tasks that used to take hours in just minutes; and who knows? This could be the technological edge that transforms your entire operation sooner than you expect.
Notes On This Ansible Tutorial for Beginners
- You need at least two servers to follow this tutorial, a server for the control host where you install Ansible, and a server for a remote host that will be controlled by Ansible. If you haven't noticed, we offer extremely affordable VPS plans. Check out our website and check out our incredible deals!
- Whenever you see the SUBDOMAIN, DOMAIN, or TLD variables, replace them with the details of your domain name. In example.ssdnodes.com, the SUBDOMAIN is example, ssdnodes is the DOMAIN and .com is the TLD. Or you can just use an IP address instead of a domain.

Ansible for Beginners - A Simple Definition
A lot of people compare Ansible to similar tools like Chef or Puppet. They all help automate and provision infrastructure, but there are a few features that make me prefer Ansible over the others.
Step 1: Installing Ansible
To take your first steps with Ansible, you first need to install it on your control machine. This is the machine you’ll use to dispatch tasks. For most people, this will be your desktop machine at home or your laptop, but you can also use one VPS as a control host to connect to other VPSs.
Installing Ansible on Ubuntu 24.04
You can install Ansible using standard package managers like apt/yum or Python’s pip command. To install it using standard package manager in Ubuntu, add its repository information apt-add-repository. Next, update the system and install Ansible using apt-get.
$ sudo apt-get install software-properties-common
$ sudo apt-add-repository ppa:ansible/ansible
$ sudo apt-get update
$ sudo apt-get install ansible
Installing Ansible on AlmaLinux 9
To install Ansible on AlmaLinux 9, update the package list, then install the ansible-core package:
$ sudo dnf update
$ sudo dnf install ansible-core
Step 2: Understanding Ansible Control Host
The control host is the main server on which you've installed Ansible, which you will use to dispatch tasks to the remote managed Ansible hosts.
Before you start delegating tasks to a managed host, make sure you have non-root, a sudo-enabled user on your control host—it’s always a bad idea to connect to a remote VPS via a root user.
Step 3: Ansible Inventory Files
The Ansible inventory file lists which hosts will receive commands from the control host. The inventory can list individual hosts, or group them under categories you distinguish. This file is crucial for defining the managed infrastructure and can include IP addresses or domain names of the hosts. Additionally, you can organize hosts into groups based on various criteria such as their roles, environments (e.g., development, staging, production), or geographic locations.
Ansible Inventory File Location
The default location for the inventory file is /etc/ansible/hosts, but it’s also possible to change the location of the inventory file by uncommenting and modifying the inventory parameter in /etc/ansible/ansible.cfg. This flexibility allows you to maintain multiple inventory files tailored for different environments or projects. For instance, you might have separate inventory files for development, testing, and production environments. Ansible Inventory files are mostly in the INI and YAML formats.
Ansible Inventory File Example
A typical inventory file sample can list the managed host either by IP address or by domain names. It is also possible to list one managed host in more than one group. Here’s an example of listing two hosts under the webservers and dbservers categories.
[webservers]
123.45.67.89
SUBDOMAIN.DOMAIN.TLD

[dbservers]
123.45.67.89
SUBDOMAIN.DOMAIN.TLD
To test if all the hosts are discoverable by the inventory file, use the following ad-hoc command.
$ ansible all --list-hosts
You can also list the hosts by group name:
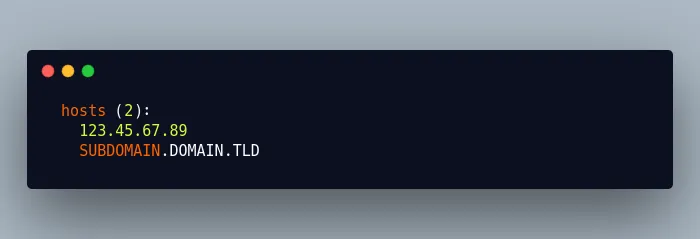
$ ansible dbservers --list-hosts
hosts (2):
    123.45.67.89
    SUBDOMAIN.DOMAIN.TLD
Ad-hoc commands in Ansible are merely those that perform a single command across one or many hosts. They don’t use tasks but allow you to do a lot of things quite easily without building out playbooks (more on those in the second part of this guide).
To find out if all the hosts are up and running, use the following ad-hoc command that uses the ping module of Ansible. The -u switch specifies which user Ansible will connect to via SSH—change it according to the non-root user you created earlier.
$ ansible all -m ping -u USER
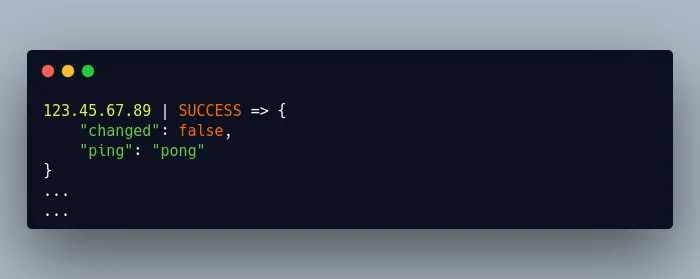
The "changed": false in the above JSON result tells us that the ping Ansible task didn’t change anything on the remote server.
Note: You might get an error saying that your host is unreachable. To solve this, simply create an ssh key pair if you don't already have one on your control host: ssh-keygen -t rsa -b 4096, then copy it to your remote host: ssh-copy-id USER@REMOTE_HOST_IP.
Rather than specifying all the hosts as in the above command, you can also ping a group of hosts. Specify the group name in place of ‘all’ with the following command:
$ ansible webservers -m ping -u USER
Step 4: Ansible Modules
Modules are the discrete units of code that can be used from the terminal or in a playbook task. They simplify Ansible tasks by installing software, copying files, using templates, and so on.
Modules use the available context to determine what actions if any needed to bring the managed host to the desired state and are idempotent, that means if you run the same task again and again, the state of the machine will not change.
To find the list of available modules, use the following command:
$ ansible-doc -l
Let’s try to install Nginx on an Ubuntu/Debian host using an ad-hoc command in Ansible:
$ ansible webservers -b --become-user=root -m shell -a 'apt -y install nginx' -u USER

172.104.160.8 | SUCCESS | rc=0 >>
Reading package lists...
Building dependency tree...
The following flags were used with the above command:
-b: Instruct ansible to become another user to run the command--become-user=root: Run the command as arootuser-m: Declares which module is used in the command-a: Declares which arguments are passed to the module
The alternate and preferred way of installing software using an ad-hoc command is to use apt module. If your remote managed host is running RHEL/CentOS, then change the module name from apt to yum.
$ ansible webservers -b --become-user=root -m apt -a 'name=nginx state=present update_cache=true' -u USER
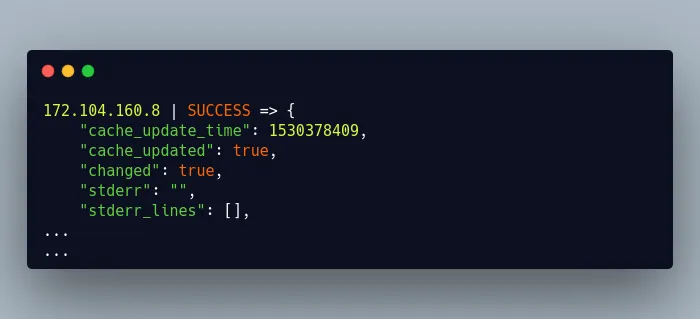
In the above Ansible command, the -a switch passes the arguments to the apt module by specifying the name of the package to be installed, the desired state, and whether to update the package repository cache or not.
The line change: true in the result section of the above ad-hoc command signifies that the state of the system has been changed. If you run the above ad-hoc command again, the value of changed field will be false, which means the state of the system remains unchanged, because Ansible is aware that Nginx is already present in the system and will not try to alter the state again.
That’s what we call Ansible idempotent. You can run the same ad-hoc command as many times as you’d like and it won’t change anything unless it needs to.
172.104.160.8 | SUCCESS => {
    "cache_update_time": 1530378676,
    "cache_updated": true,
    "changed": false
}
So far, we have understood the ansible modules and its usages through ad-hoc way, but this is not so useful until we use the modules in ansible playbooks to run multiple tasks in the remote managed host.
Step 5: Tasks in Ansible
When you dispatch a job from a control host to a managed host using an Ansible module, it is known as a task. Tasks can be implemented using ad-hoc commands, as we’ve done just above, or you can use an Ansible playbook (more on those in a moment).
One example of a task is copying a file from the control host to a managed host, since it requires the use of ‘copy’ module. There are thousands of modules in Ansible, which means a task can use any of the modules to bring a managed host to the desired state. How many modules are there by default in Ansible? Let’s see:
$ ansible-doc -l | wc -l
1852
If you haven’t guessed, there are a lot of things you can do when combining Ansible tasks and modules.
Step 6: Ansible Playbooks
No Ansible tutorial would be complete without a guide to Playbooks. And some concrete Ansible Playbook examples.
Ansible Playbooks are composed of one or more plays and offer more advanced functionality for sending tasks to managed host compared to running many ad-hoc commands.
The tasks in Ansible playbooks are written in Yet Another Markup Language (YAML), which is easier to understand than a JSON or XML file. Each task in the playbook is executed sequentially for each host in the inventory file before moving on to the next task.
Let’s create a simple Ansible playbook example that will install Nginx and a MySQL server on the managed hosts that we had already defined in the inventory file.
To be more precise, we want Nginx installed on hosts in the webservers group and a MySQL server installed on hosts in the dbservers group.
$ vi playbook.yml

---
- hosts: webservers
  gather_facts: yes
  become_user: root
  tasks:
  - name: Install Nginx
    apt: pkg=nginx state=present
    notify:
    - restart nginx
  - name: Enable Nginx during boot
    service: name=nginx state=started enabled=yes
  handlers:
    - name: restart nginx
      service: name=nginx state=restarted

- hosts: dbservers
  become_user: root
  tasks:
  - name: Install mysql
    apt: pkg=mysql-server state=present
The hosts tells Ansible on which hosts to run the tasks. The above Ansible playbook includes two host groups from the inventory file. The tasks for webservers group are to install Nginx and enable Nginx during boot, and the dbservers group includes a single task to install MySQL.
The become_user in both the host section tells ansible to use sudo to run the tasks.
The gather_facts option gathers information about managed hosts such as distribution, OS family, and more. In ansible terminology, this information is known as FACTS.
The handlers section restarts Nginx when Ansible gets notified that Nginx has been installed.
A handler is the same as a task, but it will be executed when called by another task. It is like an event-driven system. A handler will run a task only when it is called by an event it listens for.
Now run the above playbook example using ansible-playbook. Append the name of the user from a remote managed host in the command using -u switch.
$ ansible-playbook playbook.yml -u USER
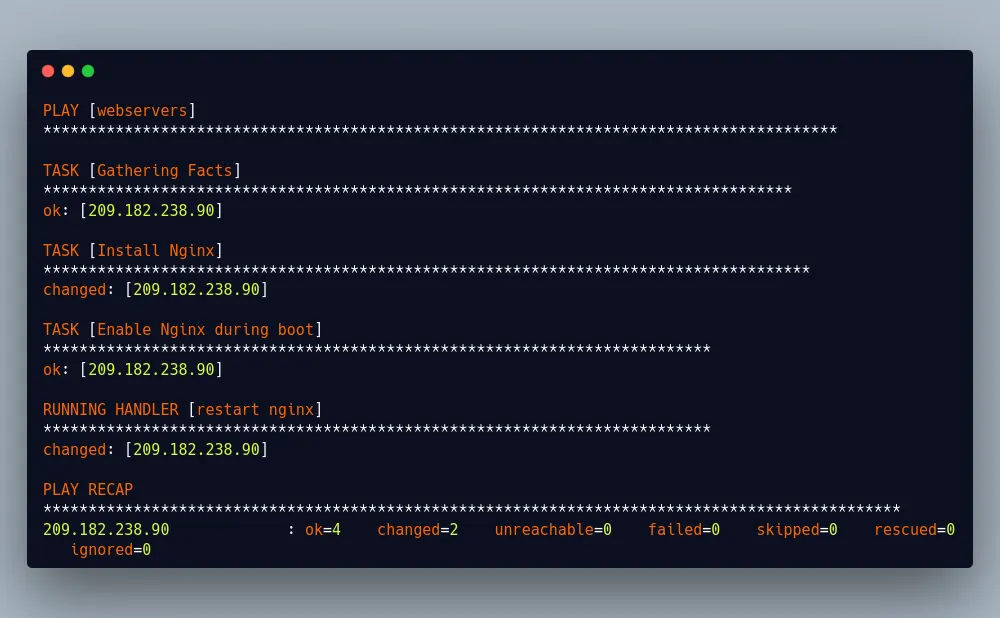
The last line contains information about the current run of the above playbook. The four points of data are:
ok: The number of tasks that were either executed correctly or didn’t result in a change.changed: The number of things that were modified by Ansible.unreachable: The number of hosts that were unreachable for some reason.failed: The number of tasks failed to execute correctly.
Step 7: Ansible Roles
In Ansible, a role provides a mechanism to break a complicated playbook into multiple reusable components. Each component offers a small function that can be used independently within the playbook. So rather than creating one complex playbook, you can create many roles and simply drop them into your playbooks.
You can’t execute roles directly, the way you do a playbook, and you can’t specify which host you want to execute a role, the way you would an ad-hoc command. Instead, they’re built into the playbooks you use to define a host.
The Ansible Galaxy repository has thousands of pre-built roles for you to choose from, although you’re free to create your role framework. Let’s dig into how you might want to do just that.
Step 8: Ansible Variables
In Ansible, variables are similar to variables in any programming language—they let you input values and numbers dynamically into your playbook. Variables simplify operations by allowing you define and declare them throughout all the various roles and tasks you want to perform.
There are few places where you can define variables in an Ansible playbook.
- In the playbook
- In the inventory file
- In a separate variable file
- Using
group_vars
To define variables in a playbook, use vars key just above the task where you want to use the variable. Once declared, you can use it inside the {{ }} tag. Let’s declare a variable by the name pkgname and assign it the value of the package name that we want to install, which is nginx. Once done, we can use the variable in a task.
---
- hosts: webservers
  gather_facts: yes
  become_user: root

  vars:
    pkgname: nginx

  tasks:
  - name: Install "{{ pkgname }}"
    apt: pkg="{{ pkgname }}" state=present
    ...
    ...
It is also possible to declare a variable in the inventory file using the syntax [host_group_name:vars]. Let’s define the variable pkgname in the inventory file.
[webservers:vars]
pkgname=nginx
Now the variable pkgname can be used anywhere in the webservers hosts section in the playbook.
You can also define variables in a separate variable file and import it into the playbook. Create a variable file using vi another text editor and define the variable pkgname here.
$ vi ansible_vars.yml

---
pkgname: nginx
To use the variable pkgname, import the above file using the vars_files keyword in the playbook.
$ vi playbook.yml

---
- hosts: webservers
  gather_facts: yes
  become_user: root

  vars_files:
    - ./ansible_vars.yml
...
...
Another preferred way of managing variables is to create a group_vars directory inside your Ansible working directory. Ansible will load any YAML files in this directory with the name of any Ansible group.
Create the directory group_vars in your Ansible working directory, and then create the variable files matching with the group name from the inventory file. In our example, this would be webservers and dbservers. This allows you to separate variables according to host groups, which can make everything easier to manage.
$ cd <your_ansible_working_directory>
$ mkdir group_vars
$ cd group_vars
$ vi webservers
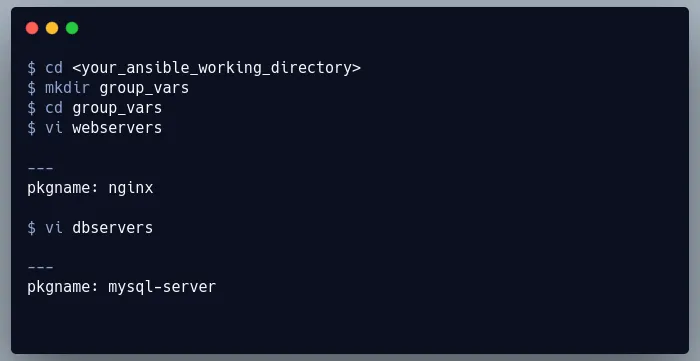
You don’t need to declare the variable in your playbook, as Ansible will automatically pull the variables from each group_vars files and will substitute them during runtime.
Now suppose you want to have variables that will apply to all the host groups mentioned in the inventory file. To accomplish it, name a file by the name all inside group_vars directory. The group_vars/all files are used to set variables for every host that Ansible connects to.
Step 9: Ansible Conditionals
In Ansible, conditionals are analogous to an if statement in any programming language. You use a conditional when you want to execute a task based on certain conditions. For example, if you only want to install a package on a remote server if it is not already installed, you would use a conditional to check the package's status before proceeding with the installation task.
Ansible Conditionals Example
In our last playbook example, we installed Nginx, so let’s extend that by creating a task that installs Nginx when Apache is not present on the host. We can add another task to the playbook we’ve already built.
...
...
  tasks:
  - name: Check if Apache is already installed
    shell: dpkg -s apache2 | grep Status
    register: apache2_is_installed
    failed_when: no
  - name: Install "{{ pkgname }}"
    apt: pkg="{{ pkgname }}" state=present
    when: apache2_is_installed.rc == 1
    notify:
    - restart nginx
...
...
The first task in the above playbook checks if Apache is installed using dpkg -s command and stores the output of the task to apache2_is_installed variable. The return value of the task will be a non-zero value if Apache is not installed on the host.
Usually, Ansible would stop executing other tasks because of this non-zero value, but the failed_when: no gives Ansible permission to continue with the next set of tasks when it encounters a non-zero value.
The second task will install Nginx only when the return value of rc is equal to one, which is declared via when: apache2_is_installed.rc == 1.
Step 10: Ansible Loops
All programming languages provide a way to iterate over data to perform some repetitive task. Ansible also provides a way to do the same using a concept called looping, which is supplied by Ansible lookup plugins. With loops, a single task in one playbook can be used to create multiple users, install many packages, and more.
How to use Ansible Loops
While there are many ways to use loops in Ansible, we’ll cover just one of them to get you started. The easiest way to use loops in ansible is to use with_items keyword, which is used to iterate over an item list to perform some repetitive tasks. The following playbook includes a task which installs packages in a loop using the keyword with_items.
---
- hosts: webservers
  gather_facts: yes
  become_user: root

  tasks:

  - name: Installing packages using loops
    apt: pkg={{ item }} state=present update_cache=yes
    with_items:
      - sysstat
      - htop
      - git
Run the above playbook from your command line, and you’ll see that you’ve installed all three packages on the remote host with a single task!
Step 11: Ansible Tags
Ansible Tags allow you to run only specific tasks from your playbook via the command line. Just add the tags keyword for each task and run only the task(s) that you want by using --tags switch at the end of the ansible command.
How to Use Ansible Tags
In the following playbook, we have added tags at the end of each task, thereby allowing us to run tasks separately from a single playbook.
---
- hosts: webservers
  gather_facts: yes
  become_user: root

  tasks:
  - name: Check if Apache is already installed
    shell: dpkg -s apache2 | grep Status
    register: apache2_is_installed
    failed_when: no
  - name: Install "{{ pkgname }}"
    apt: pkg="{{ pkgname }}" state=present
    when: apache2_is_installed.rc == 1
    notify:
    - restart nginx
  - name: ensure nginx is running and enable it at boot
    service: name=nginx state=started enabled=yes
    tags:
    - mytag1

  handlers:
    - name: restart nginx
      service: name=nginx state=restarted

- hosts: dbservers
  become_user: root
  tasks:
  - name: Install mysql
    apt: pkg="{{ pkgname }}" state=present
    tags:
    - mytag2
Now run any of the tasks by specifying tag name at the end of ansible command.
$ ansible-playbook playbook.yml -u ansadm --tags 'mytag2'
Step 12: Using Ansible Templates
Typically, after installing a web server like Nginx, you need to configure a virtual hosts file to properly serve a given website on your VPS. Instead of using SSH to log into your VPS to configure it after running Ansible, or using Ansible’s copy module to copy many unique configuration files individually, you can take advantage of Ansible’s templates features.

A template file contains all of the configuration parameters you need, such as the Nginx virtual host settings, and uses variables, which are replaced by the appropriate values when the playbook is executed. Template files usually end with the .j2 extension that denotes the Jinja2 templating engine.
To begin working with templates, create a directory for template files in your Ansible working directory.
$ mkdir templates
Create two template files. The first template file will be the default index.html file for each site, and the second template file will contain configuration settings for the Nginx virtual host.
$ cd templates
$ vi index.html.j2
<html>
You are visiting {{ domain_name }} !
</html>
Similarly, create a template file for the Nginx virtual host:
$ vi nginx-vh.j2
server {
        listen       80;
        server_name  {{ domain_name }};
        client_max_body_size 20m;
        index index.php index.html index.htm;
        root   /var/www/html/{{ domain_name }};

        location / {
                    try_files $uri $uri/ /index.html?q=$uri&$args;
        }
        location ~* \.(js|css|png|jpg|jpeg|gif|ico|woff|ttf|svg|otf)$ {
               expires 30d;
               add_header Pragma public;
               add_header Cache-Control "public";
               access_log off;
    }
}
Notice that the variables domain_name in the above two template files are enclosed within {{ }}, which means they will be substituted during runtime by the value of this variable. To define the variable domain_name, navigate to the group_vars directory and edit the file webservers and add the following lines in it.
$ cd group_vars
$ vi webservers

---
domain_name: SUBDOMAIN.DOMAIN.TLD
Finally, edit the ansible playbook to create a root folder for sites, copy the index.html file to the site’s root folder, and copy the virtual host file to the Nginx virtual host directory /etc/nginx/sites-enabled one by one.
$ vi playbook.yml

---
- hosts: webservers
  gather_facts: yes
  become_user: root

  tasks:
  - name: Check if Apache is already installed
    shell: dpkg -s apache2 | grep Status
    register: apache2_is_installed
    failed_when: no

  - name: Install "{{ pkgname }}"
    apt: pkg="{{ pkgname }}" state=present
    when: apache2_is_installed.rc == 1
    notify:
    - restart nginx

  - name: ensure nginx is running and enable it at boot
    service: name=nginx state=started enabled=yes

  - name: create virtual host root directory
    file: name=/var/www/html/{{ domain_name }} state=directory

  - name: Copying index file to webroot
    template:
      src: templates/index.html.j2
      dest: /var/www/html/{{ domain_name }}/index.html

  - name: Enables nginx virtual host
    template:
      src: templates/nginx-vh.j2
      dest: /etc/nginx/sites-enabled/{{ domain_name }}

  - name: restart nginx
    service: name=nginx state=restarted

    tags:
    - mytag1

  handlers:
    - name: restart nginx
      service: name=nginx state=restarted

- hosts: dbservers
  become_user: root
  tasks:
  - name: Install mysql
    apt: pkg="{{ pkgname }}" state=present
    tags:
    - mytag2
The template task in the above Ansible playbook takes two mandatory parameters src and dest. There are also a few optional parameters that can be specified in a template task but is not required at this stage.
- The
srcparameter specifies the name of the template file from templates directory that Ansible will copy to the remote server. In our case, the two templates files that we have created areindex.html.j2andnginx-vh.j2 - The
destparameter is the path in the remote server where the file should be placed.
Finally, run the playbook from your ansible working directory:
$ ansible-playbook playbook.yml -u USER
Step 13: Ansible Blocks
Ansible blocks, which were introduced in version 2.0, allow you to logically group tasks and better handle errors, which is useful when you want to execute multiple tasks under a single condition. With blocks, you can group a set of tasks together and apply a conditional to the entire block rather than each individual task. This helps in organizing the playbooks and making them more readable.
How to use Ansible Blocks
To end the block, use the when keyword once you’re done defining all the tasks you want to be executed. If the evaluation of the when condition returns true, then all the tasks within the blocks will be executed one by one. All tasks within the blocks will inherit the common data or directives that you set just after the ‘when’ keyword.
---
- hosts: webservers

  tasks:
  - name: Install Nginx

    block:
    - apt: pkg=nginx state=present
    - service: name=nginx state=started enabled=yes

    when: ansible_distribution == 'Ubuntu'
    become: true
    become_user: root
The block section in the above playbook includes two related tasks to install nginx and start/enable it. The when evaluation specifies that these tasks should only be run when the remote managed host is using Ubuntu as its operating system. Both the tasks will inherit the privilege escalation directives after the ‘when’ keyword.
You can also use blocks to handle failures, similar to exceptions in most programming languages. The aim is to gracefully handle failures within the block rather than withdrawing the entire deployment.
Here is an example of how to use blocks to handle failures:
tasks:
  - block:

  - name: Enable Nginx during boot
    service: name=nginx state=started enabled=yes

    rescue:
      - name: This section runs only when there is an error in the block.
        debug: msg="There was an error in starting/enabling nginx."
    always:
      - name: This section will run always.
        debug: msg="This always executes."`
Conclusion
Okay...so if you followed along with this Ansible tutorial step by step, you’ve gotten a simplified but practical lesson in most how to take your first steps with Ansible:
- How to install Ansible
- Running ad-hoc commands
- Understanding how modules work
- Creating Ansible playbooks
- Running your first playbook
- And a few other key fundamentals to get you started.
More Ansible Tutorials
For more on Ansible, check out the official Ansible documentation.
Check out our secure Ansible playbook tutorial to the complete playbook we put together for securing new VPSs:
- Ansible playbook for a more secure VPS (part 1)
- A More Secure Ansible Playbook (part 2)
A note about tutorials: We encourage our users to try out tutorials, but they aren't fully supported by our team—we can't always provide support when things go wrong. Be sure to check which OS and version it was tested with before you proceed.
If you want a fully managed experience, with dedicated support for any application you might want to run, contact us for more information.