
Installing an ISO image on a VPS sounds overwhelming, but it’s actually simpler than you think.
With nested virtualization, you can run virtual machines inside your VPS.
This guide walks you through the entire process of installing an ISO image on your VPS. We’ll use the Arch Linux ISO image as an example, but you can install any other image of your choice.
You'll first verify that your VPS supports nested virtualization, install the required packages, create virtual disks, then boot Arch Linux, and finally manage your VMs through the command line.
By the end, you'll have mastered how to run fully functional virtual machines inside your VPS.
Prerequisites
To follow this tutorial, you’ll need:
- A VPS with nested virtualization enabled. Our affordable Performance VPS allows you to enable this feature.
- Access your sever via SSH, check out How to access your server using SSH for instructions.
- Some basic knowledge managing VPS servers.
- If you're not familiar with nested virtualization, check out What is Nested Virtualization?
Benefits of Installing Your Own ISO Image on a VPS

You might be asking: Why go through the trouble of setting up nested virtualization?
It's actually a game-changer for your VPS!
You'll enjoy incredible flexibility to run multiple operating systems at once, build perfectly isolated development environments, and test specialized software without compatibility headaches, among many other use cases.
Step 1: Check if Nested Virtualization is Enabled
Let's first check if your VPS supports nested virtualization by running these commands.
$ grep -cw vmx /proc/cpuinfoIn the above command, any number above 0 means it's supported.
$ cat /sys/module/kvm_intel/parameters/nestedThis second command checks if the nested parameter is enabled in the KVM module. An output of Y or 1 confirms that it's on.
I once spent hours debugging a VM setup before realizing nested virtualization wasn't enabled on my VPS, so always check this first! Some VPS providers disable this feature by default.
Without nested virtualization, your VMs will either fail to start or run extremely slowly as they'll be using software emulation instead of hardware acceleration.
At SSD Nodes, we offer nested virtualization as an add-on on our Performance VPS servers.
Step 2: Install the Required Packages
Now we'll install all the packages needed to run virtual machines:
sudo apt update
sudo apt install -y \
  qemu-kvm \
  libvirt-daemon-system \
  libvirt-clients \
  bridge-utils \
  virtinst \
  virt-manager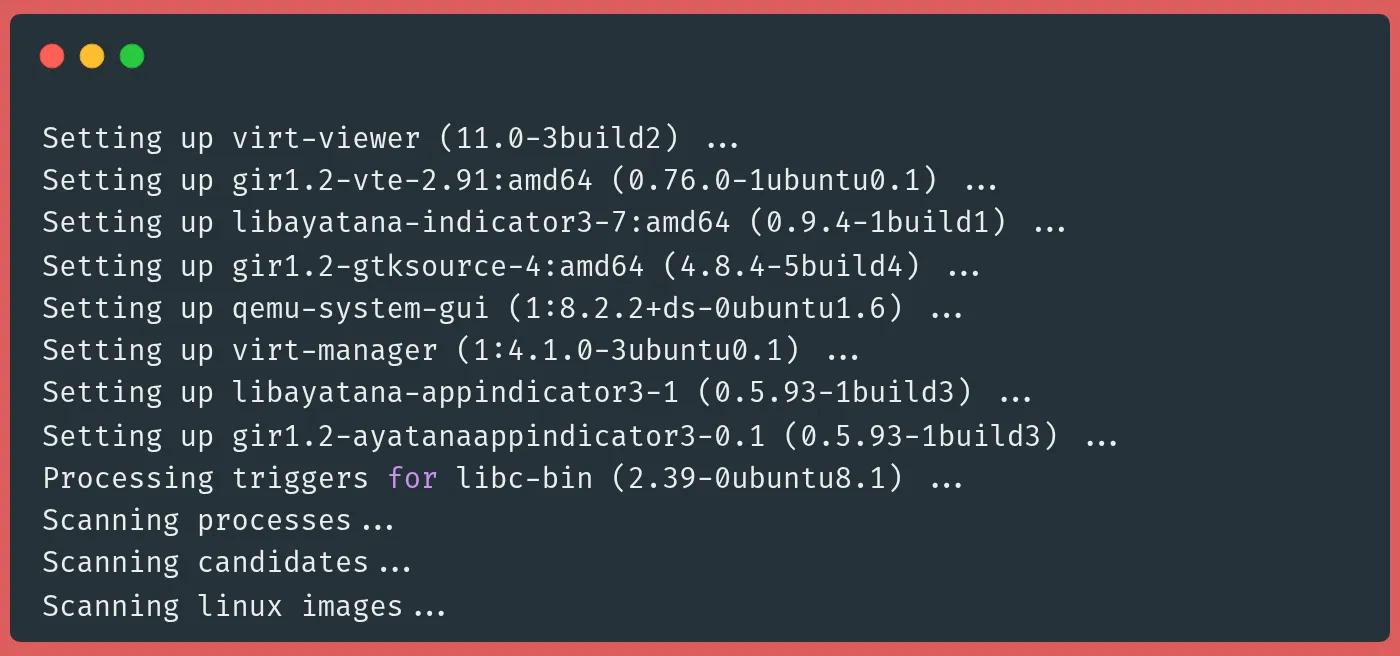
This installs all the virtualization tools we need. qemu-kvm is the hypervisor itself, libvirt provides the API and daemon to manage VMs, bridge-utils helps with networking, virtinst gives us command-line tools like virt-install, and virt-manager is a GUI tool (though we won't need it for our console-based setup).
These packages work together to create the complete virtualization stack.
QEMU provides the emulation, KVM is the kernel module that allows direct access to CPU virtualization features, and libvirt gives us a consistent API to manage everything.
Step 3: Start the Virtualization Service
To start the virtualization process, we need to first enable and start the libvirt service to manage our VMs.
sudo systemctl enable --now libvirtdCheck the status:
sudo systemctl status libvirtdOutput:
● libvirtd.service - libvirt legacy monolithic daemon
     **Loaded: loaded** (/usr/lib/systemd/syst
em/libvirtd.service; enabled; preset: enabled)
     **Active: active (running)** since Wed 2025-05-14 12:09:45 UTC; 20s ago
TriggeredBy: ● libvirtd-ro.socket
             ● libvirtd-admin.socket
             ● libvirtd.socket
       Docs: man:libvirtd(8)
             https://libvirt.org/
   Main PID: 9397 (libvirtd)
      Tasks: 22 (limit: 32768)
     Memory: 11.2M (peak: 12.6M)
        CPU: 788ms
From the output, we can see libvirtd is running properly. The service handles all VM operations and needs to be running before we can create or manage any VMs.
Step 4: Verify the Default Network
First, check if the default virtual network is active:
sudo virsh net-list --allOutput:
 Name      State    Autostart   Persistent
--------------------------------------------
 default   active   yes         yes
This command lists all defined virtual networks. The virsh command is your main interface to libvirt from the command line. You'll use it for most VM management tasks. The output shows the "default" network is active, set to start automatically, and is persistent (saved between reboots).
This default network provides NAT (Network Address Translation) for your VMs, allowing them to access the internet through your VPS without needing their own public IPs.
This creates a virtual bridge named virbr0 that your VMs will connect to. Without this network, your VMs would be isolated. Every time I set up a new server, I check this because it saves a ton of networking headaches later.
Step 5: Download the Arch Linux ISO
Let's create a directory for boot images and download the latest Arch Linux ISO.
First, we make a directory to store our ISO files:
sudo mkdir -p /var/lib/libvirt/bootThe mkdir -p command creates all necessary parent directories and doesn't error if the directory already exists. The libvirt convention is to use /var/lib/libvirt/boot for this. Move to this directory:
cd /var/lib/libvirt/bootDownload the Arch Linux installer ISO from one of the available mirrors:
sudo wget https://mirror.rackspace.com/archlinux/iso/2025.05.01/archlinux-2025.05.01-x86_64.isoThis could take a few minutes depending on your VPS's download speed. The ISO contains everything needed to boot and install Arch Linux. I prefer keeping ISOs in this standardized location so I can easily find them later when setting up new VMs.
You could technically store them anywhere, but sticking to the /var/lib/libvirt hierarchy makes everything more organized.
Step 6: Create a Virtual Disk
Now we'll create a virtual disk for our VM to install on:
sudo mkdir -p /var/lib/libvirt/images
sudo qemu-img create -f qcow2 /var/lib/libvirt/images/arch-vm.qcow2 40G
These commands first create the standard directory for VM disk images, then create a 40GB virtual disk in qcow2 format. The qemu-img tool is specifically designed for creating and managing disk images for QEMU/KVM VMs.
The -f qcow2 specifies the format.
The qcow2 format is great because it uses thin provisioning. The file only grows as you use space in the VM, not immediately to 40GB.
This means better disk space usage on your VPS. I've created many of these images, and qcow2 has been more reliable than raw format in my experience, especially when you need to take snapshots later.
Step 7: Launch the Arch Linux Installer
Start the VM installation process with virt-install:
sudo virt-install \
  --name arch-vm \
  --ram 4096 \
  --vcpus 2 \
  --os-variant archlinux \
  --disk path=/var/lib/libvirt/images/arch-vm.qcow2,size=40 \
  --network network=default \
  --graphics none \
  --console pty,target_type=serial \
  --cdrom /var/lib/libvirt/boot/archlinux-2025.05.01-x86_64.iso
This command creates and boots a new VM. Let's break down the parameters:
-name arch-vmgives our VM a name we can reference later-ram 4096allocates 4GB of memory-vcpus 2assigns 2 virtual CPUs-os-variant archlinuxhelps libvirt optimize for Arch Linux-disk path=...connects our virtual disk-network network=defaultattaches to the default NAT network-graphics nonedisables graphical console-console pty,target_type=serialenables text-based console-cdrommounts our ISO file so we can boot from it
When I run this on my own servers, I usually tweak the RAM based on what else is running - 4GB is plenty for a basic Arch install though.
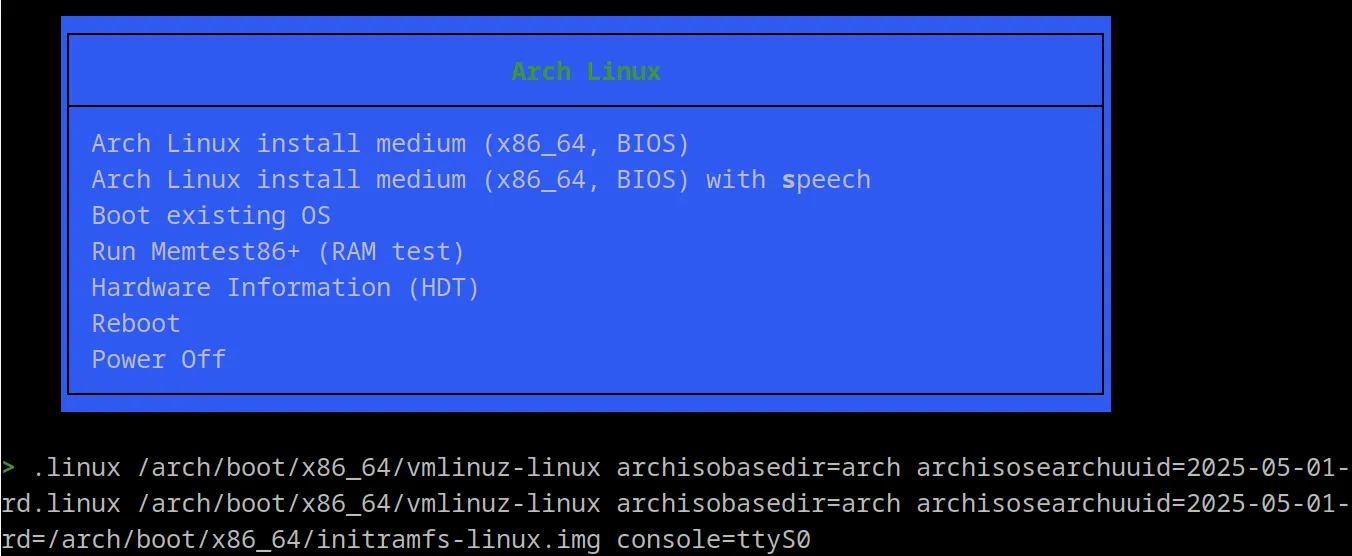
The VM will boot, and you'll see the Arch Linux boot menu:
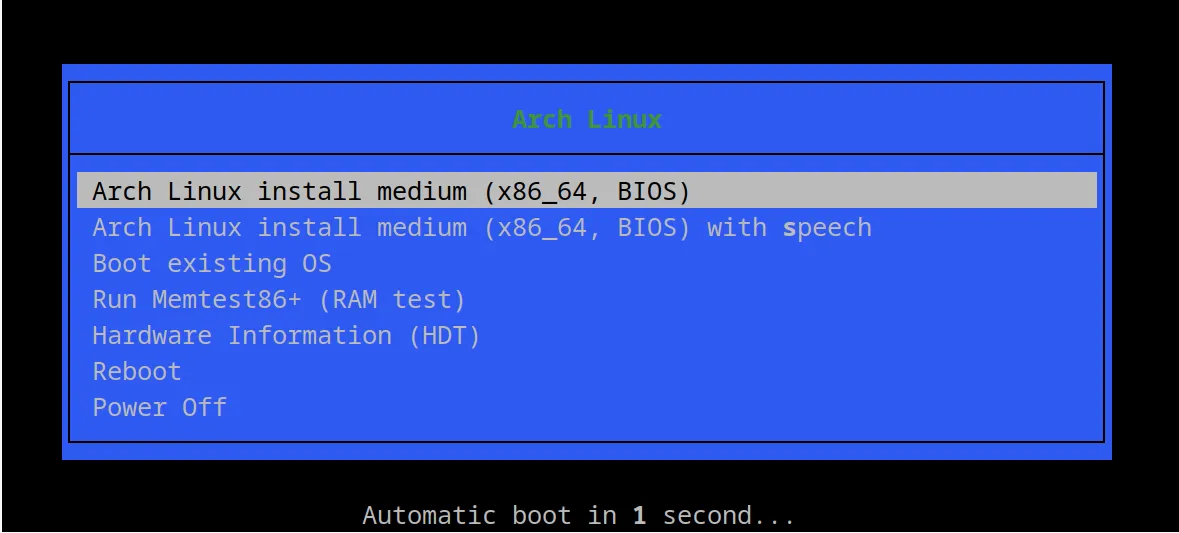
When this boot menu appears, press Tab to edit the kernel parameters, hit SPACE, and add console=ttyS0, then press ENTER. This redirects the console output to the serial port so we can see it in our terminal.
Warning
This parameter is crucial. Without it, you won't see any output once the kernel boots. The
console=ttyS0tells Linux to send console output to the first serial port, which is mapped to your terminal session by KVM.
You'll then see the boot process:
Loading /arch/boot/x86_64/vmlinuz-linux... ok
Loading /arch/boot/x86_64/initramfs-linux.img...ok
And finally the login prompt:
Arch Linux 6.14.4-arch1-2 (ttyS0)

archiso login:
Login with username root (no password needed).

With this, you are now inside the Arch Linux virtual machine inside your VPS!
Let's check if the internet is working using ping:
root@archiso ~ # ping ssdnodes.comThe output should show successful ping:
PING ssdnodes.com (172.66.43.60) 56(84) bytes of data.
64 bytes from 172.66.43.60: icmp_seq=1 ttl=57 time=1.79 ms
64 bytes from 172.66.43.60: icmp_seq=2 ttl=57 time=1.82 ms
64 bytes from 172.66.43.60: icmp_seq=3 ttl=57 time=1.80 ms
64 bytes from 172.66.43.60: icmp_seq=4 ttl=57 time=2.20 ms
64 bytes from 172.66.43.60: icmp_seq=5 ttl=57 time=2.03 ms
64 bytes from 172.66.43.60: icmp_seq=6 ttl=57 time=2.14 ms

--- ssdnodes.com ping statistics ---
6 packets transmitted, 6 received, 0% packet loss, time 5009ms
This shows our VM has internet access through the NAT network we verified earlier. This connectivity is essential for installing packages during Arch setup. The low ping times (around 2ms) in SSD Nodes nested virtualization VPS show the virtualization overhead is minimal.
I always test connectivity right away. There is nothing worse than getting halfway through an install before discovering network issues!
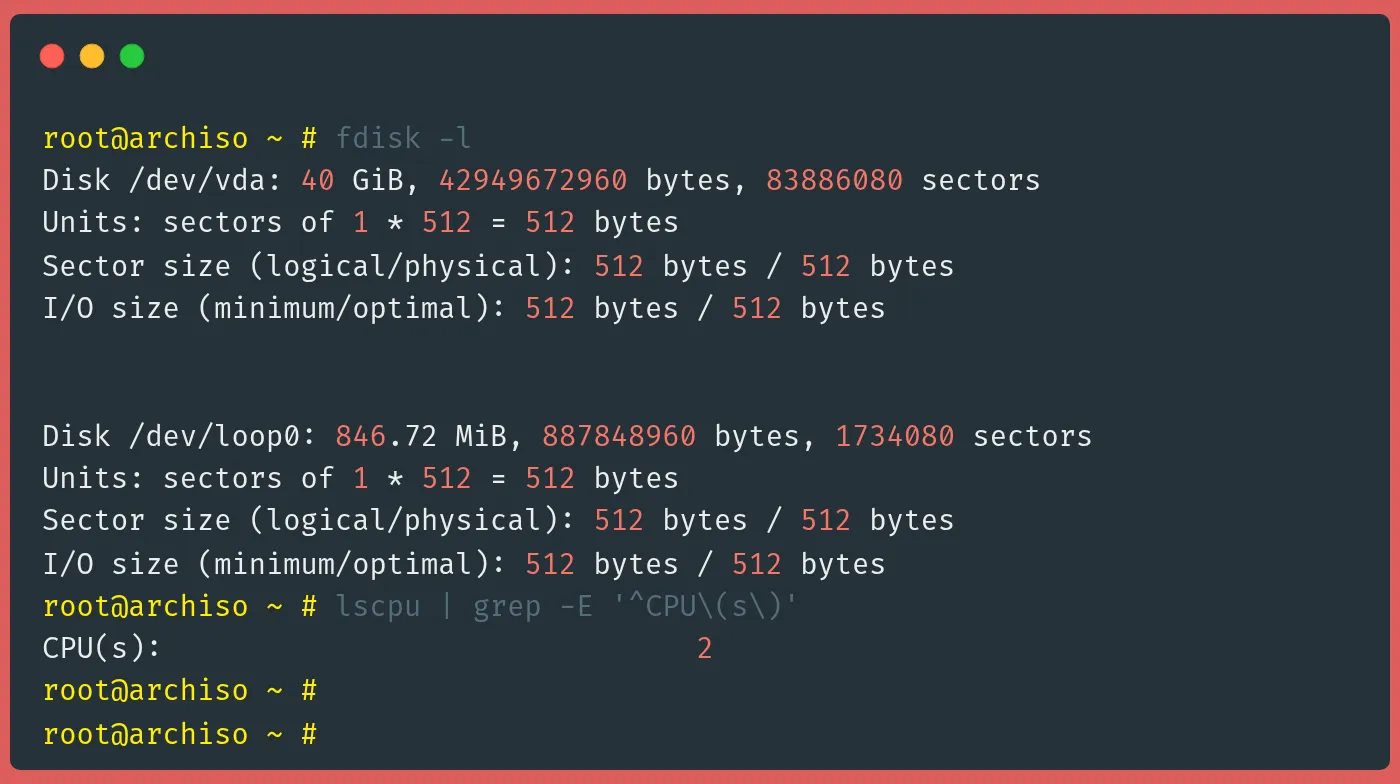
Now let's check what disks are available:
root@archiso ~ # fdisk -lOutput:
Disk /dev/vda: 40 GiB, 42949672960 bytes, 83886080 sectors
Units: sectors of 1 * 512 = 512 bytes
Sector size (logical/physical): 512 bytes / 512 bytes
I/O size (minimum/optimal): 512 bytes / 512 bytes

Disk /dev/loop0: 846.72 MiB, 887848960 bytes, 1734080 sectors
Units: sectors of 1 * 512 = 512 bytes
Sector size (logical/physical): 512 bytes / 512 bytes
I/O size (minimum/optimal): 512 bytes / 512 bytes
This command lists all disk devices in the VM. We can see our 40GB virtual disk as /dev/vda - this is where we'll install Arch. The loop0 device is part of the live ISO environment. Notice how the virtual disk appears just like a regular disk would. That's the beauty of virtualization.
Let's verify our CPU configuration:
lscpu | grep -E '^CPU\(s\)'
Output:
CPU(s): 2This confirms our VM has exactly 2 vCPUs as we configured with the --vcpus 2 parameter.
The VM sees these as regular CPUs, but they're actually virtual cores allocated from your VPS's physical resources.
If your VM workload needs more processing power, you can always shut down and reconfigure with more vCPUs.
I typically match the number of vCPUs to what the workload needs. More isn't always better since excess vCPUs can cause scheduling overhead.
Warning
When running
virt-install, do not detach from the console or close the terminal until the installation is complete. Detaching before completing could leave you with an unbootable disk image.
With the VM running, you can now continue with your Arch Linux installation process as usual.
Step 8: Disconnecting and Connecting to the VM Console
After you install your ISO image, you can detach from the VM console without shutting down the VM by pressing Ctrl+].
You'll then see this message:
Domain is still running. Installation may be in progress.
You can reconnect to the console to complete the installation process.
This message confirms the VM is still running in the background, and you've just disconnected from its console.
This is super useful when you need to check something on your VPS or if your SSH connection is unstable.
To reconnect to the VM console, use the followin:
sudo virsh console arch-vmWait briefly then press ENTER. This reconnects you to the VM's console so you can continue the installation.
The VM has been running the whole time, you're just reattaching your terminal to it. Think of it like plugging a monitor back into a running computer.
If you get this error:
error: operation failed: Active console session exists for this domainIt means your previous console session wasn't properly closed. This usually happens if your SSH connection dropped abnormally. To force a connection:
sudo virsh console --force arch-vmWait briefly then press ENTER.
If that doesn't work, you can restart the libvirt daemon:
sudo systemctl restart libvirtd
sudo virsh console arch-vm
Or reset just your VM:
sudo virsh destroy arch-vm
sudo virsh start arch-vm
sudo virsh console arch-vm
This set of commands forces a proper reset of your VM and its console connection. The destroy command is misleadingly named - it just forces a power off, not an actual deletion.
Be careful though, as it's like pulling the plug on a physical computer.
I've had to use this approach a few times when my internet connection dropped during a long installation. It's a lifesaver, but you might lose unsaved work in the VM.
Step 9: Managing Your VM
You have several options for managing your VM from the VPS.
To shut down the VM from inside:
shutdown -h nowThis properly shuts down the VM from inside the guest OS. It's like pressing the power button and selecting shutdown. All services stop cleanly. This is the preferred method as it gives the guest operating system a chance to save data and shut down services properly.
To list all the currently running virtual machines:
sudo virsh listThis command shows all running VMs managed by libvirt. you can use this to check if your VM is still running. It's a quick way to get a status report of all active VMs on your system. You can add the --all flag to see inactive VMs too.
To gracefully shut down a VM:
sudo virsh shutdown arch-vmThis sends a signal to the VM's operating system to shut down properly. It's polite and prevents data loss. This is equivalent to pressing the power button on a physical machine that's configured to trigger a clean shutdown.
To force power off a VM:
sudo virsh destroy arch-vmThis immediately cuts power to the VM - like unplugging a physical computer. Use this only when the VM is frozen or won't respond to a normal shutdown. Again, while the name destroy sounds scary, it only destroys the running instance, not the VM definition or storage.
To start a VM:
sudo virsh start arch-vmThis powers on a stopped VM. If the VM was shut down previously, it will boot normally. It's the equivalent of pressing the power button on a physical machine that's turned off.
To connect to the VM's console:
sudo virsh console arch-vmThis connects you to the VM's serial console, giving you a terminal interface to the VM. It's essential for headless setups without graphics. Remember to use Ctrl+] to disconnect when you're done.
These commands give you complete control over your VM's lifecycle. I recommend using shutdown commands whenever possible rather than destroy, as sudden power loss can sometimes corrupt filesystems.
Important Tips for VM Management
- Never close the SSH session by force closing your terminal when in a VM console. Always use
Ctrl+]first to detach. - If you're setting up the VM for the first time and want to exit temporarily, use
Ctrl+]to detach. The VM installation will continue running in the background. - If you get disconnected from SSH unexpectedly, you can reconnect and use
sudo virsh console --force arch-vmto reattach. - Take snapshots before making major changes to your VM. You can use
virsh snapshot-create-asto create a point-in-time backup you can roll back to. - Monitor your VM's resource usage with tools like
virt-top(you may need to install it separately withapt install virt-top). - For VMs you plan to use long-term, consider configuring them to autostart with your VPS by using
virsh autostart arch-vm.
Conclusion
You've now successfully set up nested virtualization on your VPS and installed Arch Linux in a VM! This powerful setup opens up a world of possibilities - from creating isolated development environments to testing deployments across different OS configurations without needing multiple physical servers.
The skills you've learned here apply to virtually any Linux distribution, not just Arch. You can use the same techniques to run Ubuntu, Debian, CentOS, or even Windows VMs inside your VPS.
Ready to start with an affordable VPS? See our nested virtualization plans →
FAQ
What is the minimum VPS size needed for nested virtualization?
For a decent experience, I recommend at least 32GB RAM and 8 vCPUs on your host VPS. For running multiple nested VMs simultaneously, 48GB+ RAM is better.
Will nested virtualization affect my VPS performance?
Yes, there's some overhead. Nested VMs typically show about 10-15% performance degradation compared to direct VMs. CPU-intensive operations in nested VMs will use more resources than expected. I've found memory-heavy applications suffer the most performance impact.
Can I run Windows VMs with this setup?
Absolutely! Just substitute the Arch ISO with a Windows ISO. Windows VMs typically need more resources though - I'd allocate at least 4GB RAM and 40GB disk space for a Windows VM. You'll also need to use the --graphics vnc option instead of the console approach we used for Arch.
My VM console isn't showing any output after boot. What's wrong?
You probably missed adding the console=ttyS0 parameter at the boot menu. You can shutdown the VM with virsh destroy and start again. I've made this mistake countless times when setting up new VMs.
Is nested virtualization secure?
Generally yes, but it does add another layer of complexity to security. Each layer of virtualization introduces potential new attack vectors. Always keep VMs updated and isolate critical VMs on separate networks. Never expose management interfaces directly to the internet.
A note about tutorials: We encourage our users to try out tutorials, but they aren't fully supported by our team—we can't always provide support when things go wrong. Be sure to check which OS and version it was tested with before you proceed.
If you want a fully managed experience, with dedicated support for any application you might want to run, contact us for more information.