
phpMyAdmin is a free software tool written in PHP that allows you to manage MySQL via a Web interface. phpMyAdmin supports both MySQL and MariaDB. With the phpMyAdmin web interface, you can manage databases, tables, columns, relations, indexes, users, permissions, etc. Additionally, it also gives you the ability to directly execute SQL statements for more complex operations.
Prerequisites
- Basic knowledge of the Linux command line.
- A Debian 11 server with a non-root user with
sudoprivileges. You can get affordable, and powerful Debian servers from our website, and you can check out our How to access your server using SSH guide to learn how to access your server and create asudouser. - The LAMP stack (Linux, Apache, MySQL, and PHP) installed on your server. Use our Installing LAMP on Ubuntu 22.04 LTS guide to set it up.
Note: You can use our LAMP 1-Click App to set up LAMP automatically when creating a server. Just visit our website, choose a server, and while prompted to choose the operating system, choose LAMP from the dropdown menu, complete your checkout, and in a couple of minutes our algorithms will take care of all the complex technicalities for you.
- A TLS/SSL certificate, because phpMyAdmin can access sensitive information about your infrastructure, and an unsecure HTTP connection will make your server extremely vulnerable.
Step 1: Updating the Package Cache and Installing Nano
Start by updating the packages in the package manager cache to the latest available versions using the following command:
sudo apt updateNext install the Nano editor which you'll later use in this article:
sudo apt -y install nanoStep 2 — Installing phpMyAdmin
Before you install phpMyAdmin, you may want to check whether you can access the MySQL command line interface using the root password and normal authentication. To do this, run the following command:
sudo mysqlIf you get an error that contains Access denied for user 'root', this means that the default authentication method has changed, and connecting to MySQL requires a password for the root account. To solve this issue, use the following command to connect to MySQL using the root user and a password:
mysql -u root -pYou'll be asked for your MySQL root password, enter it and then press Enter.
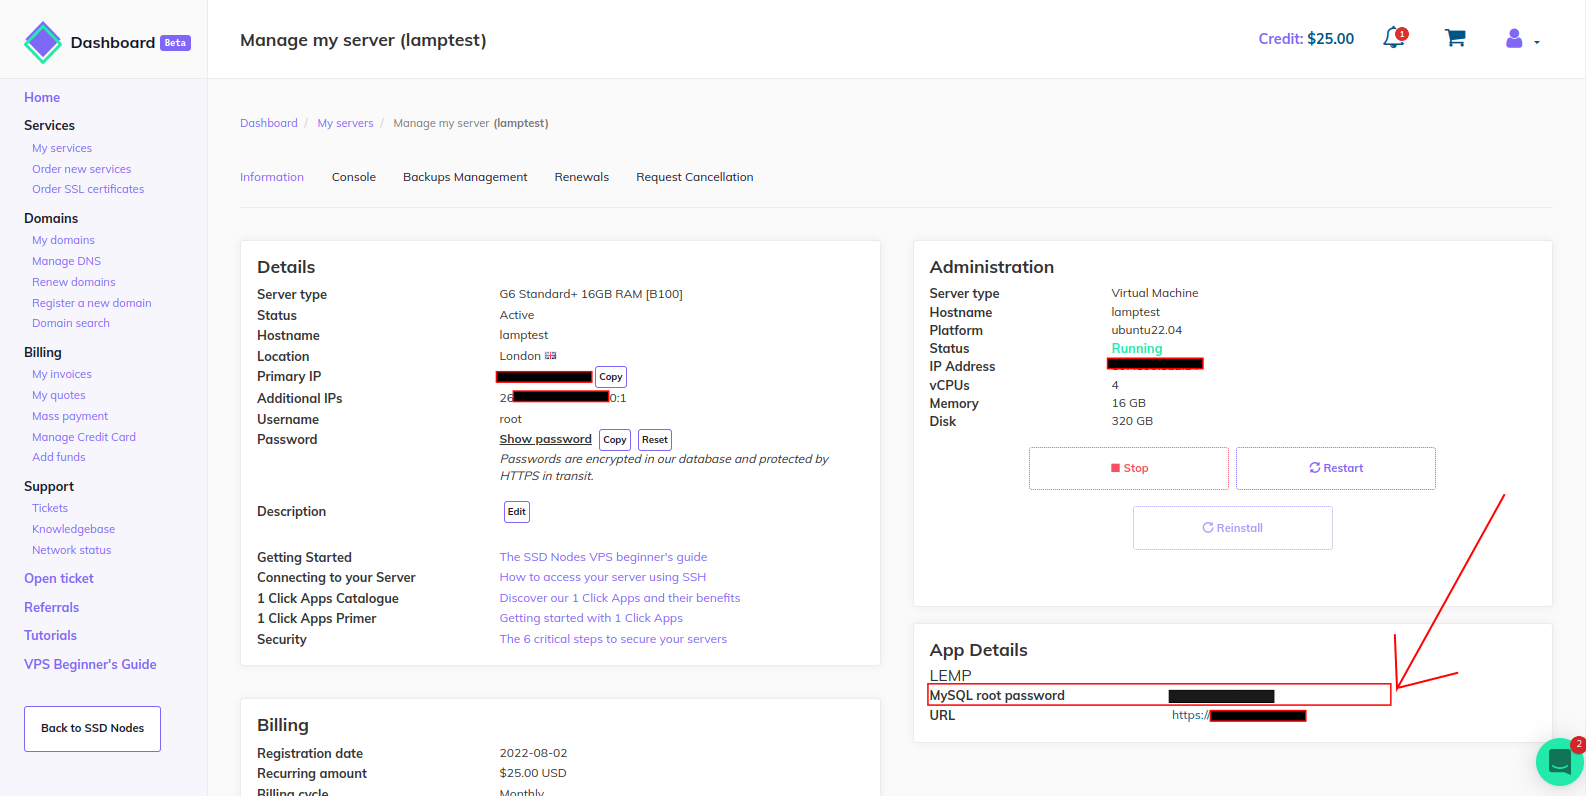
Note: If you've installed the LAMP stack using our 1-Click App, you'll find your MySQL root password in the App Details widget on your SSDNodes Dashboard. As demonstrated in the following image:
Once the MySQL prompt opens, temporarily remove the root password. You will later run mysql_secure_installation to secure your MySQL installation once phpMyAdmin is installed.
SET PASSWORD FOR root@localhost=PASSWORD('');Next, exit the MySQL interface:
exit;To install phpMyAdmin, you also need to install some PHP extensions needed for it to properly work. Use the following command to install phpMyAdmin and its dependencies:
sudo apt install phpmyadmin php-mbstring php-zip php-gd php-json php-curlHere you install phpmyadmin and the following packages:
php-mbstring: A package that provides the MBSTRING module for PHP, which is used to manage non-ASCII strings.php-zip: Provides a Zip module for PHP. Zip is a tool that is used to archive and compress files.php-gd: Provides a GD module for PHP. The GD library is a library that offers graphics drawing tools to manage image data.php-json: Provides PHP with support for JSON serialization.php-curl: Provides a CURL module for PHP. CURL is used in command lines and scripts to transfer data through URLs.
Some of the dependencies above may already be installed on your server if you followed our Installing LAMP on Ubuntu 22.04 LTS guide.
During the installation, you'll be asked to configure the server, hit SPACE on the apache2 option, then TAB, then ENTER to set Apache as the server.
When asked whether to use dbconfig-common, select Yes.
Next, you will be asked to create a MySQL password for phpMyAdmin. Set a strong password and confirm it.
This will add an Apache configuration file for phpMyAdmin in the /etc/apache2/conf-enabled/ directory.
Next, in case you removed the root password earlier, run the mysql_secure_installation command to secure your MySQL installation:
sudo mysql_secure_installationYou’ll be asked for your current root password:
In order to log into MariaDB to secure it, we'll need the current
password for the root user. If you've just installed MariaDB, and
haven't set the root password yet, you should just press enter here.

Enter current password for root (enter for none):
Tap Enter.
Next, you'll be asked whether you want to use the unix_socket authentication method:
OK, successfully used password, moving on...

Setting the root password or using the unix_socket ensures that nobody
can log into the MariaDB root user without the proper authorisation.

Switch to unix_socket authentication [Y/n]
Tap Y to enable unix_socket authentication for better security.
Next, you'll be asked to change the root password:
Enabled successfully!
Reloading privilege tables..
 ... Success!

Change the root password? [Y/n]
Tap Y to set a new password for root, and re-enter it for validation.
Next, you'll be asked to remove anonymous users:
Change the root password? [Y/n] y
New password:
Re-enter new password:
Password updated successfully!
Reloading privilege tables..
 ... Success!

By default, a MariaDB installation has an anonymous user, allowing anyone
to log into MariaDB without having to have a user account created for
them.  This is intended only for testing, and to make the installation
go a bit smoother.  You should remove them before moving into a
production environment.

Remove anonymous users? [Y/n]
Tap Y to remove the anonymous users that come with your MariaDB installation.
Next, you’ll be asked whether you want to disallow remote root logins:
Remove anonymous users? [Y/n] y
 ... Success!

Normally, root should only be allowed to connect from 'localhost'.  This
ensures that someone cannot guess at the root password from the network.

Disallow root login remotely? [Y/n]
Tap Y to disable remote root login.
Next, you’ll be asked whether you want to remove the test database that comes with your MariaDB installation:
Disallow root login remotely? [Y/n] y
 ... Success!

By default, MariaDB comes with a database named 'test' that anyone can
access.  This is also intended only for testing, and should be removed
before moving into a production environment.

Remove test database and access to it? [Y/n]
Tap Y to remove your MariaDB test database and disable access to it.
In order for the changes you've made to take effect, you’ll be asked to reload your MariaDB privilege tables:
Remove test database and access to it? [Y/n] y
 - Dropping test database...
 ... Success!
 - Removing privileges on test database...
 ... Success!

Reloading the privilege tables will ensure that all changes made so far
will take effect immediately.

Reload privilege tables now? [Y/n]
Tap Y to reload your MariaDB privilege tables. This will ensure that your changes will take effect immediately.
Reload privilege tables now? [Y/n] y
 ... Success!

Cleaning up...

All done!  If you've completed all of the above steps, your MariaDB
installation should now be secure.

Thanks for using MariaDB!
With this, your MySQL/MariaDB installation is more secure than before, provided that you follow security best practices.
Next, continue the phpMyAdmin configuration by enabling the mbstring PHP extension with the following command:
sudo phpenmod mbstringThen restart Apache:
sudo systemctl restart apache2With this, PHPMyadmin is now installed and configured with Apache. Next, you will need to configure MySQL privileges so that your MySQL users can interact with PHPMyadmin.
Step 3: Configuring a MySQL User for PHPMyadmin
PHPMyadmin is accessible by default with a user called phpmyadmin. But it is generally recommended that you create a dedicated MySQL user to manage your databases with the phpmyadmin web interface.
First, open up the MySQL command line interface:
sudo mysqlIf you get an error that contains Access denied for user 'root', this means that the default authentication method has changed, and connecting to MySQL requires a password for the root account. To solve this issue, use the following command to connect to MySQL using the root user and a password:
mysql -u root -pYou'll be asked for your MySQL root password, enter it and then press Enter.
Note: If you've installed the LAMP stack using our 1-Click App, you'll find your MySQL root password in the App Details widget on your SSDNodes Dashboard. As demonstrated in the following image:
Once the MySQL prompt opens, create a new user with a strong password using the following command:
CREATE USER 'your_user'@'localhost' IDENTIFIED BY 'your_password';Make sure to replace your_user and your_password with the appropriate values of your choice.
Next, grant your new user administrative privileges:
GRANT ALL PRIVILEGES ON *.* TO 'your_user'@'localhost' WITH GRANT OPTION;Exit the MySQL command line interface:
exitWith this, you can now navigate to your phpmyadmin web interface with the following URL (changing your_domain_or_IP with your domain or your server's IP address):
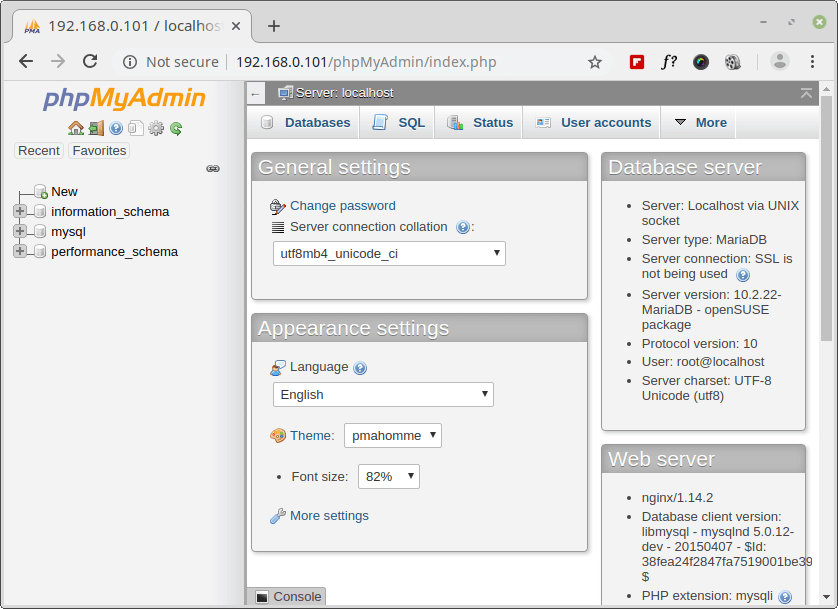
https://your_domain_or_IP/phpmyadminYou will see a login screen as follows:

Once you login with the credentials you specified earlier, you'll be taken to the phpmyadmin dashboard:
Step 4: Configuring HTTP Authentication for Additional Security
Because PHPMyadmin can access and manage all of your databases, it is extremely important to secure it. One way of adding additional security to PHPMyadmin is by adding another security layer using basic HTTP authentication, which requires users to authenticate before they access the PHPMyadmin login screen.
To use HTTP authentication, you can use the Apache's .htaccess file. First, enable .htaccess by modifying your PHPMyadmin's Apache configuration:
sudo nano /etc/apache2/conf-available/phpmyadmin.confFind the section, and then add the AllowOverride All
<Directory /usr/share/phpmyadmin>
    Options SymLinksIfOwnerMatch
    DirectoryIndex index.php
    AllowOverride All
Save and close the file.
Restart Apache:
sudo systemctl restart apache2Next create a .htaccess file inside your phpmyadmin directory:
sudo nano /usr/share/phpmyadmin/.htaccessType the following into this file:
AuthType Basic
AuthName "Restricted Files"
AuthUserFile /etc/phpmyadmin/.htpasswd
Require valid-user
Here, AuthUserFile sets the location of your password file. This is the password you'll use for authentication.
Save and close the file.
To create the password file, use the htpasswd tool passing a username of your choice as follows:
sudo htpasswd -c /etc/phpmyadmin/.htpasswd your_usernameRemember to change your_username to a username of your choice.
You'll be asked to provide and confirm a password. Type in a strong password, confirm it, and then tap ENTER.
Restart Apache again for this new authentication method to work:
sudo systemctl restart apache2Now, visiting your phpmyadmin URL will ask you for a second layer of authentication before you can access the phpmyadmin login screen:
https://your_domain_or_IP/phpmyadminCongrats
You've successfully installed phpmyadmin on your Debian 11 server, and you can now manage your MySQL database with a web interface. For more information on phpmyadmin, check out their official website.
Important Note
What we’ve done in this article is suitable for testing purposes and personal use, whereas if you want to publish your site to production, and securely process your customers’ online transactions, we do suggest you check our Secure Your Site Using HTTPS blog article, that explains in detail how to secure your site with SSL certificates.
Reader Alert!
If you feel that the technical instructions in this tutorial are time-consuming, or beyond your expertise, you can choose a very convenient and practical solution, ready-made, fully and professionally tested, and developed by SSD Nodes (That is us 😊). Just visit our website, choose the server’s specifications that fit your needs, and while prompted to choose among the operating systems and the 1-Click Applications we have, choose phpmyadmin from the dropdown menu, complete your checkout, and in a couple of minutes our algorithms will take care of all the technical aspects smoothly and effortlessly, just for you!
Bonus: All our 1-Click applications are now installed with an active HTTPS self-signed certificate!
Way more practical, smooth, and headacheless, isn’t it?