
Do you want to get WordPress with LEMP and MariaDB running on your Ubuntu server in no time? Well, you can do so with this detailed tutorial.
Installing WordPress with LEMP and MariaDB on Ubuntu
To install WordPress with LEMP and MariaDB on Ubuntu, you will set up a WordPress MariaDB database, install the required PHP packages, download WordPress, configure the web server and MariaDB database, and then complete the installation through the WordPress web interface.
Note
If you want to skip all the technical steps of setting up WordPress on your server and have it installed in minutes, then I have some great news for you! Our team of engineers has prepared a ready-to-use 1-click WordPress application for your convenience. Just choose a server, and while prompted to choose the operating system, choose WordPress from the dropdown menu. This will set up WordPress in minutes!
Prerequisites for Installing WordPress with LEMP and MariaDB
To install WordPress with the LEMP stack and MariaDB database, you need the following:
- An Ubuntu 24.04 server. We offer the globe's absolute lowest cost Ubuntu servers!
- Root access to your server or a
sudouser. Check out our How to access your server using SSH guide to learn how to access your server and create asudouser. - The LEMP stack installed on your server. Use our Installing LEMP on Ubuntu 22.04 LTS guide to set it up. Or you can use our LEMP 1-Click Application to get started in minutes! Just choose a server, and while prompted to choose the operating system, choose LEMP from the dropdown menu.
Step 1 - Updating the Package Cache
Before you install WordPress with LEMP and MariaDB, you need to update your Ubuntu packages in the package manager cache to the latest available versions using the following command:
sudo apt updateStep 2 - Creating a WordPress MariaDB Database and User
WordPress needs a MySQL database to store your site's data, such as user information, posts, pages, etc. In this tutorial we'll use MariaDB, which is a compatible drop-in replacement for MySQL but with more features.
To create a MySQL/MariaDB database, use the mysql client to connect to MariaDB and access its command line interface with the following command:
sudo mysqlIf you get an error that contains Access denied for user 'root', this means that the default authentication method has changed, and connecting to MariaDB requires a password for the root account. To solve this issue, use the following command to connect to MariaDB using the root user and a password:
mysql -u root -pYou'll be asked for your MySQL root password, enter it and then press Enter.
Note: If you've installed the LEMP stack using our 1-Click App, you'll find your MySQL root password in the App Details widget on your SSDNodes Dashboard. As demonstrated in the following image:
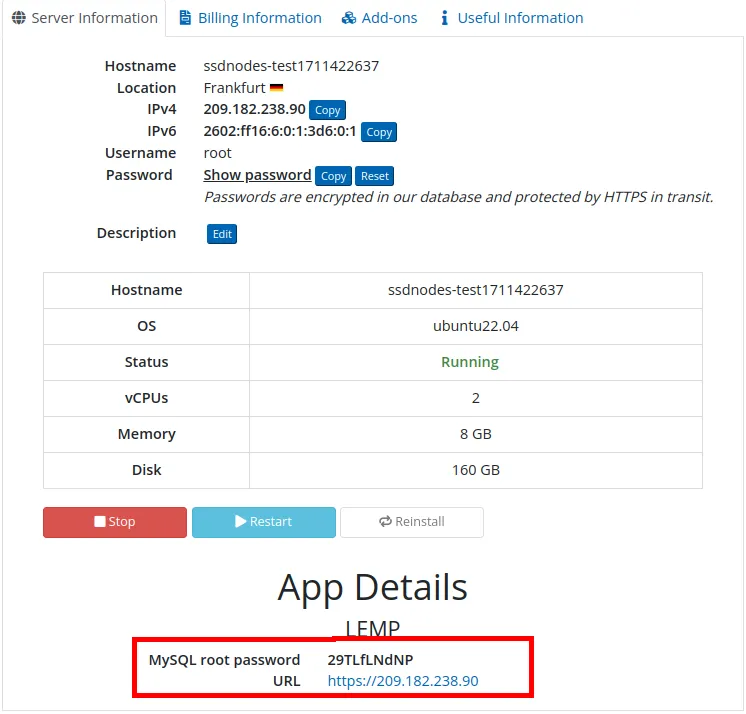
You should get a prompt similar to the following:
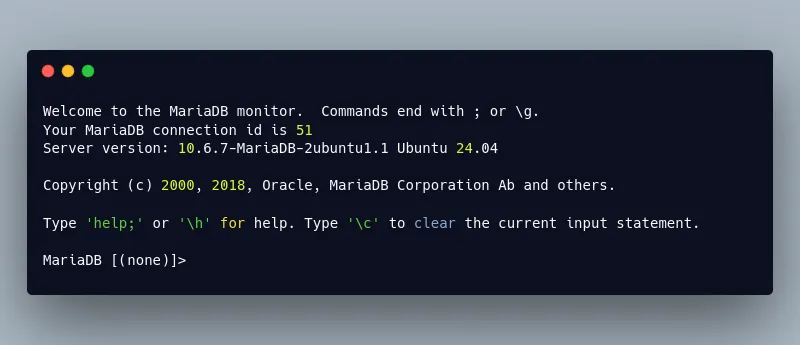
Now you can create a database for WordPress. We'll name the database wordpress, but feel free to use your site's name, or any other name you would like, just make sure to remember it. Use the following MySQL statement to create a database named wordpress:
CREATE DATABASE wordpress DEFAULT CHARACTER SET utf8 COLLATE utf8_unicode_ci;This creates a database called wordpress with UTF-8 as a character set, which supports all alphabets and languages.
If you receive an error upon entering the preceding command, make sure you've typed it in correctly, and that you end it with a semicolon (;).
Next, you'll need to create a MariaDB user account that will manage this wordpress database. Only this one account can interact with the site's database, which is a good security best practice. For this new user, we'll use the name wp_user, but again, feel free to use another name of your choice.
To create a new MariaDB user account, use the following statement in the MariaDB command line interface. Remember to replace password with a strong password for your user account, or you might wake up some day to the news of your WordPress website transforming into an abnormal nightmare:
CREATE USER 'wp_user'@'localhost' IDENTIFIED BY 'password';Now, you'll need to give all access permissions to the user account that will manage your wordpress database:
GRANT ALL ON wordpress.* TO 'wp_user'@'localhost';Here, you use the GRANT ALL statement to grant all privileges on the wordpress database to your wp_user user.
Refresh the privileges for the preceding command to take effect and apply the permission changes to the database server:
FLUSH PRIVILEGES;Exit out of the MariaDB command line interface and return to the regular Linux shell with the following command:
EXIT;
With this, you have a MariaDB database and a MariaDB user account that can be used by your WordPress website to store data. Next, you'll install some important PHP packages that WordPress needs to function properly.
Step 3 - Installing Required PHP Extensions for WordPress
WordPress requires a few additional PHP packages to be installed, in addition to the PHP packages that were installed with the LEMP stack. In this step, you'll use the apt command to install the most important PHP extensions that WordPress uses.
Note: The PHP packages we'll install are required for basic WordPress usage, but many WordPress plugins that extend the basic functionalities of WordPress come with their own requirements, and may require additional PHP extension packages to be installed. Refer to the documentation of the specific plugin you want to install to find out its required packages and install them with apt using the method we'll demonstrate in this step.
To install the most important PHP extensions for WordPress, run the following command:
sudo apt install php-curl php-gd php-intl php-mbstring php-soap php-xml php-xmlrpc php-zip php-imagickHere, you install the following packages:
php-curl: Provides a CURL module for PHP. CURL is used in command lines and scripts to transfer data through URLs.php-gd: Provides a GD module for PHP. The GD library is a library that offers graphics drawing tools to manage image data.php-intl: Provides an Internationalisation module for PHP.php-mbstring: A package that provides the MBSTRING module for PHP, which is used to manage non-ASCII strings.php-soap: Provides the SOAP module for PHP. SOAP is an API architecture that uses the XML language to transfer data between software. Although it has been replaced by the more flexible REST architecture in most web services, SOAP is still used by some companies.php-xml: A package that provides a DOM, SimpleXML, WDDX, XML, and XSL module for PHP.php-xmlrpc: Provides a XMLRPC-EPI module for PHP. XML-RPC is a feature of WordPress that enables data to be transmitted via HTTP using XML for encoding.php-zip: Provides a Zip module for PHP. Zip is a tool that is used to archive and compress files.php-imagick: Imagick is a native php extension to create and modify images using the ImageMagick API.
Once the installation is complete, restart the php-fpm process for it to use the newly installed PHP extensions:
sudo systemctl restart php8.1-fpm.serviceNote: You may have another version of php-fpm installed on your system, so you might have to change 8.1 in the preceding command with your version of PHP. To check your php-fpm version, use the following command:
sudo systemctl status php* | grep fpm.serviceYou should receive the full name and version of your php-fpm service:

With this, the required PHP extensions are now installed. Next, you'll configure Nginx to serve WordPress.
Step 4 - Configuring Nginx to Serve WordPress
Now that our WordPress database and the PHP extensions are ready, we'll configure the Nginx web server to serve the pages and posts of our website. We'll create a new root web directory for WordPress files, and use a new Nginx configuration file made specifically for the website.
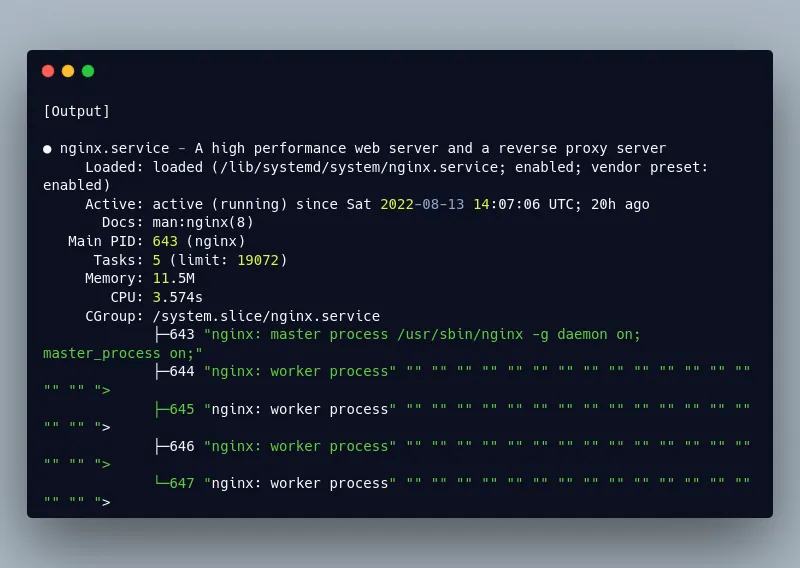
First check Nginx’s status with the following command:
sudo systemctl status nginxThe output should show that the Nginx service is enabled and running:
By default, Nginx is configured to serve files out of a root web directory located at /var/www/html. This default configuration is suitable for small single-site web servers. However, hosting multiple sites using this method will quickly become unmanageable and cumbersome. Instead, it is best to create a root web directory for each site you’d like to host on your web server. In this tutorial, we will create a root web directory for our WordPress website located at /var/www/wordpress. Again, feel free to use your site's name or some other name instead of wordpress for this root web directory, just remember to use the correct path in your Nginx configuration.
Use the following command to create a root web directory for your WordPress site, replacing wordpress with your site’s name if you want:
sudo mkdir /var/www/wordpressNext, open a new configuration file in Nginx’s sites-available directory, which is a directory that contains configuration for each of your sites. Again, make sure to replace wordpress with your name of choice:
sudo nano /etc/nginx/sites-available/wordpressPaste into it the following:
server {
    listen 80;
    listen [::]:80;
    server_name <domain_name_or_IP>;
    access_log off;
    location / {
        rewrite ^ https://$host$request_uri? permanent;
    }
}

server {
    listen 443 ssl;
    listen [::]:443 ssl;
    server_name <domain_name_or_IP>;
    root /var/www/wordpress;
    index index.php index.html index.htm index.nginx-debian.html;
    autoindex off;
    ssl_certificate /etc/ssl/certs/lemp.pem;
    ssl_certificate_key /etc/ssl/private/lemp.key;
    ssl_protocols TLSv1 TLSv1.1 TLSv1.2;
    ssl_ciphers HIGH:!aNULL:!MD5;

    location ~ \.php$ {
         include snippets/fastcgi-php.conf;
         fastcgi_pass unix:/var/run/php/php-fpm.sock;
         fastcgi_param SCRIPT_FILENAME $document_root$fastcgi_script_name;
         include fastcgi_params;
    }

    location / {
        try_files $uri $uri/ /index.php$is_args$args;
    }
    location = /favicon.ico { log_not_found off; access_log off; }
    location = /robots.txt { log_not_found off; access_log off; allow all; }
    location ~* \.(css|gif|ico|jpeg|jpg|js|png)$ {
        expires max;
        log_not_found off;
    }
}
Here, you have two server blocks representing configuration for two ports: port 80 which serves HTTP requests, and port 443 that serves HTTPS requests.
Notice that, in the HTTP configuration, you use the rewrite directive in the location block to redirect HTTP requests to HTTPS.
In the preceding configuration file, you set up the following:
listen: The port number Nginx will listen on. Here, you set its value to80in the HTTP server block, which is the port number assigned to HTTP. And you set it to443in the HTTPS server block, which is the port number for HTTPS.server_name: The domain names or IP addresses these two server block configurations should respond for. Make sure to replace `` with your domain name or IP address.access_log: Configures Nginx access logs, the special valueoffcancels allaccess_logdirectives on the current level.root: The root web directory, also known as the document root, that stores the files served by your website. Here, you set its value to/var/www/wordpress, which is the root web directory we created earlier, so make sure to set the proper value in your case.index: The order in which Nginx will prioritize index files for your website.autoindex: Configures Nginx auto indexing to enable or disable the ability to browse your files from the web browser. We set it tooffto disable auto indexing.ssl_certificate: The SSL certificate file path. See Secure Your Site Using HTTPS for more information.ssl_certificate_key: The path of your SSL certificate's private key file.ssl_protocols: The protocols that will be used by SSL.ssl_ciphers: The ciphers that will be used by SSL.location ~ \.php$: A location block that handles PHP processing. It tells Nginx to handle any HTTP request with a URL that ends with.phpwith the directives included in this location block. This effectively points Nginx to thefastcgi-php.confconfiguration file and thephp-fpm.sockfile, which declares the socket that is associated withphp-fpm.location /: The main location block, which includes atry_filesdirective, and it allows Nginx to route HTTP requests to the WordPressindex.phpfile.location = /favicon.ico: A location block for requests to/favicon.ico. Which you configure to disable logging for thefavicon.icofile.location = /robots.txt: A location block for requests to/robots.txt. Which you configure to disable logging for the/robots.txtfile.location ~* \.(css|gif|ico|jpeg|jpg|js|png)$: A location block to configure static files to be cached with the maximum value, which sets the browser cache expiration time in the far future. This is important because these static files are expensive resources to serve.
Next, you'll need to activate this Nginx server block configuration by linking your wordpress configuration file to the configuration file in Nginx’s sites-enabled directory using the following command:
sudo ln -s /etc/nginx/sites-available/wordpress /etc/nginx/sites-enabledTo check that your configuration file has been properly linked to Nginx’s sites-enabled directory, run the following command:
sudo ls -l /etc/nginx/sites-enabledYou should receive an output that’s similar to the following:
total 0
lrwxrwxrwx 1 root root 34 Aug 13 14:06 default -> /etc/nginx/sites-available/default
lrwxrwxrwx 1 root root 36 Aug 14 10:17 wordpress -> /etc/nginx/sites-available/wordpress
Here, you can see that your /etc/nginx/sites-available/wordpress configuration file has been successfully linked.
Next, unlink the default Nginx configuration from the /sites-enabled/ directory. This forces Nginx to use your wordpress configuration instead of the default configuration:
sudo unlink /etc/nginx/sites-enabled/defaultTo check that the default Nginx configuration has been properly unlinked from the sites-enabled directory, run the following command:
sudo ls -l /etc/nginx/sites-enabledYou should receive an output that’s similar to the following:
total 0
lrwxrwxrwx 1 root root 36 Aug 14 10:17 wordpress -> /etc/nginx/sites-available/wordpress
Here, you can see that the default configuration symlink is no longer in the sites-enabled directory, which means that it has been successfully unlinked.
Next, test your configuration’s syntax using the following command:
sudo nginx -tYou should receive an output that’s similar to the following:
nginx: the configuration file /etc/nginx/nginx.conf syntax is ok
nginx: configuration file /etc/nginx/nginx.conf test is successful
This output shows that there are no errors in the configuration file.
If you receive any errors, review your configuration file and make sure you’ve set your directives and values properly.
Next, reload Nginx for the changes you’ve made to take effect by running the following command:
sudo systemctl reload nginxYou now have Nginx configured to serve files from the /var/www/wordpress root web directory. Let's test the configuration using a test HTML file:
sudo nano /var/www/wordpress/test.htmlAdd the following HTML code to it:
<!DOCTYPE html>
<html lang="en">
<head>
    <meta charset="UTF-8">
    <title>Wordpress on LEMP Test Page</title>
</head>
<body>
    <h1>Test Page for WordPress Nginx Configuration</h1>
</body>
</html>
Save and close the file.
Use your browser to navigate to this test.html file:
https://<domain_name_or_IP>/test.htmlAs always, replace <domain_name_or_IP> with your domain name or IP address.
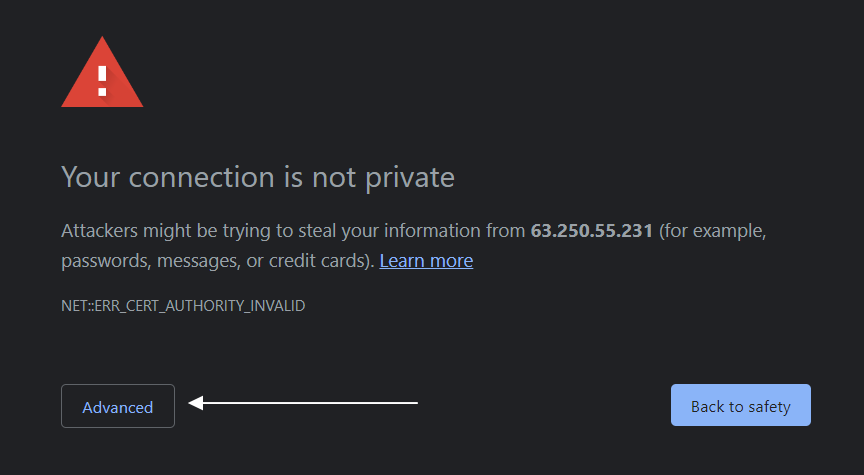
If you haven't set up an SSL certificate from a Certificate Authority like Let's Encrypt, you will receive a "Not Secure" error informing you that the connection to your server is not secure. This error message is normal because your website is encrypted and secured with a self-signed certificate, and the browser does not recognize it since your server is not one of its known certificate authorities.
Click the Advanced button or More information depending on the browser, and choose to proceed. The following is an example of the error in the Google Chrome browser:
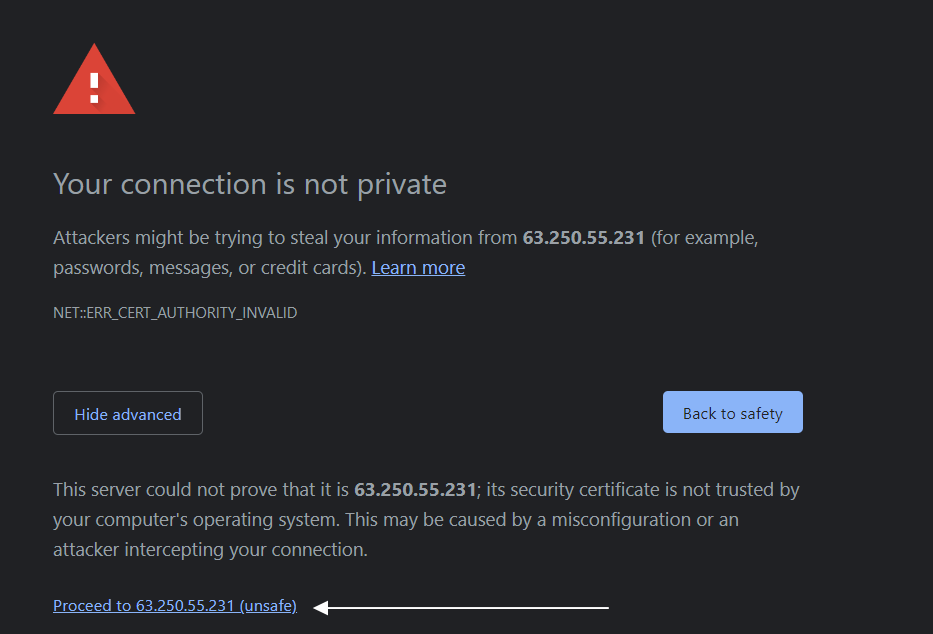
Once you proceed, you'll receive the message Test Page for WordPress Nginx Configuration. Which means that the Nginx configuration is correct.
To secure your WordPress website using a valid SSL certificate, check out the Creating and Installing a CA Certificate section of our Secure Your Site Using HTTPS with Self-Signed or CA SSL Certificates on Ubuntu article.
You now have Nginx configured and tested, and you can now download and install the WordPress files on your server and serve them with Nginx, which is what we'll do in the next step.
Step 5 - Downloading WordPress and Setting up its Configuration File
You've created a database for your WordPress site, installed the required PHP extensions, and configured Nginx. Now, you are ready to download WordPress files and set them up in your root web directory.
First go to your /tmp temporary directory, in which you'll download the WordPress release compressed in a tar.gz archive:
cd /tmpNext, use wget to download the latest WordPress release using the following command:
wget https://wordpress.org/latest.tar.gzOnce the download finishes, use the tar command line tool to extract the package:
tar -xzvf latest.tar.gzCheck that a new wordpress folder is in your /tmp directory and display its contents with ls:
ls /tmp/wordpressYou should see a list of files. These files represent the source code of WordPress.
The WordPress documentation recommends that you rename the wp-config-sample.php sample configuration file into wp-config.php, which is the file name WordPress uses for configuration. Use the following command to copy the wp-config-sample.php file into a file called wp-config.php to be used by WordPress:
cp /tmp/wordpress/wp-config-sample.php /tmp/wordpress/wp-config.phpNext, copy the contents of this wordpress directory into your /var/www/wordpress root web directory using the following command:
sudo cp -a /tmp/wordpress/. /var/www/wordpressNow check the contents of your /var/www/wordpress root web directory:
sudo ls -l /var/www/wordpressYou should receive an output similar to the following:
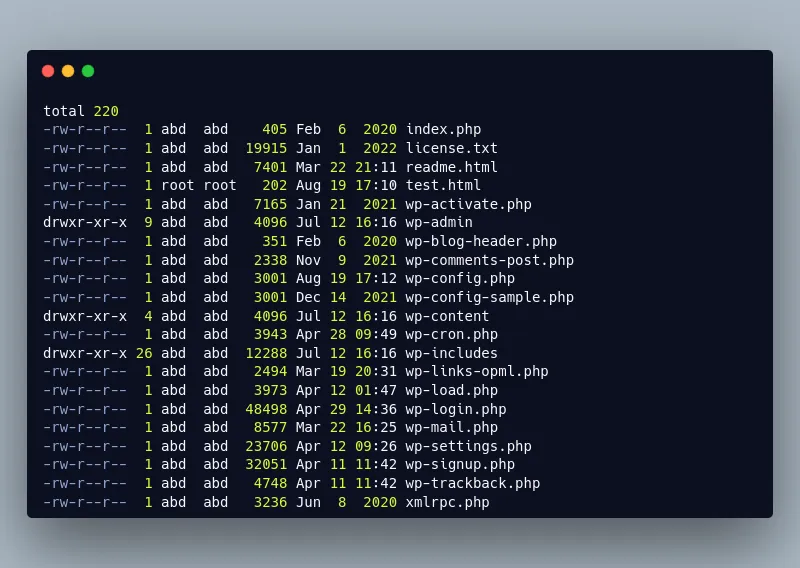
Nginx will need permissions to modify the /var/www/wordpress directory, so you'll need to assign its ownership to the www-data user and group, which is the user and group that Nginx uses. Run the following command to assign the root web directory to Nginx's user and group:
sudo chown -R www-data:www-data /var/www/wordpressWith this, WordPress code is in your root web directory, and Nginx has permission to modify it in order to serve and update it.
Configuring WordPress with MariaDB
Next, you'll need to set up some WordPress configurations for your site to function properly.
First, set up secret keys required for WordPress to enhance security. You can generate the required secret keys using an online service that WordPress provides. Use the following command to get random and secure secret keys from the WordPress API:
curl -s https://api.wordpress.org/secret-key/1.1/salt/You'll get random values similar to the following:
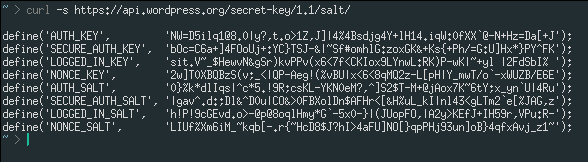
You can copy the keys you get and paste them into your wp-config.php configuration file.
Note: Do not share your unique secret keys with anyone!
Copy the keys you receive and open the wp-config.php configuration file:
sudo nano /var/www/wordpress/wp-config.phpFind the following section:
define('AUTH_KEY',         'put your unique phrase here');
define('SECURE_AUTH_KEY',  'put your unique phrase here');
define('LOGGED_IN_KEY',    'put your unique phrase here');
define('NONCE_KEY',        'put your unique phrase here');
define('AUTH_SALT',        'put your unique phrase here');
define('SECURE_AUTH_SALT', 'put your unique phrase here');
define('LOGGED_IN_SALT',   'put your unique phrase here');
define('NONCE_SALT',       'put your unique phrase here');
And replace the values with your unique secret keys.
Next, configure WordPress to use the database you created earlier. Look for the following lines in your configuration file, and set the proper values to them:
define( 'DB_NAME', 'wordpress' );

/** MySQL database username */
define( 'DB_USER', 'wp_user' );

/** MySQL database password */
define( 'DB_PASSWORD', 'password' );
Here you set the following configuration values:
DB_NAME: The database name you created in Step 2.DB_USER: The database user name.DB_PASSWORD: The database password.
Next, to allow Nginx to write files to your WordPress website, add the following line to wp-config.php. This forces WordPress to use direct file IO requests from within PHP. Make sure to add it before the line that instructs you to stop editing the configuration:
define( 'FS_METHOD', 'direct' );
/* That's all, stop editing! Happy publishing. */
Save and close the file.
You now have the required WordPress configuration. Next, we'll perform one last thing to finish up our WordPress installation journey, where you'll use the web interface that comes with WordPress to set up your website.
Step 6 - Finishing up Your WordPress & MariaDB Installation
You've created a MariaDB database, installed the required PHP extensions, configured the Nginx web server to serve your website, and configured your WordPress website through the wp-config.php file. It is now time to finish the installation through the WordPress web interface.
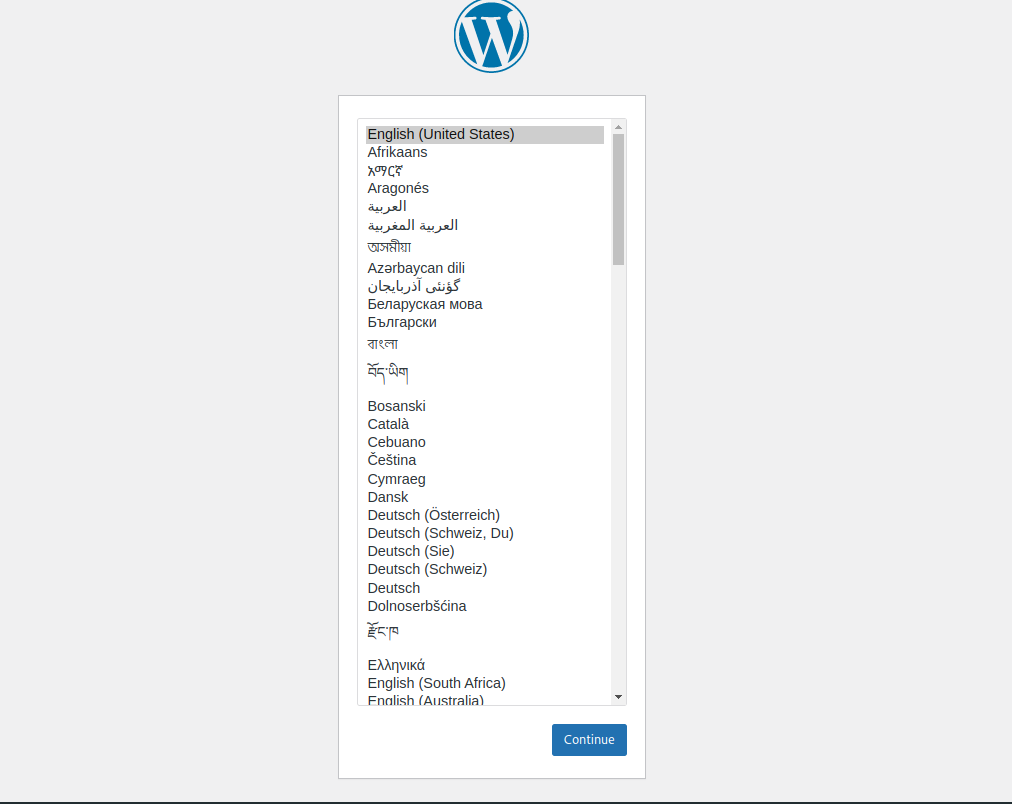
First, navigate to your website using your browser:
https://<domain_name_or_IP>/You'll receive a web form asking you to choose your WordPress site's language:
Next, you'll be asked to set a title for your website, a user name, a password, your email address, and search engine visibility. Set your preferred values and click Install WordPress.
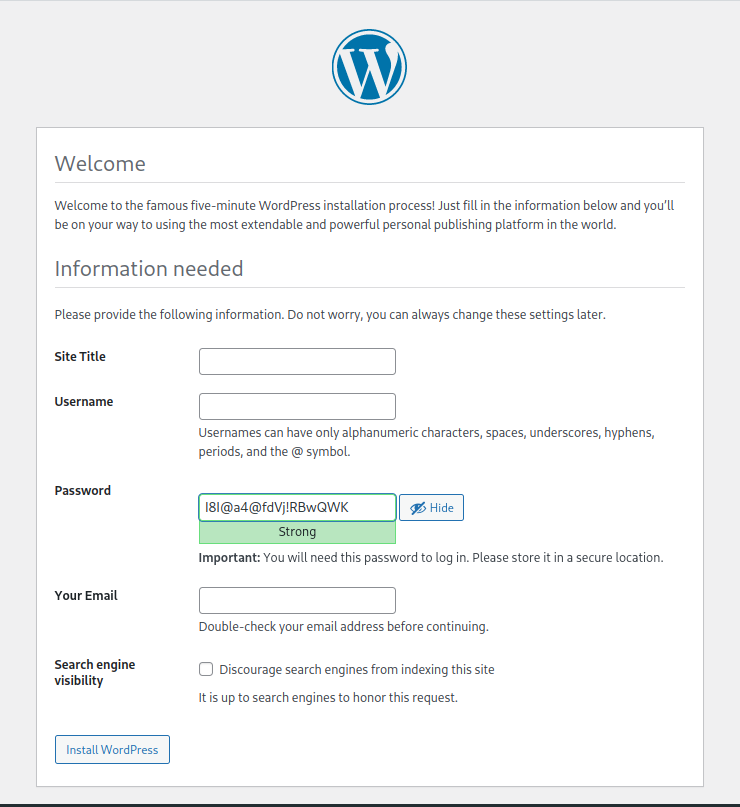
Note: For security reasons, it is recommended to choose a hard to guess username. Avoid using your first name or common names such as admin or administrator.
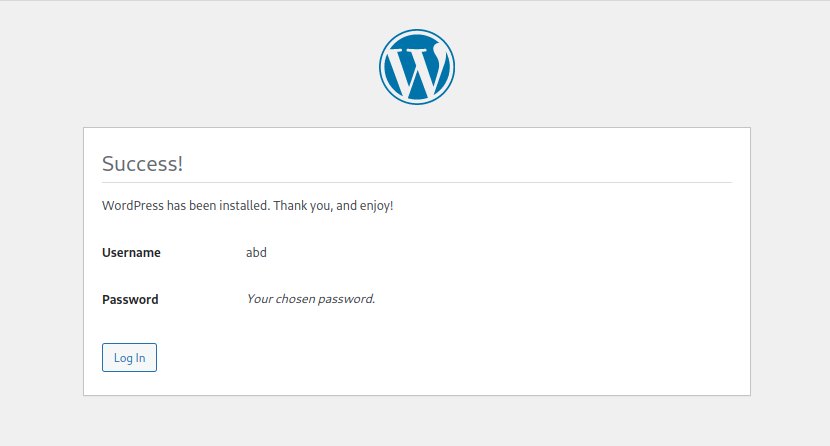
You'll be redirected to a page notifying you that the installation was successful, and asking you to login using the username and password you've set.
Logging in will take you to the WordPress dashboard:

Now visit your site with your web browser:
https://<domain_name_or_IP>/Your website is now officially online!
Congrats
You now have your very own place on the Internet! You can use your WordPress website to create a blog, an online shop, or an online gallery to show your amazing art, or whatever else you'd like!
Explore the WordPress dashboard to learn more about what you can do. For example, go to Appearance > Themes to select a new theme for your website.
Important Note
What we’ve done in this article is suitable for testing purposes and personal use, whereas if you want to publish your site to production, and securely process your customers’ online transactions, we do suggest you check our Secure Your Site Using HTTPS with Self-Signed or CA SSL Certificates on Ubuntu blog article.
Reader Alert!
If you feel that the technical instructions in this tutorial are time-consuming, or beyond your expertise, you can choose a very convenient and practical solution, ready-made, fully and professionally tested, and developed by SSD Nodes (That is us 😊). Just visit our website, choose the server’s specifications that fit your needs, and while prompted to choose among the operating systems and the 1-Click Applications we have, choose WordPress from the dropdown menu, complete your checkout, and in a couple of minutes our algorithms will take care of all the technical aspects smoothly and effortlessly, just for you!
Bonus: All our 1-Click applications are now installed with an active HTTPS self-signed certificate!
Way more practical, smooth, and headacheless, isn’t it?
A note about tutorials: We encourage our users to try out tutorials, but they aren't fully supported by our team—we can't always provide support when things go wrong. Be sure to check which OS and version it was tested with before you proceed.
If you want a fully managed experience, with dedicated support for any application you might want to run, contact us for more information.