
Configuring a Webmin Let's Encrypt setup to secure your connections via HTTPS is vitally important for your server security, as Webmin manages highly sensitive infrastructure on your Linux VPS.
In this guide, I’ll walk you through a quick Webmin HTTPS setup via a TLS/SSL certificate, where you will install Let’s Encrypt on Webmin, which is now easier than ever.
Prerequisites for Installing Let's Encrypt on Webmin
Before you proceed with installing Let’s Encrypt, you’ll need:
- A VPS running Linux. You can get affordable VPS hosting through our website.
- A domain name. You can purchase one directly from your SSD Nodes dashboard, where you will be able to easily manage it.
- Webmin installed on your VPS. Check out How to Install Webmin on Ubuntu 24.04 for a full guide, or if you want it installed in less than a minute, follow the steps below.
To get a reliable Linux VPS with Webmin pre-installed, go to our homepage, choose a server of your choice and click Customize Your Server:
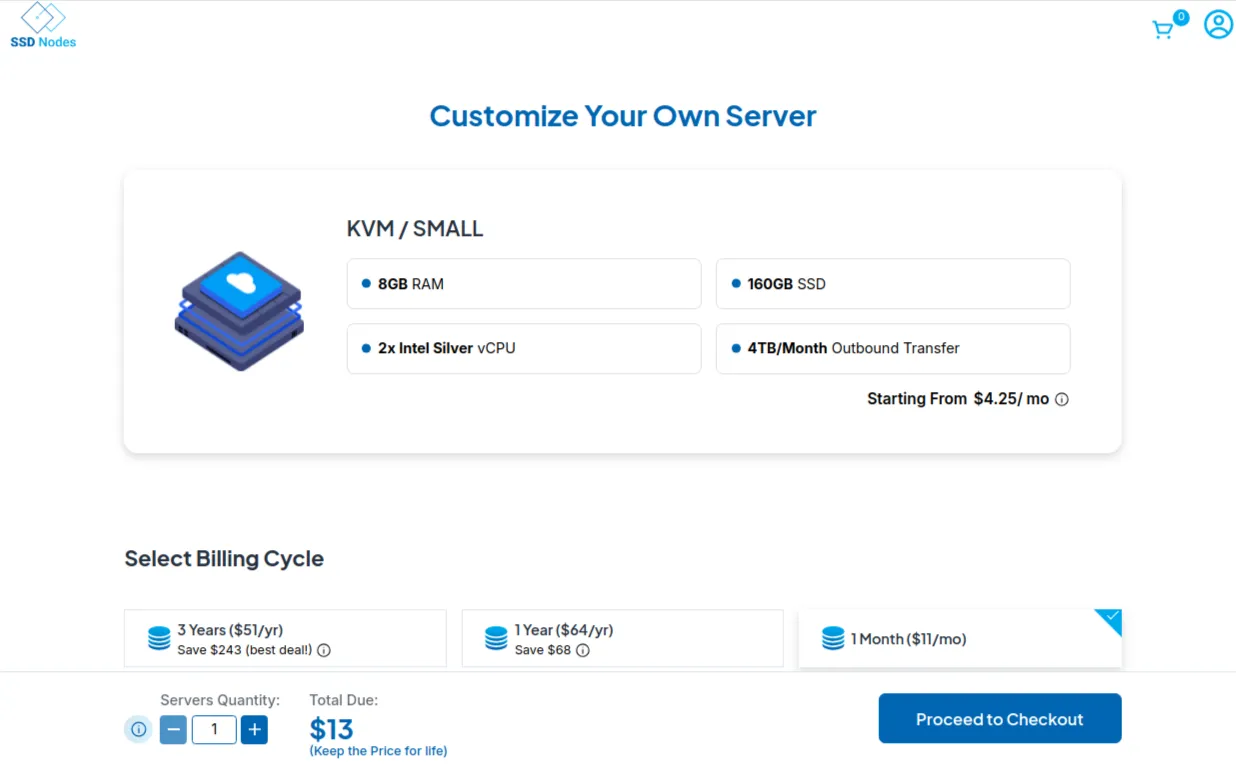
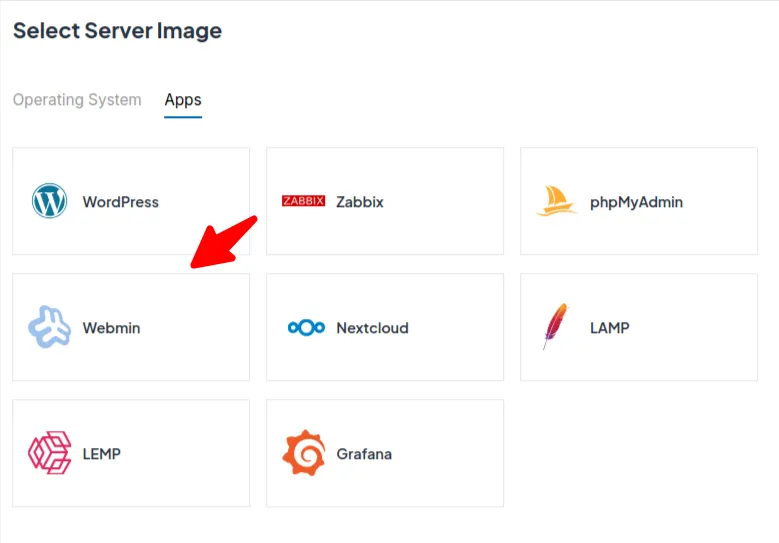
Choose a suitable location among our 14 locations worldwide, then under Select Server Image, Click Apps, and choose Webmin, then proceed to checkout:
And congratulations! You’ll have Webmin installed on your VPS in no time.
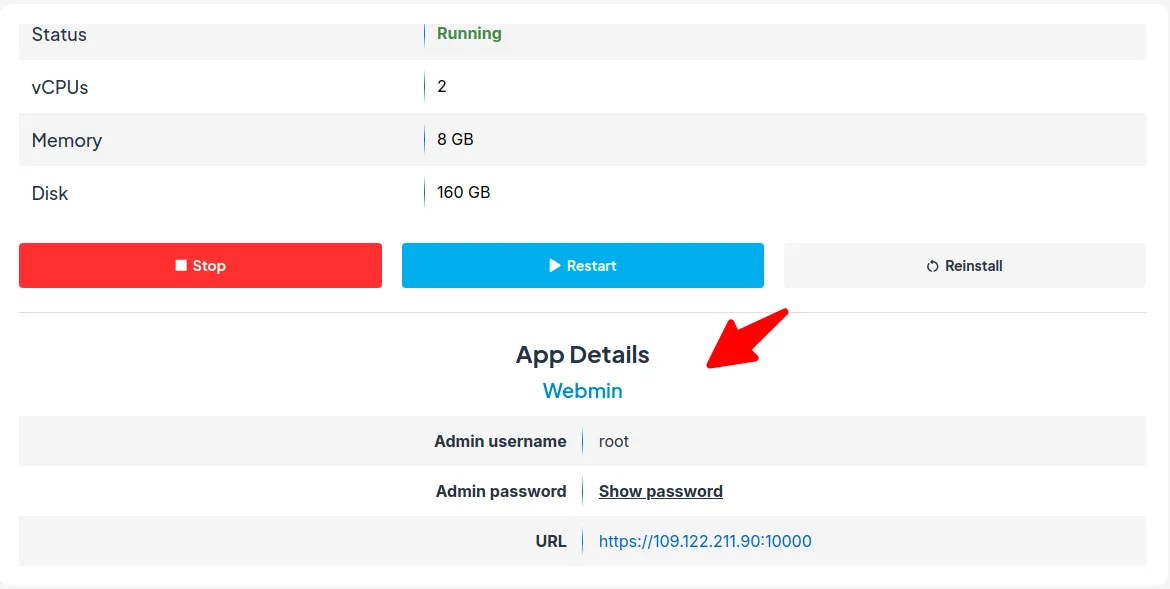
To access Webmin, use the URL in the App Details section in your SSD Nodes dashboard:
Deploy Your Webmin VPS With Us And Save $5000+
Did you know that we are the most affordable VPS provider in the market? We provide powerful cheap VPS hosting for all your hosting needs. You can save up to $5000 with us over the course of three years! Stop overpaying for your VPS and check out the SSD Nodes hosting pricing page for more information.
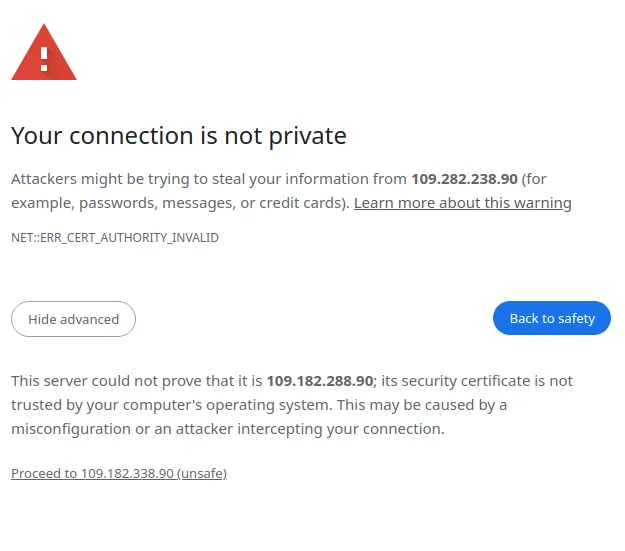
When you first access Webmin, your browser will show a security warning because Webmin uses a self-signed SSL certificate by default. We'll fix this warning by installing a trusted Let's Encrypt certificate in the next steps. For now, just click "Advanced" or "More Information" in your browser, then "Proceed" to continue to the login page:
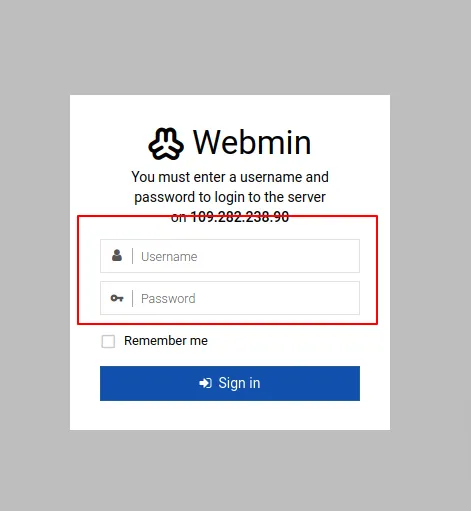
Once you proceed, you’ll have access to the Webmin login page:
With Webmin now installed on your VPS, you can move on to installing Let’s Encrypt on it to securely manage your server via HTTPS. I will cover a simple way of doing this in the next few sections.
Webmin Let's Encrypt Setup: Installing the SSL Certificate for HTTPS Security
To install a Let's Encrypt SSL certificate in Webmin, you'll first access Webmin with default credentials, then set your hostname to match your domain, generate a certificate through Webmin's SSL Encryption settings, and finally restart Webmin to apply the changes. The process requires a web server for domain validation.
Step 1: Access Webmin - Default Credentials & Password Reset
Webmin Default Credentials
The Webmin default credentials are the same as your Unix system credentials. You can log in with your Unix username and its corresponding password, or use the root account (root username with root password). After successful authentication, Webmin will redirect you to the dashboard. For better security, I recommend changing these default credentials immediately after your first login.
Reset the Password on Webmin
To reset your Webmin password, navigate to Webmin > Webmin Users in the dashboard. Click on your username, then choose the "Set to.." option in the Password field. Enter and confirm your new password. Then click "Save" to apply the changes.
Step 2: Generating a Let’s Encrypt SSL Certificate
To secure Webmin with SSL, you'll first generate a Let’s Encrypt SSL certificate using Webmin itself. For this, you need a web server (such as Nginx or Apache) configured to serve your domain name.
- Ensure a Web Server is Running: If you’re not running any web server, then connect to your server via SSH, and install a lightweight server like Nginx. For example, on a Debian/Ubuntu system:
sudo apt update sudo apt install nginx - Create a Minimal Virtual Host (Server Block) for the Domain: Create a new file for your site:
sudo nano /etc/nginx/sites-available/your_domain.comAdd the following content (replace
your_domain.comwith your actual domain name):server { listen 80; server_name your_domain.com; root /var/www/your_domain.com; # This location is used by Let's Encrypt for HTTP validation location /.well-known/acme-challenge/ { allow all; } }If you don’t already have a directory for the domain, create one:
sudo mkdir -p /var/www/your_domain.com - Enable the Site and Reload Nginx: Create a symlink to enable the site:
sudo ln -s /etc/nginx/sites-available/your_domain.com /etc/nginx/sites-enabled/Test the configuration and reload:
sudo nginx -t sudo systemctl reload nginx - Verify DNS Settings: Make sure that the DNS A record for your domain points to your server’s IP address.
After setting up a web server, you can generate the Let’s Encrypt certificate using Webmin by following these steps:
- Access Webmin through
https://<your_domain_or_ip_address>:10000/ - Inside the Webmin Dashboard, click on the left-hand menu, click Networking, then Network Configuration.
- Click on Hostname and DNS Client.
- Fill in the Hostname field with your domain, such as
example.comorwww.example.com. - Click Save
After setting up your domain name, you can then generate a Let's Encrypt certificate:
- Click Webmin in the left-hand menu, then Webmin Configuration.

- Click on SSL Encryption.
- Go to the Let’s Encrypt tab.
- Type in your domain name in the Hostnames for certificate field.
- In the Let's Encrypt validation method field, use your root directory. In our Nginx example, this is the value of root in Nginx configuration:
/var/www/your_domain.comAlthough it can also be different if you’re using a different server such Apache. - Select a period for automatic renewal in the Months between automatic renewal section. A good value for this in Webmin’s Let’s Encrypt settings is 2 months (or 2.5 months at most). This is because Let’s Encrypt certificates expire every 90 days. The Best practice is to renew at around 60 days to ensure there’s time for troubleshooting if anything goes wrong.

After you configure everything, click Request Certificate, and wait for a few minutes, you’ll get a message informing you that the request is being processed:
Requesting a new certificate for your_domain.com, using the website directory /var/www/your_domain.com ..After a few minutes, you’ll get a message confirming that the process succeeded:
.. request succeeded!

Configuring Webmin to use new cert and key ..
.. done!
If you get an error during this process, please recheck all previous instructions and see the troubleshooting section at the end of this tutorial.
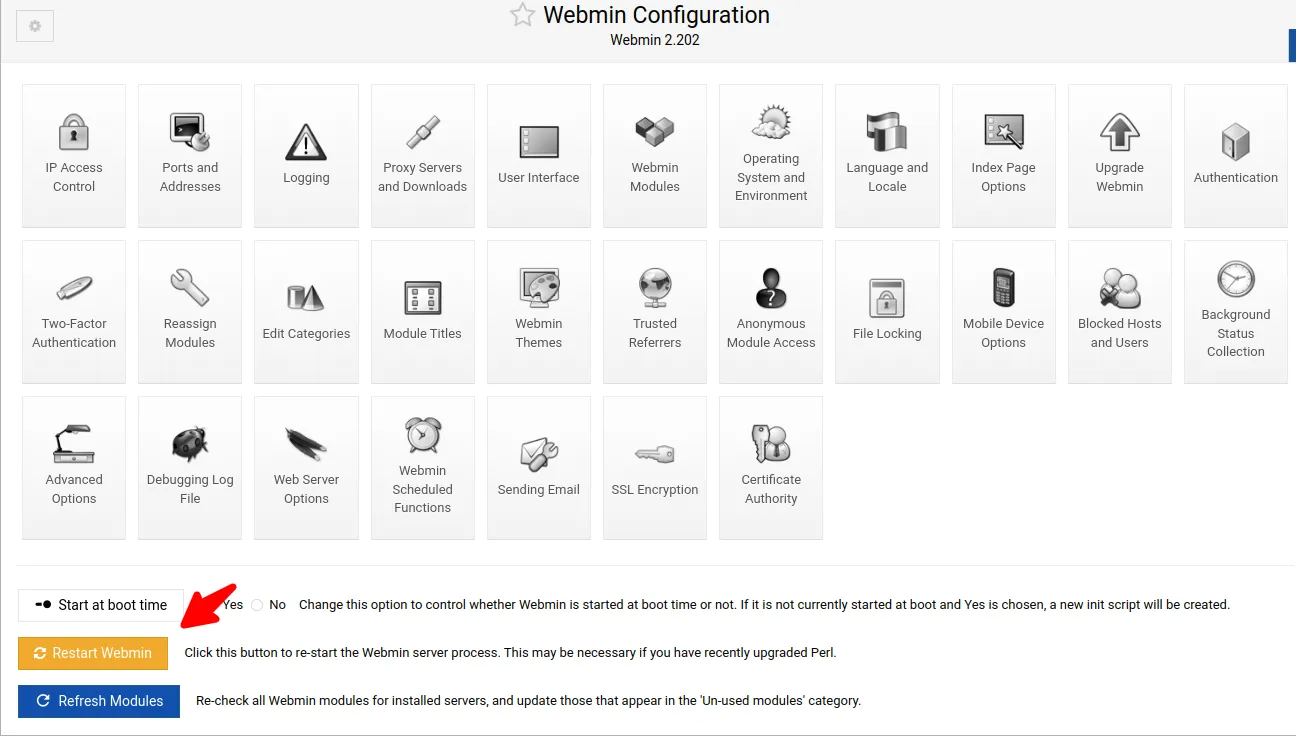
Click Return to Webmin Configuration, then Restart Webmin for changes to take effect:
Refresh your Webmin dashboard, and you should see a Certificate is Valid message in the settings of the URL bar.
Step 3: Webmin’s Let’s Encrypt SSL Certificate Location
When Webmin generates a Let’s Encrypt SSL certificate, it saves it in /etc/webmin/miniserv.pem. This file contains both the certificate and private key.
Step 4: Installing Let’s Encrypt SSL Certificates for Apache and Nginx
Installing SSL Certificates for Apache
For Apache, if you are looking to secure your websites with Let's Encrypt, I recommend following a dedicated Apache SSL implementation rather than sharing Webmin's certificate. This approach provides better security management and avoids potential compatibility issues. Our comprehensive guide How to Install LAMP (MariaDB) & Let's Encrypt on Ubuntu walks you through the complete process of setting up Apache with Let's Encrypt certificates using Certbot. The guide covers everything from installing the Certbot package to automating certificate renewals, ensuring your Apache-hosted websites remain secure with minimal maintenance.
Installing SSL Certificates for Nginx
For Nginx users, to secure your web server with a Let's Encrypt SSL certificate, I recommend implementing a dedicated Nginx SSL configuration using Certbot. Our detailed guide How to Install WordPress with LEMP and MariaDB on Ubuntu takes you through the complete process of setting up Nginx with proper SSL implementation.
Troubleshooting Webmin SSL Certificate Errors
When encountering SSL certificate issues with Webmin, first verify your certificate hasn't expired by checking its details in Webmin Configuration → SSL Encryption. Common fixes include restarting the Webmin service, checking DNS settings to ensure your domain points to the correct IP address, and verifying firewall settings aren't blocking ports 80 or 443.
What to Do When Webmin's SSL Certificate is Not Working
If your Webmin SSL certificate isn't working on your Linux server, check that the certificate files exist in /etc/webmin/ and have proper permissions (600 for private keys, 644 for certificates). Try regenerating the certificate through the Let's Encrypt tab in Webmin Configuration → SSL Encryption. Ensure your web server is properly configured to handle the domain validation challenge.
Failed to Open /etc/webmin/miniserv.conf
This error typically indicates permission issues or a corrupted configuration file. Check the file permissions with ls -la /etc/webmin/miniserv.conf and ensure the file is owned by root and has 600 permissions. If the file is corrupted or missing, restore it from backup or reinstall Webmin, then reconfigure your SSL settings.
Webmin Message: This Web Server is Running in SSL Mode
If you're seeing this message unexpectedly, it means Webmin is redirecting non-SSL connections to SSL. To disable SSL mode temporarily, edit /etc/webmin/miniserv.conf, set ssl=0, and restart Webmin with sudo systemctl restart webmin. But remember that running Webmin without SSL is not recommended for production environments.
Webmin's failed to initialize ssl connection
This error suggests problems with the SSL library or certificate configuration. Verify that OpenSSL is properly installed on your system. Check Webmin logs in /var/webmin/miniserv.error or /var/webmin/miniserv.log for specific error details. Regenerating SSL certificates and ensuring proper file permissions often resolves this issue. As a last resort, reinstall Webmin, but make sure to preserve your configuration files.
FAQ
Where can I host game servers with Webmin control panel access?
If you are looking to host game servers with easy management capabilities, our VPS Gaming Hosting solutions provide the performance needed for both the games and management interfaces like Webmin. These specialized hosting options ensure you have sufficient resources to run both game servers and administrative tools without performance degradation.
What are some alternatives to Webmin?
Popular alternatives to Webmin include:
- Cockpit: Which offers a modern interface and is less intrusive.
- Ajenti: Known for its responsive UI and lightweight design.
- Plesk: A commercial option with comprehensive features.
- cPanel: A popular commercial and user-friendly platform.
- DirectAdmin: A commercial option that’s resource-efficient.
- ISPConfig: A free tool for multi-server management.
Webmin vs Cockpit
In short, Webmin offers more extensive configuration options with a module-based system, while Cockpit features a modern, streamlined interface that integrates better with systemd. Cockpit is lighter and focuses on server monitoring, while Webmin provides deeper system configuration capabilities.
Webmin vs Ajenti
Webmin offers a mature, comprehensive feature set with hundreds of modules, while Ajenti provides a more modern, responsive interface. Webmin has broader OS support and a larger community, whereas Ajenti focuses on lightweight performance and visual appeal.
A note about tutorials: We encourage our users to try out tutorials, but they aren't fully supported by our team—we can't always provide support when things go wrong. Be sure to check which OS and version it was tested with before you proceed.
If you want a fully managed experience, with dedicated support for any application you might want to run, contact us for more information.